Thursday, May 1, 2014

Crafts Galore Encore May Challenge - "Hoppy Birthday" Shaped Card starring Blue Moon Creation


Can you believe it's May already?? I'm ready for warmer temps and a new Crafts Galore Encore challenge! This month it's anything goes, so get busy crafting your heart away!!

But first some announcements -----

Prizes aren't being claimed!! 
The winners will be announced on our WINNERS PAGE on the last day of the month. Click the link to see if you have won. We have had a number of people fail to claim their prizes and we have redrawn and they were still not claimed!

We're looking for a new DT member!!!
If you are interested in joining our design team please put DT after your name on your entry OR email us at cardsgaloreencore@yahoo.co.uk, Thanks!


I decided to make a shaped card using two digis from Get Inky! Stamps (Stitched Heart Bunny and Backside Bunny) from our sponsor Blue Moon Creation and stamps from their Sew Sweet Cupcakes set. The generous prize is a 3 month club membership (includes one newsletter, 9 digital images, 3 go to sketches)!


The card measures 7.5" x 4.5" and can stand by itself. This is my first shaped card made with digis and I quite like how it came out! Instead of cutting out the entire top bunny, I left a small tab at the top to attach the two bunnies to make the card. Since the coloring bleeds through the cardstock and I wanted to add a sentiment, I traced the cut out backside bunny onto plain white cardstock to provide a clean area for stamping. Using a combination of BMC sentiment stamps and masking techniques I created the greeting Hoppy Birthday. Then I assembled the card and using the xyron 9" creative station I applied adhesive to the bunny with the sentiment and layered the pieces to complete the card cleanly without the tab showing. I also decided to apply adhesive to stick the ears together (after the fact) because it gave the card a more uniform look as it opens and closes.

I hope you enjoyed this post and will consider joining in on this month's challenge.

Supplies:
  • Blue Moon Creation - Stitched heart bunny digi, backside bunny digi; Sew Sweet Cupcakes stamp set: Happy, I love you and Birthday stamps
  • Neenah Solar White cardstock
  • Recollections white cardstock 
  • Copics - C1, C3, C5, R81, R83, R85
  • ColorBox fluid chalk ink - Rose Coral
  • Xyron 9" Creative Station
  • Scotch ATG 
My daughter Zora wanted to join in on the fun so here's her project! Please let us know what you think. I love how the bunny sparkles!


La-Vie

Challenges


Tuesday, April 22, 2014

Blistering Hot! Summer Z-Fold Card


As a part of a swap with Scrapbooking Swap Til Ya Drop on FaceBook, I created two summer themed Z fold cards using directions from Flowerbug's Inkspot. Here's what I came up with. The Z fold cards are standing in this photo.

Supplies:
  • DCWV light blue, dark blue, yellow glitter cardstock
  • Queen & Co. Summer Fun Summertime cardstock
  • Kiwi Lane  Tiny Border: Delight #2
  • American Crafts Garden Phrases, Mini Marks rub-ons
  • Claudine Hellmuth dimensional stickers
  • #10 envelopes
  • Adhesives: Scotch ATG, Glossy Accents


These cards were pretty easy to make. Once cut provides the card bases for both cards if you start with a 12x12 piece of card stock. The patterned paper layers were from another 12x12 sheet. I embellished with a rub on and dimensional stickers from Claudine Hellmuth at HSN.com.


I made one card with a decorative edge and one without. I used a double layer of DCWV yellow glitter cardstock on the card on the right. The layer is one piece cut from a 12 x12 sheet of paper on a diagonal. I then adhered the front layer and then turned over the card and adhered a second layer of the cardstock to make it double-sided. Using a Kiwi Lane template and a fine tip sharpie, I traced and hand cut the wave-like pattern. I ended up having to go back after folding the card to add glossy accents to keep the layers together.


Here are the cards closed and laying down and below you can see the card open. you could add your hand writing in there for a personal message.


 I hope you enjoyed this blistering hot! summer Z fold card! Until we craft again....

La-Vie

Challenges:

  • TBD


Friday, April 18, 2014

Teacher Appreciation - Chalkboard Tag Card


Guess what? It's my birthday today!!

Thanks for stopping by today! I have a super cute set of tag cards I made to accompany the embellished cups/water bottles for the teachers and support staff for teacher appreciation. I went for a chalkboard look (although my pics don't show how smudgy they look).


I'm happy with how they came out. They open up so my kids could write a note and their names inside. I attached the cards to small gift bags with red apple brads.

Supplies:
  • DCWV - All Chalked up Brights - red chalkboard card stock; The Edumacation Stack - brown school supplies pattern, blue numbers, alpha and apple pattern
  • CTMH Art Philosophy Cricut Cart - tag card pg. 40 cut at 3.5"
  • Cricut Essentials Cart - rounded square cut at 2.25" (real dial size)
  • Clear and Simple Stamps - Rag Doll Teacher Notes stamp set
  • White watercolor pencil
  • Inkadinkado linen white pigment ink
  • The Paper Studio sticky doos- foam tape circles
  • Recollections - apple brads
  • Glamor Glitz iron on pearls - added with glossy accents
  • hole reinforcers from Dollar Tree
La-Vie

Challenges:
TBD

Wednesday, April 16, 2014

Teacher Appreciation - Manly Embellished Water bottles


In a previous post I shared how I made polka dot monogram cups for the female teachers in my children's lives. Today I have an idea for all the fellas. Instead of a girly cup, I decided to go with water bottles. I have both aluminum and clear plastic ones. I still included a monogram but with a more manly font and styling. Which do you like best? Clear or Aluminum?


Supplies:
  • Water bottles - Dollar Tree
  • Vinyl - Oh My Crafts!
  • Top note - Cricut Essential cart (in E2) - cut at 3.5" relative size
  • Stars, Monogram - CTMH Art Philosophy cart - cut at 1.25" and 1.75"
  • Vinyl Kiss cut on E2 - blade set to 1, speed 3, depth 3, multi-cut 1
  • Cricut transfer tape
  • plastic Easter grass from Dollar Tree
  • Crystal light drink sticks
In addition, I added a note pad/pen set for the ladies and a lined small note book for the fellas (both from Dollar Tree).


I really hope these men love these bottles and will use them. It's so hard gifting to males in a crafty way!!

La-Vie

Stop back to see the tag cards I attached to these bottles. They are adorable (not so manly - sorry!)

Challenges:
  • TBD

Monday, April 14, 2014

Pink Butterfly 70th Bday Guest Book


Last post I shared the butterfly invitation I was hired to make. The order also included a matching guest book. Everything on the market was related to weddings or was too child-like. I was glad to create a one-of-kind masterpiece for this special event!


Supplies:
  • DCWV Chipboard
  • The Paper Studio - pink and cream card stock, bling
  • Staples - acid free inkjet paper cream
  • Psst Sheer shimmer spritz - Sparkle
  • Cricut cart Sophie - 7" for the printed layer, 7.25" for the butterfly
  • Alphas - stash
  • We R Memory Keepers sweetheart distress tool
  • 9" Xyron
  • crop-a-file big bite


I'm not sure why the picture doesn't show solid lines but they are solid in person. Every paper was filled with lines for guests to fill in their names and addresses. My large Xyron was instrumental is assembling this guestbook. I was able to make each layer into a sticker.


These dimensional alphas from my stash worked best for the cover and although they already were on foam adhesive, I added glossy accents to ensure they stayed put. 


I hope you enjoyed viewing this creation. The birthday girl loved it!!

La-Vie

Challenges
TBD

Wednesday, April 9, 2014

Pink Butterfly 70th Bday Invitation


Guess what? I've been dying to show you this, but it was my first client project of the year and it was top secret!! Now that the wonderful event has passed I can share this beautiful butterfly invitation. My best friend hired me to make 80 invitations for a surprise 70th bday party she was throwing for her beloved mom. I was tickled pink to say the least! Her mom LOVES butterflies so I went to my go to Cricut cart for that - Sophie!


Both the pink and cream cardstock are from The Paper Studio at Hobby Lobby. The iridescent gems also are from The Paper Studio.


I laid out the text in word and printed on cream ink jet paper (acid free) from Staples before cutting the layer to this invite on my Cricut E2. Using settings of blade 1, speed 1, pressure 2 and no multi cut worked best. I must have ripped 100 before figuring that one out, LOL. It was important to cut the top portion of the text with the butterfly shape upside-down to make sure it reads correctly once the invite is open.


The shimmer on the outside of the invite was creating by spritzing with "Sparkle" Psst! Sheer Shimmer Spritz by Tsukineko. It works best to spritz from about 8 inches above your project. I laid as many out on my kitchen table as possible (kraft wrapping paper covered the table) and spritzed away!

I hope you enjoyed this project as much as I did! Everyone loved it and told me they saved it. But wait! I've got more. Stop back tomorrow to see the matching guest book!!

La-Vie

Challenges:

Tuesday, April 1, 2014

April Challenge - Crafts Galore Encore: fav color


It's time to announce the April challenge for Crafts Galore Encore! You're going to love this one! Include your favorite color in your project. Our sponsor for this month is Kenny K Downloads  Two winners (one chosen at random and one chosen based on their submission) will be able to choose two Kenny K digis each.

My fav color for male-oriented digis is red! I started with Kenny K's digi called J-Cool. I was excited to color this image because I have not colored many men at all - specifically not African-American ones. I really had fun with this one!

Copics:

  • Skin - E13, E15
  • Hair - E29, E79
  • Hankie - C3
  • Glasses - R29, Y06, Y15
  • Shoes - B93, R29, Signo ball white pen
  • Earrings/chain - Y15
  • Sweatshirt - R29, R59
  • Shirt B93
  • Jeans - B0000, B34, B45, B93, B95, B99
  • Copic multiliner black

Once I had colored J-Cool, I looked into my stash and found a Sizzix movers and shapers Circle flip-it card designed by Stephanie Barnard of The Stamps of Life. I just knew it was the setting for J-Cool. Then I thought, let me add some brick texture, so I pulled out my brickyard Cuttlebug embossing folder and my Cuttlebug to make that happen. I added stamping and thought I was almost done.

But then I was stumped! J-Cool looked too corny by himself with the clean bricks and I had to reach out to crafty friends to help me get a clue of which direction to go in next. Shout out and thanks to Lyne, Anna, Carol, Ellen, Leila for sparking my creativity. They suggested a boom box, graffiti and street light/signs. I marinated on that for a day and then went about my task. I love the result! I wrote all the names of my household on the walls of the card.  I may have found a new way to sign my cards...who knows.


Additional supplies:

  • 2" boom box  - rock princess - DCWV black adhesive cardstock, Bazzill White, silver from my stash
  • 4" traffic light - Artiste - Bazzill yellow, red and green
  • Core'dinations - VC Ruby and whitewashed collection
  • Brickyard cuttlebug folder
  • Kenny K Digi - J-Cool
  • ATG, Xyron, Zig 2 way
  • No Fear, Play Hard - CTMH Later Sk8r - stamped in Chipped Sapphire distress ink
  • Background (card interior) - CTMH Later Sk8r - stamped in Broken China distress ink
  • Sunburst, Trophy - CTMH Cricut Artiste Collection: Kudos
  • 100 Copic black and Uniball Signo white opaque pen for graffiti
  • EK Success powder tool
  • Copic Xpress it blending card


La-Vie

Challenges:

  1. The Crafting Cafe - One for the boys
  2. DL.ART - April Linky Party
  3. Crafting by Designs - ATG
Sunday, March 30, 2014

"I'm All Ears" Paper Wizard Disney Page


Earlier today, Paper Wizard announced a giveaway on its FaceBook page. Check it out here. For the first 12 people who post a newly made scrapbook page/layout to their FaceBook would receive a ticket to the selling floor of a Scrapbook Expo show of your choice. Scrapbook Expo is here in April so I jumped on it and made another page for my 2011 Disney album. The whole album is being created using Mosaic Moments.

I only had a few pics of us wearing Mickey Mouse ears so I scrapbooked this very differently than I usually do. It's a lot more busy looking but I love it! Can't always stay in the box....


The inspiration for this layout was the cute pics I took of my son in his stitched Mickey ears. I bought the Paper Wizard title to help exemplify both my children's new obsession with Disney! Here's a closeup of the 9-layer title.

Supplies:
  • Paper Wizard title - I'm All Ears
  • Mosaic Moments - White grid paper
  • Marvy Punch - 3" square punch
  • EK Success - Disney speciality paper: red/beige stars, Mickey paper with clouds and the blue star border
  • Simple Stories:
    • Say Cheese Simple Basics Kit: Yellow dots/stripes cardstock, bingo cards/stars
    • Say Cheese Fundamentals Cardstock Stickers: Family Fun Documented, Arrow, Photo Op, camera banner piece, I love this, Smiles from Ear to Ear, black heart, black polka dot border, red polka dot scalloped border
    • Say Cheese: blue film strip cardstock
  • Adhesives: Scotch ATG, Glossy Accents, Zots, The Paper studio foam adhesive, Xyron
  • Zig millennium pen
Wish me luck!!

La-Vie

To view more of my Disney pages check out these links:

Monday, March 17, 2014

St. Patrick's Day ATC


Happy St. Patrick's Day!! 

This weekend I went to Heirloom's Allentown Rubber Stamp & Paper Arts Festival. They ran an Artist Trading Card (ATC) challenge with a Luck of the Irish theme. Here's my entry.


The ATC card is from Inkessentials. I ran it through my xyron machine face down to make the front of the card sticky. I then applied 2 types of washi tape to create the grass and sky. The focal die cut, layers and shamrock can be found on the Create a Critter 2 Cricut cart. The sentiment is from Stampin' Up! and the google eyes were from my stash.

I hope you enjoyed the holiday and this quick post!

La-Vie

Challenges:


Tuesday, March 11, 2014

Princess Wall Art - Word Collage


I was glad to catch an hour in my craft room today! I made some wall decor for my 9-year-old daughter's room using the Word Collage Cricut cart. The flourishes at the top and bottom are decorative brackets from the American Alphabet cart in my E2.


Supplies:

  • Word Collage - Princess cut @11.5"
  • American alphabet - font 3: bracket cut at 9.5"
  • Vinyl - dark purple from Oh My Crafts and light purple from Cricut
  • Cricut transfer tape


I hope you enjoyed my quick post today! It sure made one little girl happy!

La-Vie

Challenges:

  • TBD


Friday, March 7, 2014

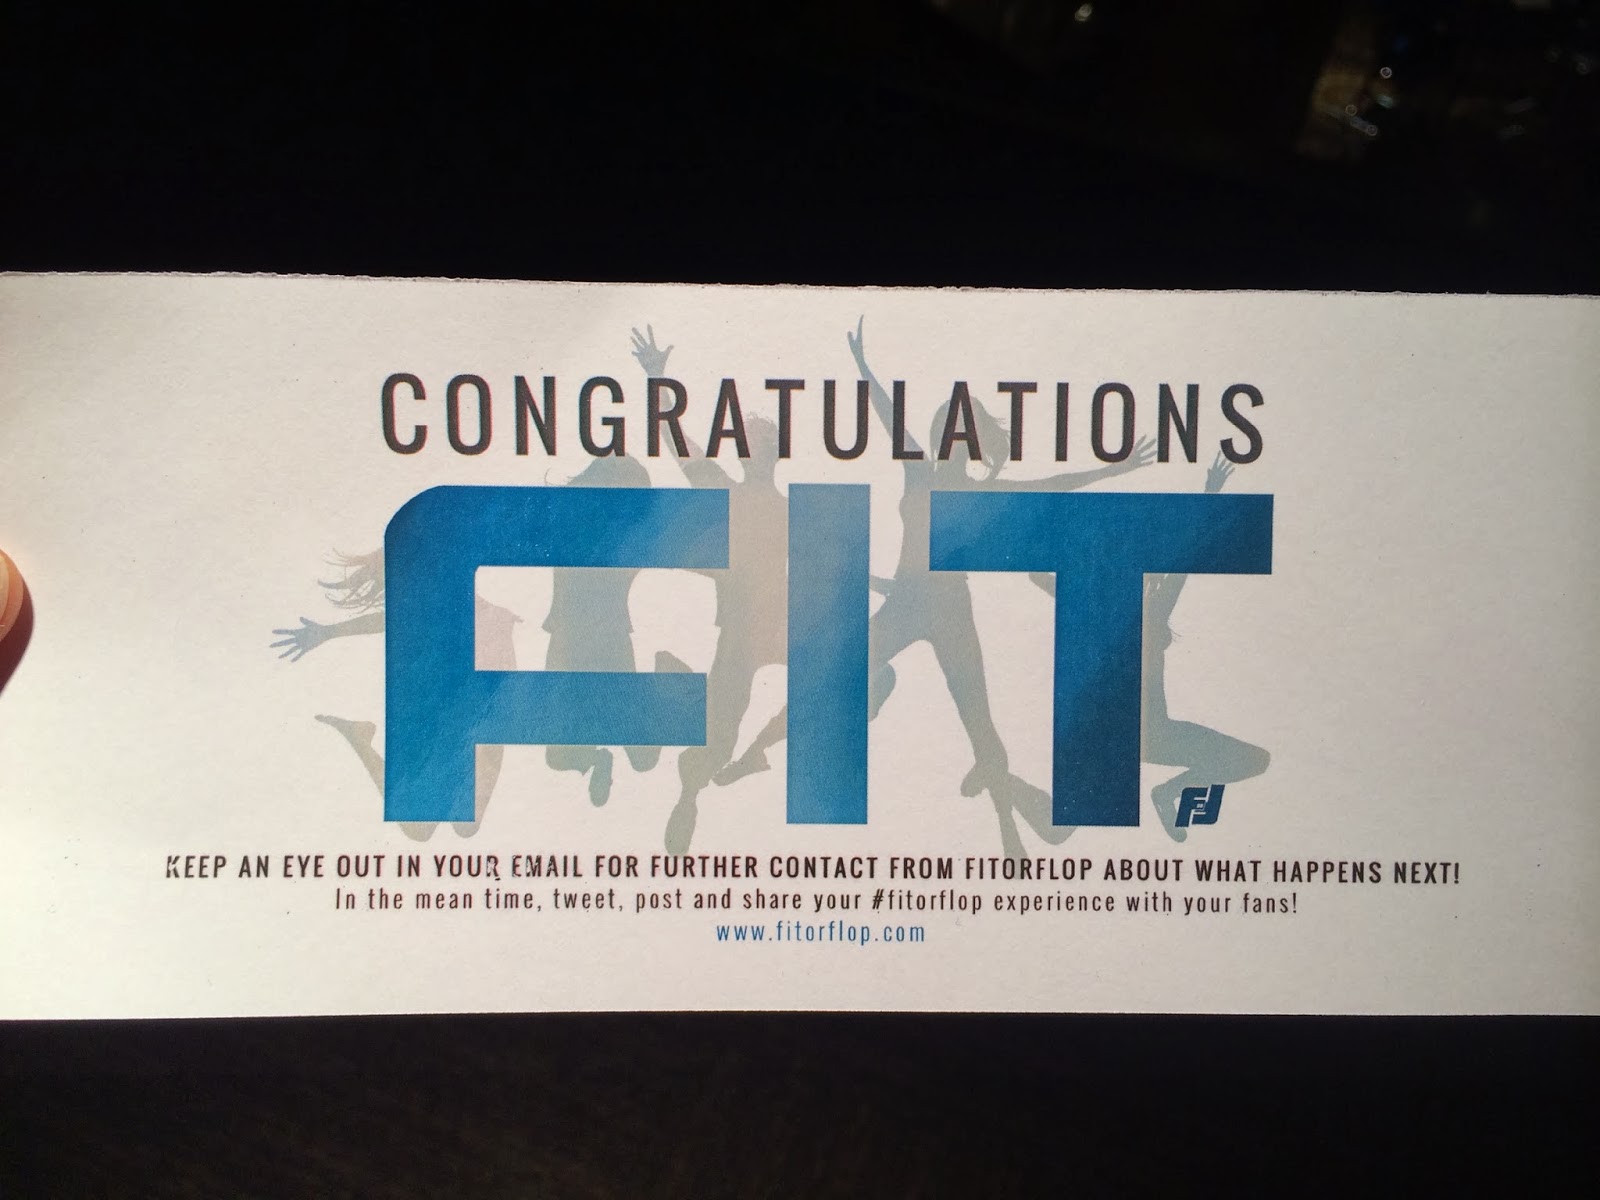
Vote for My Husband Doc Beast on Fit or Flop!!!


This is my husband Dr. William Borde-Perry. He's an ER physician and BeachBody fitness coach extraordinaire! His motto has been that he wants to help everyone get fit. Well now he has a real chance! Right now he's in the second round of Fit or Flop season III competing to be America's next fitness star. When he wins (with your help) he will get $10K to produce his workout DVD and get it out to the masses.


To help him, please go register and vote once daily here!!

Please note that you will need to register by inputting your name, email and password the first time you vote. The second time you vote, you will need to verify your email address through a link they will send in email (so they know you're not a computer voting). Thereafter you can vote each day in March and catapult my dear hubby to the #1 spot and into the next round of this awesome competition. Remember you can vote from any computer or mobile device as well!

Here are some highlights from the taping last November. There was a lot of waiting. Here are the kids doing just that!


But it was solo worth it because my husband went in with a winning attitude and a winning concept!

It's official!!!
He was voted Fit from two out of three judges and therefore moved on in the competition!


We were so glad to be there to support him and to share in the excitement and joy of the moment!


Thanks for your support!! You're helping to make my hubby's dreams come true!

La-Vie 


Thursday, March 6, 2014

Teacher Appreciation - Vinyl Decorated Reusable Cups


After watching Joy's video from Obsessed with Scrapbooking on YouTube, I started collecting these cups every now and again from Dollar tree in the hopes to embellish them for teacher appreciation week. Thanks for the inspiration Joy Tracey!!


Supplies:

  • Cups - Dollar Tree
  • Vinyl - Oh My Crafts!
  • Top note - CTMH Art Philosophy cart and layer cut at 3.5" relative size
  • Polka dots - Cricut Essential cart (in E2) - .75", 1', 1.25" real dial size
  • Vinyl Kiss cut on E2 - blade set to 1, speed 3, depth 3, multi-cut 1
  • Monogram - CTMH Artbooking cart - font cut at 1.75" real dial size
  • Cricut transfer tape
  • 12x24 cricut mats

I've gotten a jump start on them but need YOUR HELP!! I plan on making tag cards to attach with ribbon to the straw but what should I put inside?? I have some easter grass for the bottom but wondered if I should put in one of the following:

  1. chocolate kisses
  2. drink mix sticks (those individual ones you add to water to make a beverage)
  3. a gift card
  4. something else??
Please let me know your best guess at what teachers would love for a small appreciation gift this year. I'll update you when the votes are tallied and the cups are complete. Who knows? I might give a prize to one lucky commenter... you never know... so stay tuned.

Thanks!!

La-Vie

Wednesday, March 5, 2014

Playing with my Viva Decor Pearl Pens - Play Football Tag


I'm back with another tag today. While I have owned several colors of pearl pen for a couple of years I have never tried it until now!! I tell you, 2014 is it! I am going to try out all the things I am hoarding in this craft room! I made the pearls on a craft sheet this time but I am strong enough with it now to make it right on my next project.

I made several of this tag for an all-boy swap.  I figured most boys are into sports at some point. I hoping my son doesn't play football but I figured hey... it's one of America's favorite pastimes.


Supplies:

  • Bazzill cardstock
  • xyron
  • cuttlebug tiny mosaics embossing folder
  • football tag cut at 3.75" relative size Wrap it Up Cricut cart
  • Play cut at 1.75" real dial size Graphically Speaking cart from recollections kraft cardstock inked with vintage photo distress ink
  • twine from stash
  • American crafts ribbon
  • Viva Decor Bronze Pearl Pen
  • Recollections bling - diamond cut pattern
  • Glossy Accents by Inkessentials

I have two versions of this tag, one with the pearl pen and another with bling. Another with ribbon straight up and another with ribbon tied to the side. Which features do you prefer?


Here's all the tags. I love making multiples. Once I have my game plan, I am like a machine.


I hope you enjoyed my swap tags. I cannot wait to see what the other participants made. I'll update you asap.


La-Vie

Challenges:


Tuesday, March 4, 2014

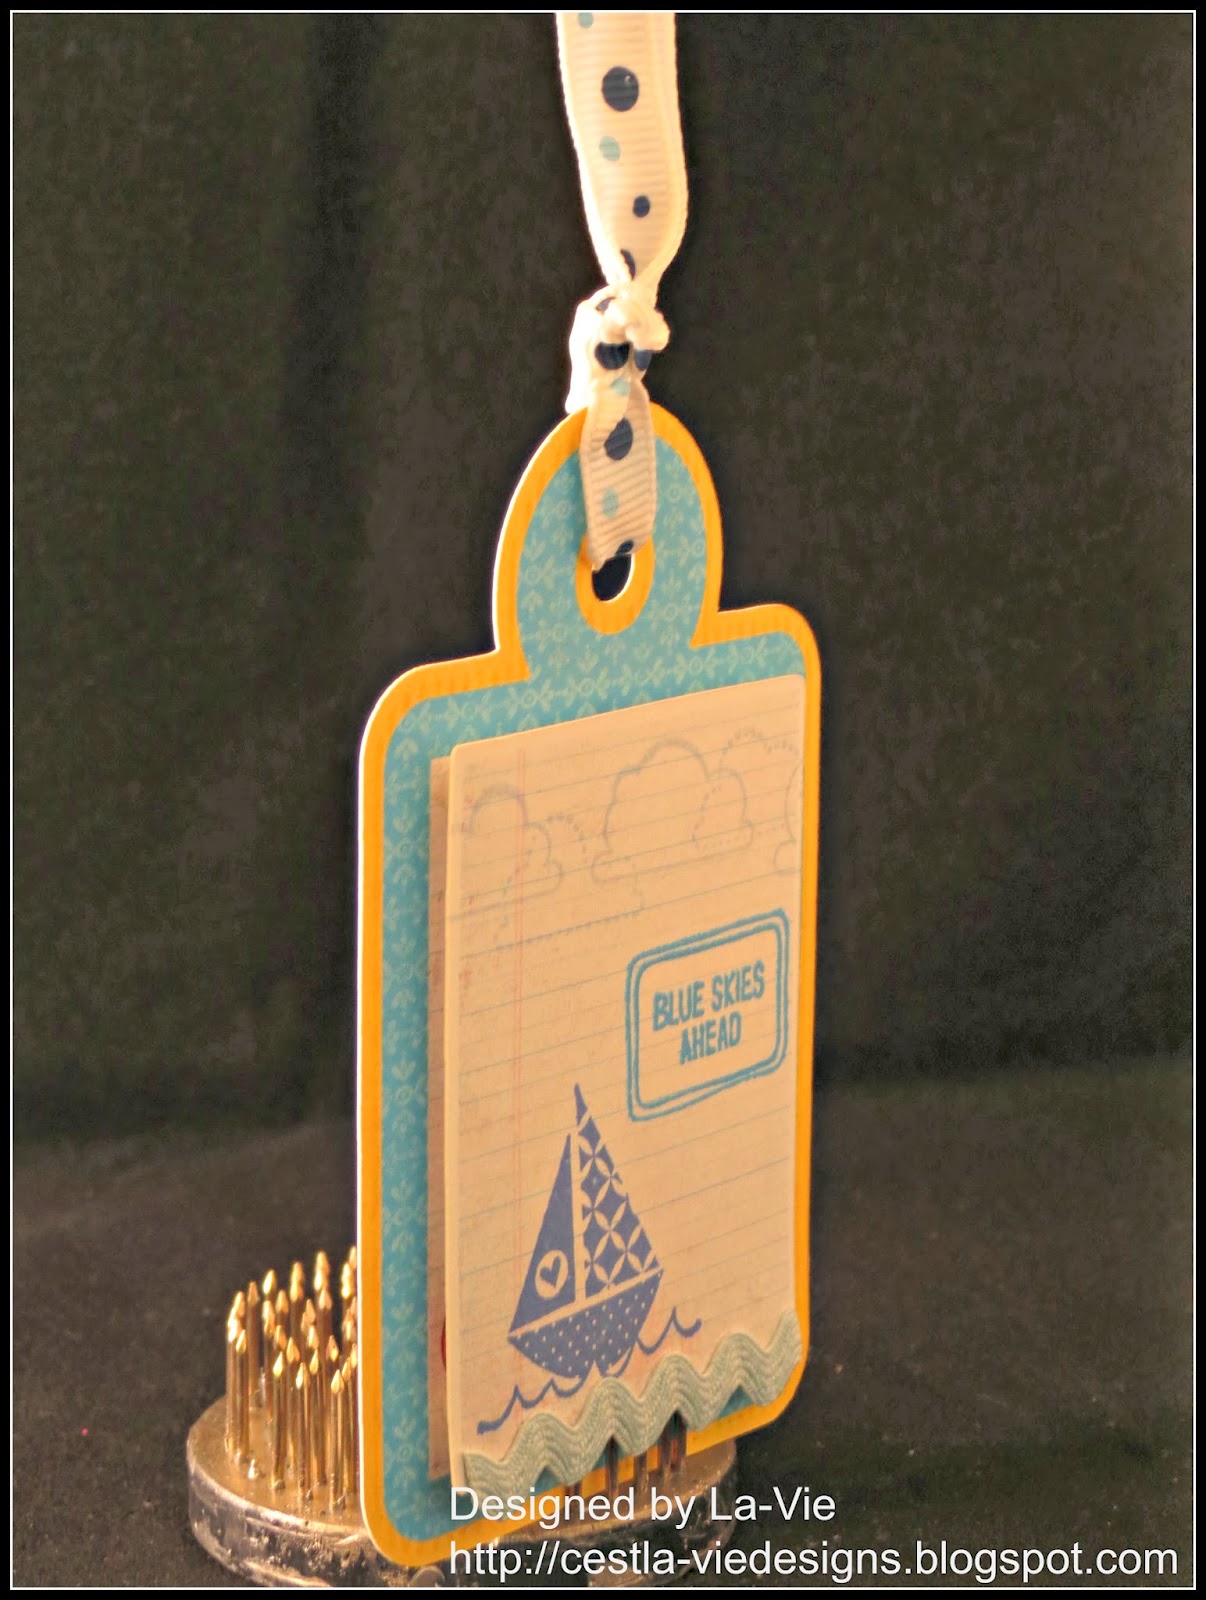
Blue Skies Ahead!


I had another swap-ortunity lately! Wink...wink! This time it was a boy-related tag swap. I decided to make a 3D rage cuz I'm really starting to get into the boy theme. I'm gearing up to continue scrapbooking the precious moments of my 5 year old son's life. 


This tag was printed and cut on the Cricut Imagine machine. I didn't think the image on the tag was manly enough so I decided to layer the top and create my own stamped scene. I'm very happy with the results.


Supplies:
  • Tag print and cut from Cricut Imagine - Imagine More cart at 4"
  • Notebook paper layer print and cut at 4"
  • Bazzill basic white cardstock
  • Boat stamp - Recollections - Memento Ink: Danube Blue
  • Blue Skies stamp - Inkadinkado: Road Trip - Memento Ink: Bahama Blue
  • Clouds border stamp - Recollections: Fun Borders - Memento Ink: Summer Sky
  • Recollections Foam tape
  • Jolee's Boutique red, white and blue ribbon
  • Queen and Co. blue and white ribbon
  • Martha Stewart ric rac ribbon
  • Xyron

Thanks for stopping by! Tell me, do you find it easy to make multiples of the same design?

La-Vie

Challenges:


Monday, March 3, 2014

XOXO Gap Card


As a part of the Just Us Crafty Girls craft group on Facebook I participated in a Gap Card swap for Valentine's Day. The hostess was also participating in the swap so I created two versions of the card so that she wouldn't have 2 of the same (because hostess gets one set of the swap cards regardless). There's a wealth of tutorials on this card and many others at a blog called Beccy's Place.


I'm really fond of washi tape these days! I applied 3 different patterns (polka dot, pink solid and red patterned) on the edge of the card. It helped to apply scotch ATG adhesive where the ends of the tape lay to make sure they don't curl off of the card (can't stand that!!).

Supplies:
  • DCWV card stacks: parchment, speckled, DCWV patterned paper: 12x12 Sweetheart
  • XOXO - Cricut American Alphabet cut at 1.25" real dial size
  • Washi Tape from Anna Griffin and Recollections - 3 different widths and patterns 
  • Tim Holtz Distress Ink and Applicator Festive Berries
  • Zots Glue dots - bling
  • Scotch ATG

Which do you like the best? The vertical or the horizontal version? I hope you enjoyed this post and will come back soon to see more of my creations. Thanks!

La-Vie

Challenges: