Showing posts with label copics markers. Show all posts

Sunday, May 10, 2015

Mother's Day Card featuring Clear and Simple Stamps


It's Mother's Day!! Wishing a happy and healthy day to all my mom friends around the world!!

Today I have a card for you! It's a little out of my comfort zone because of the large bold background print on the base card from Micheals. Of course it all started with the beautiful lady outline sticker from Elizabeth Crafts. I made my own glitter paper using Sookwang tape, Stampendous mixed media cardstock and warm diamond glitter. The focal is perched on a beautiful nestabilities die cut from Sizzix.


I colored the focal with black and red Copic markers and fussy cut the scene. The bow and the white section of her skirt are 3D - popped up on foam tape. The burlap ribbon from The Paper Studio seemed to break up the pattern and bring focus to the focal. 


The internal sentiments are from Clear and Simple Stamps in Versafine Ink. Thanks for stopping by!

La-Vie


Challenges


Please follow me on social media and help spread the word about me.
Pinterest


Friday, August 29, 2014

Heartfelt Creations - Bella Rose Leaves Canvas


I love a great find! I was milling around TJ Max and found a five pack of canvases on a random clearance table. I figured hey, this will come in handy some day! Well guess what? Today is the day! I'm dipping my toe into mixed media. I needed a daily reminder for my weight loss journey so I chose an appropriate quote and my fav stamp (that I own) by Heartfelt Creations - Bella Rose Leaves.


To achieve this look, I stamped the image in the upper left hand corner with Stazon ink. Then I painted the entire canvas with gesso. When it dried there was a light outline of the stamp showing through the gesso. I used those guidelines to trace the stamped image with Stickles. After about a couple of hours drying time, I used brush stix (chisel and round tips) to add color to the leaves with Tim Holtz distress inks.

I then added the quote in my own handwriting and faux stitching around the edges using a Copic marker. Next, I sponged on distress inks to blend a two-color background. To activate the ink and leave a subtle spotted background, I sprayed on some sheer shimmer spritz by Imagine Crafts. The final touch was some bling of course!

Supplies:
  • Flat canvas 7 1/5 x 5 3/4"
  • Heartfelt Creations - Bella Rose Leaves
  • Gesso
  • Stazon Ink - Forest Green
  • Copic Marker - 100 Black
  • Stickles - Pine
  • Tim Holtz Distress Ink - Forest Moss, Evergreen Bough, Salty Ocean, Broken China, Worn Lipstick
  • Recollections - clear bling
  • Imagine Crafts (Tsukineko) - Psst! Sheer Shimmer Spritz: Sparkle, Brush Stix
  • Nicole Heat tool

Here's a close up of the Heartfelt Creations - Bella Rose Leaves. I think it is a great focal point for my  daily reminder. This stamp is versatile. It can be used alone or with the Bella Rose stamp set and/or the Bella Rose Die set.


Thanks for taking a peek at my latest project. I'd love to hear your opinions on my work and Heartfelt  Creations.

La-Vie

Challenges

Heartfelt Creations - Dutch Iris


Here's my latest creation - a thinking of you card stamp by Heartfelt Creations. I think this is a retired stamp but I'm glad I purchased it a while ago. It's a great ready to go card front. I used Copics to color it (which took quite a while), but I could see coloring it with watercolors, or wink of stella in the future. The possibilities are endless!

Supplies:

  • Heartfelt Creations - Dutch Iris (retired)
  • American Crafts - 5x7 card (green)
  • The Paper Cut - Mirricard (purple)
  • The Paper Studio - Yellow polka dot ribbon
  • Memento - Tuxedo Black
  • Wink of Stella - Clear
  • Tim Holtz - Grid Blocks
  • Copic X-press It Blending Card
  • Copic Markers - YG: 61, 63, 67  V: 12, 15, 17   Y: 00, 15    
Thanks for stopping by! Do you love Heartfelt Creations? Id love to hear about it. Please leave me a comment!

La-Vie


Challenges:


Friday, May 31, 2013

Lady Luck Card


Here's a quick post! I'm up against a tight deadline. I love the adrenaline rush of getting a project done in 30 mins.! I envisioned this project by picking the stamps last night but finished it up on the spot.

At the Crafting Cafe we were asked to interpret "Lady Luck" for this week's challenge. Here's my interpretation. I hope you like it! I identified with the "lady," a stamp from Stamp LaJolla, the frog from The Stamps of Life and the cute quote from Repeat Impressions. The bib card is from The Paper Cut but I hand cut my own bib in the color I needed. That reminds me! I am entering a second challenge at The Paper Girls. It calls for the colors navy, cream, coral and touches of yellow, pink and green based paper from Dear Lizzy Lucky Charm. I also entered 3 Girl Jam anything goes with ribbon.

Additional Supplies:

  • Copics RV34, Y15, G07
  • EK Success scallop punch
  • Stampin' Up! Coral ribbon
  • Marvy 1.5" circle punch
  • Bazzill cream cardstock
  • Jet Black Archival Ink by Ranger
  • Ad tech Dot glue runner


See you in the morning for the Get Inky! Stamps blog hop!!  It's going to be EPIC!

La-Vie


Wednesday, May 8, 2013

Get Inky! Challenge 3: Fabulous Floral Fun


This is officially my first post as a design team member for Get Inky! Stamps by Blue Moon Creation! I'm so excited! I've been learning a lot and having fun already!!! Thia Gielow is the owner/creative designer of Get Inky! Stamps which offers super cute photopolymer and digital stamps. Check them out! It's definitely worth a look see...

As you know, my favorite thing lately has been competing in challenges. Well it's your turn now! The current Get Inky! Stamps challenge is Fabulous Floral Fun - use flowers in your project. The prizes are awesome!!


Supplies:
  • Stamps - Get Inky! Stamps: Buzzing Bees, Joyful Jar Drinks, Sew Sweet Cupcakes
  • card - DCWV
  • yellow layer - Recollections, embossed in the Anna Griffin Cuttlebug with Sizzix: Tim Holtz Alterations - honeycomb
  • white layer - Recollections
  • hybrid Ink - Perfect little black dress, Clear and Simple Stamps
  • Copic Markers - .05 multiliner black, Bee: Y06, 100, Stem: G07, Flower: R81, R83, R85, R20, colorless blender 0
  • Creative Memories corner rounder
  • ribbon from my stash
  • adhesives - Scotch ATG, painter's tape

I really let my creativity fly on this one to inspire and entice you! Get Inky! Stamps offers flowers in both physical and digital form but I wanted to show you how to get more out of the stamps by creating my own flower. The stamps I used were the bow in the Joyful Jar Drinks set and the curved ribbon in the Sew Sweet Cupcakes set. Both the bee and the sentiment came from the Buzzing Bees set (see below). 


In order to make the center of the flower, I masked off the other parts of the bow with painter's tape. Once I inked it up, I removed the tape and stamped my image.


Next, I masked off everything but the right side of the bow including some of the circle part to ensure continuity.

Using the same tape over and over, I re-inked the same petal and made my way around the circle.


Depending on how closely you stamp the petals you may need to apply a mask to the stamped image to make sure the last petal doesn't overlap. I find the new post it notes that are sticky over the entire surface work best. When you stamp the last petal some of the image will be stamped on the post it note.


Once the flower was done I used the curved ribbon stamp from the Sew Sweet Cupcakes set to create the stem. The rest is history! I hope this project inspired you to think out of the box when it comes to stamping! Thanks for stopping by!

Ok, now that you're done reading this post, please stop by the Get Inky! Stamps blog and leave a comment on my post there. You may learn something new about me... (oh and please mention you're a follower of mine. Thanks!) Then come back here and leave me a comment letting me know you did it. Why, you ask? Because one random follower (who comments on both blogs) will get a mystery prize!


This post appeared first on the blog C'est La-Vie Designs Unlimited, LLC

La-Vie

Wednesday, April 17, 2013

Welcome card


When I saw the flashy floral stamp set from Inkadinkado the pineapple stood out to me most. I knew I had to get it and create something with it right away! I found my inspiration this afternoon from the challenges at Sketchy Friday - Sketch #14 (see below) and the rainbow color challenge at My Creative Time. The designer's challenge is to incorporate at least 3 of the following 6 colors Red, Orange, Yellow, Green, Blue, Purple or all 6 for an extra challenge. I decided to use all 6 because I never back down from a crafty challenge!!!!!! Here's what I came up with....


 Crafty tips I learned along the way...
  1. use a pink eraser to erase across the entire surface of each new clear stamp to take off the manufacturing gunk. Immediately clean the stamp using clear stamp fluid and a scrubber pad before using it. Otherwise you may notice your ink beads on the surface instead of what it's supposed to do.
  2. if you aren't tying a bow, consider using the xyron 1" to put adhesive on a ribbon scrap in order to stick it on your project.

Supplies:
  • American Crafts 5x7 card base - green
  • DCWV purple glitter cardstock
  • Recollections red cardstock
  • Core'dinations blue and orange cardstock
  • Bazzill yellow cardstock, white
  • Stamps Inkadinkado flashy floral = pineapple and butterfly, welcome - Repeat Impressions
  • Ink - Clear and Simple Stamps Hybrid ink Espresso Your Style
  • Copics - 0, Y00, Y02, Y06, YG61, YG63, YG67, YR04, YR07, V12, V17
  • Punches - 2" marvy circle punch, Martha Stewart punch around the page: heart chain and scallop dot
  • Pen - faux stitching with Pigma Micron 05 in green
  • White ribbon - stash
  • Adhesives - xyron 1" and 5", Scotch ATG

La-Vie

Tuesday, April 16, 2013

Artist Trading Card, Twinkle Twinkle Little Star, A Prayer


On Sunday I returned to the Heirloom's Rubber Stamp and Paper Arts Festival as bonding time for my daughter and I. We both entered the Artist Trading Cards (ATC) contest to win show bucks. The theme was Twinkle, Twinkle Little Star. We went to do the make 'n takes together and sometimes I just assist. It is a joy to see my daughter learning new techniques and developing a love for crafting.

The ATC is 2 1/2" x 3 1/2" with a stamped image from Another Stamp Company. I love this little brown girl with her afro. It was quick and minimal on purpose since my Saturday entry required a lot of work.

Supplies:
  • Inkssentials manila artist trading card
  • Copic Markers - RV09, Y26, E00 E33, Y28
  • Ink: Clear and Simple Stamps - Espresso Your Style, Tim Holtz Distress Ink - Broken China, Chipped Sapphire, Faded Jeans, Peacock Feathers
  • Zig Millenium Pen .05 in black
  • Star - Queen and Company Twinkling Goosebumps
  • Stamp: Maryam - Another Stamp Company 

La-Vie

Tuesday, April 2, 2013

Friendship Card


Did you miss me? I took a little break to go see my family last week (including my baby nephew!) I'm back in my craftroom (oh how I missed it so...) and have created a Friendship card as my entry into 5 challenges.

Supplies:
  • Cardstock - hand cut card base and layer: Bazzill, hand cut News print butterfly tag: Graphic 45, Olde Curiosity Shoppe
  • Stash - buttercream colored button, ribbon, Friendship sticker
  • Clear star - Twinkle Goosebumps colored with V15 Mallow Copic Marker
  • Ink - Tim Holtz Distress Ink in tea dye and dusty concord
  • Anna Griffin Cuttlebug and D'vine Swirls embossing folder
  • Paper Shapers decorative edge scissors, Provo Craft
  • EK Success powder tool
 
I started out with this sketch from Sketchy Friday (see above), added an Action Wobble and newsprint for their challenge (see below), a button for the Craftin Desert Diva's linky party, the colors lavender, buttercream and vanilla (black and white are ok as well) for The Play Date Cafe (see color scheme below) and last but not least, there's a freestyle challenge going on at Hiding in My Craft Room (HIMCR).


Challenges


La-Vie

Thursday, March 14, 2013

It's a Boy Scrapbook page

 
I had to work "HARD" for these challenges y'all!!! It almost blew my mind. You've gotta jump in and participate. My entry is for  Color Me Scrappy Challenge #33 and subsequently About a Boy Hoarders Challenge. While Color Me Scrappy provided the color palate and sketch, About a Boy asked us to scrapbook a male in our lives and to use stash items that have been in hand for a year or more. I chose my nephew Adrieeal (cuz he's so cute!!!) and included the last known picture of my sister pregnant (big as a house!!) I wanted to show the progression from pregnant to one month old and how he seems to have grown so much in a short amount of time. All these items have been in my stash for over a year.


 Supplies:
  • 3 Birds All Dressed Up layered layouts (HSN.com)- yellow base paper and the die cut element
  • red linen cardstock from Joann's
  • Vellum title - DCWV Baby Boy vellum title stack
  • Making Memories - yellow staples
  • Studio Decor Shadow box embellishment kit - metal photo corners
  • Copics - black multiliner, 100, G02, G09, Y02, Y06
  • adhesive- Tombo vellum adhesive, scotch ATG, Xyron, painters tape


Here's the sketch and colors provided by Color Me Scrappy:


Craft tips: If the elements of your project are perfect but not the right colors, never fear! Grab your  Copics (or any alcohol markers) and make it whatever color you like! I carefully colored many of the elements in the die cut as well as the vellum sentiment to match the challenge color scheme. Don't be afraid to mix colors either. The words were light blue and I needed green so I added light yellow and voila! lime green. I also used a darker green to change the color from blue to green.
 
Use vellum adhesive and no one will be able to tell where it's stuck down. Can you see any adhesive under my vellum title? I added it to 5 visible places. Staple elements on the page that would be a hassle to adhere any other way. There are colored ones available from many manufacturers.
 
Tape pointy elements down on the back of the page. I used painters tape to hold down the pointy ends of the metal picture corners. They were made for a shadow box, not scrapbooking so those ends could do some major damage to another page or to someone's fingers.


My crafty soundtrack for this week is... alicia keys... "This girl is on FIIIIIRRRRREEEEEE!...."


La-Vie

Just Keep Swimming Card


Today I am entering a co-challenge held by 3 Girl Jam Challenge #13 in conjunction with The Alley Way stamps. Each challenge has different rules but asks participants to glean inspiration from the picture below. 3 Girl Jam asked us to use a stamp and ribbon in the project and The Alley Way Stamps asked to use their stamps (if you don't have any digital free ones were provided). I included the images I used below as well. I was inspired by the stacking of the shapes in the picture and some of the colors. The Alley Way stamps I chose were irresistible and jumped out at me right away!

Crafty Tips: print digital stamps on white cardstock instead of paper to make sure it can handle the coloring. You can always use part of an image as I did today to bring across the theme. Also, if you don't have a trio for the color you want to use, use the colorless blender to lighten the color in areas to mimic shading. I used this tip with the top fish. BG09 is very dark. The blender allowed me to show contrast. With darker shades, such as the red (I did shading but it did not photograph well :[ errr! ) you may want to outline the shape with the black or the Copic multiliner to help corral the color. the red was hard to keep in place. Finally, coloring the background of your fussy cut digital stamps gives it a more cohesive look. I wanted the stamps to blend in but not fully to give it that underwater feel.


Supplies:
  • DCWV 5.5 x 5.5 pre-cut card: blue, DCWV glitter cardstock: blue
  • The Alley Way Stamps - digital Just keep swimming fish school and just keep swimming sentiment
  • Recollections - white cardstock 8 1/2 x 11" - printed TAW digital stamps
  • Wrights seam binding 1/2" wide tan
  • Recollections - blue bling
  • Jolee's all that bling- dimensional stickers
  • Copics - sentiment B0000, B00, B02, BG05; Fish: 0, BG09, B10/ C1, C3, C5/ R24, R29, R81
  • Adhesive: Xyron and scotch ATG
     
 
Wish me luck x2!
 
La-Vie


Monday, March 11, 2013

Birthday Wishes

 
This quick birthday card was made to enter the DCC227 - Black, White & Red Designer's Choice Challenge at Repeat Impressions. I have been seeing a lot of project lately made with Washi tape and fabric tape. I thought I'd give it a whirl. This card came together so quickly, I think I will include these tapes in my normal rotation! The stamps, usually used to make flip cards, begged to be colored! I've included the colors I used below. The colorless blender helped to vary the colors even in the small candles. A quick bit of inspiration for ya!
 
Supplies:
  • Stamps - Repeat Impressions
  • Fabric tape - striped and paisley (stash)
  • Washi tape - red polka dot and black polka dot - Recollections
  • Card base  - Joann's basics white pre-cut card
  • Copics - 0, R24, R29, R59
  • Ink stampin' up black pigment ink

Wish me luck!


La-Vie
 

Saturday, March 2, 2013

My Blog Crush - Clear and Simple Stamps Spread the Love Challenge


Wow, this week has been a crafting world wind! I'm back with a truly different challenge entry. I hope you can check it out and take part. Click here for more info! Ok, here's the skinny... one of my fav stamp companies Clear and Simple Stamps is hosting the Spread the Love campaign in conjunction with Amber at Damask Love (where you can link your project). I was challenged to highlight a blog I love, explain why and create a project with one of the challenge color schemes (I chose the one below) all in ode to my blog crush.

One winner will be chosen as Clear and Simple Stamps' blog crush and will be invited to be a guest designer for the Collection 7 release (meaning lots of great product for free and lots of exposure!! 
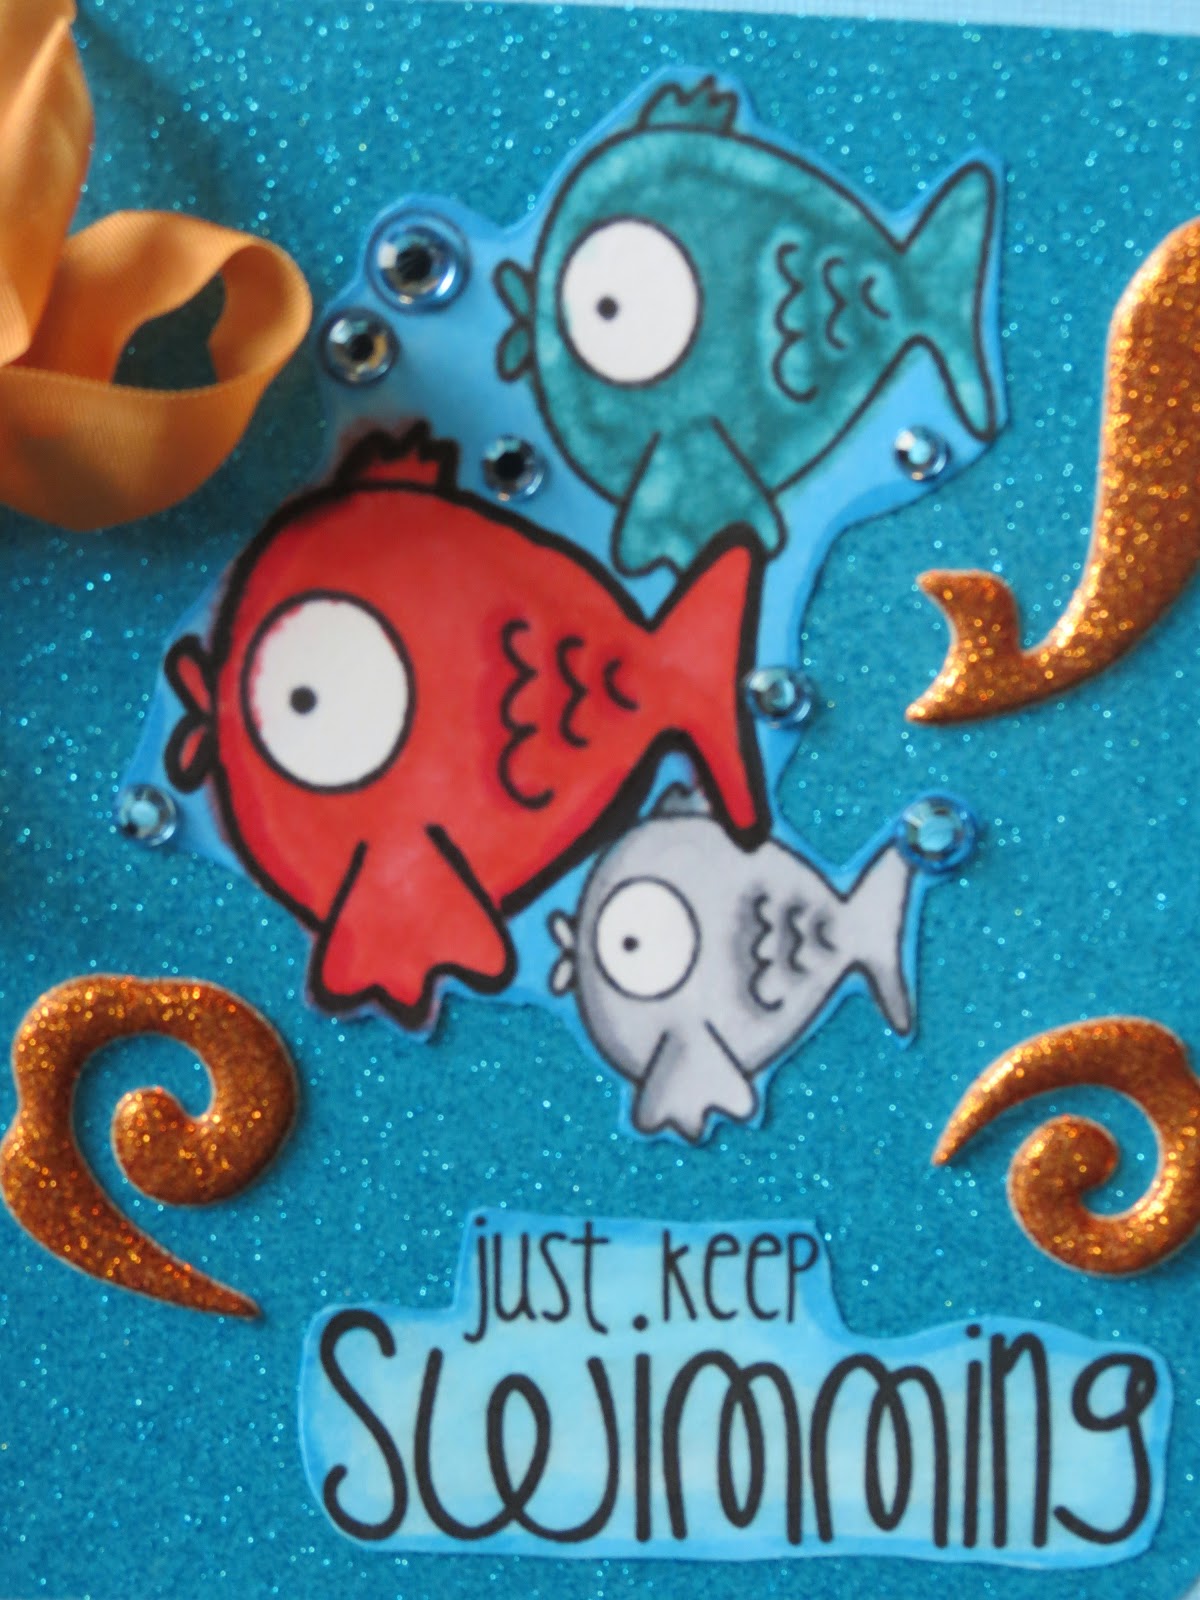
I am so SO excited about that!) All participants get a virtual swag bag too. It's all good and all fun! I chose the bold springtime blooms color scheme and several Clear and Simple Stamps products for my project. And here it is! I tried some new techniques with stamping and coloring and using twine - things I don't usually do in ode to my crush!


Who's my blog crush??????? Drum roll please......

My blog crush is Thoughts of a Cardmaking Scrapbooker!!!!! Michele Kovack does it all - she crafts, published her work in craft magazines, serves on craft design teams, is a loving mom and wife, works and blogs about it all - daily! I love her ability to be open, honest, humble, inspiring and I admire her work ethic and her amazing crafts. She always adds a little something extra (lots of glitter, LOL) and knows her unique craft style. She is doing everything I hope to do some day. So, this project is dedicated to you Michele Kovack!!! I hope you like it.


Here's a closer look at my project. I think crafting is a therapy Michele and I share!


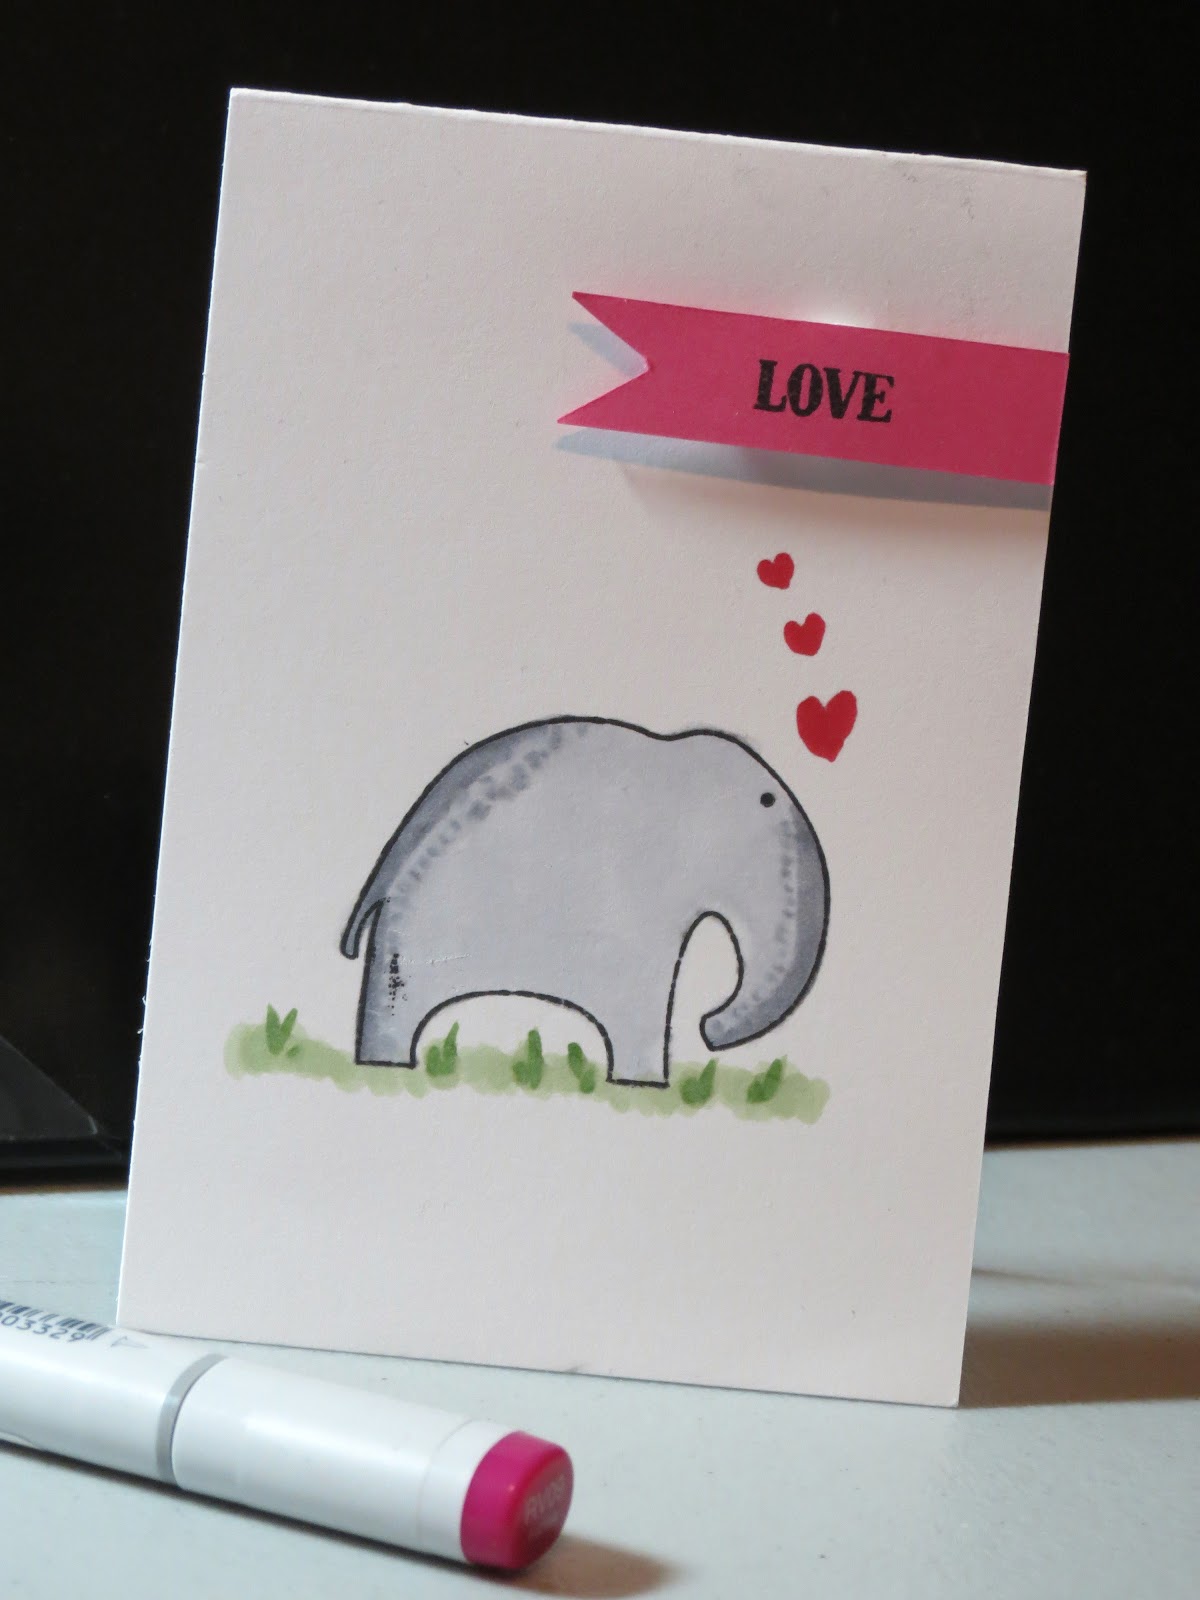
If you can take classes with Clear and Simple Stamps for Copic instruction. They are wonderful. I learned a lot (but didn't practice). Now that I am getting the courage to color and put my work out there here's my crafty tip of the day. When working with Copics (I am new at it) make several impressions on the same paper you are using to try out colors and to make notes. Not all inks work with Copics and some will work only after you heat set it. I learned the hard way. I stamped in black, 2 shades of brown and then gray before choosing.  If your collection is not that large or is not set up in trios for blending, you'll need the practice before moving to the final.

I discovered using the hybrid ink from Clear and Simple Stamps works best. I liked the look of stamping and coloring in shades of brown. After I colored the skin and hair completely, I went over everything with E00 and it made it look better. I felt the areas I wanted differentiated and those I wanted blended all came together. By mistake or not, it' a good tip that I discovered. Try it (on your scratch paper first).


Supplies:
  • Pink bib card - The Paper Cut
  • Purple cardstock and metallic orange cardstock - DCWV
  • White cardstock - Bazzill Basics
  • Orange, purple, pink twine: American crafts
  • Flower embellishment - Jolee's Boutique
  • Embossing Folder: Sewing- Sizzix run through the Cuttlebug
  • Punch: Paper Shapers for Stampin' Up!
  • Ink - Espresso Your Style - Clear and Simple Stamps
  • Stamps: Crafting is my therapy from the Craft Room set, Carlie from Rag Doll Carlie:Hello set - Clear and Simple Stamps
  • Copics - Skin: E33, E00, Clothes: G02, RV09, Hair E37, E29, E00
 
La-Vie 


Saturday, January 12, 2013

Hot Pink, Black and White Damask Embellished letters

 
Embellished wooden letters have fast become a best seller at C'est La-Vie Designs Unlimited, LLC! A month hasn't gone by without an order for these babies! These letters can stand on their own and/or be hung on the wall. This time, the order was for Hot Pink, Black and White Damask for a baby shower and nursery decor. I used my fav new technique of coloring the hot pink portions with my Fuschia copic sketch marker. That's right! I colored everything (except the ribbon). I love the ease of creating a coordinated look by hand coloring your own embellishements.
 
Supplies:
 
~wooden letters from Hobby Lobby
~Black and white Damask - Printed from Cricut Image Teresa Collins Black and White
~Fuschia Copic Sketch marker
~Bling, chipboard boarder, fluffy flower from my stash (bling added to center to create a new embellishment)
~Hot pink Damask ribbon from Hobby Lobby
~mod podge, teriffically tacky tape


La-Vie

Saturday, January 5, 2013

We're Pregnant! Layout - Instant Baby Scrapbook


I've got the spark! While working for a client to create an instant scrapbook for a baby boy, I have expeienced some of my most creative moments this year. I attribute it to the calm I feel about my craft organization. I can view and find everything because I use the ScrapRack and the 4 section system for organizing everything taught by Tiffany Spaulding (creator of the ScrapRack).


This pregnancy layout starts with My Mind's Eye - Wild Asparagus cardstock and blue distressed frames. Using the Cricut Cartridge 9 Months I created this entire layout. The lady, the titles the untrasound graphic. It's a go to cart for pregnancy and baby. On the ultrasound embellishment, I used Copic markers to color in the baby. The hearts are from a valentines set of puffy alphas I got in the $ section at walmart some years ago.


These are the cutest titles I have seen for this cut from 9 Months. Instead of layering some of the pieces, I cut everything out in white Bazill basics cardstock, left it on the mat and used copics to color in the sections I needed. I even did that for the layered pieces. Great time saver! I was able to quickly color the images, going outside the lines, to give it a completely covered look. I am in love with glitter cardstock from DCWV! I had to add some bling - boy book or not!


La-Vie

Friday, December 7, 2012

Shadowing with Copics - Clear and Simple Stamps at CKC Lancaster 2012


Here's my feeble attempt at giving you a flower basking in the sun while casting a shadow down on the ground. It's a technique I practiced in Copics class instructed by Clear and Simple Stamps at CKC Lancaster 2012. I'm sharing things I learned in classes there this month.

In this hour long class I learned quite a bit. It all started with yesterday's post. Picking up where I left off, I  learned how to 1. layer colors with Copic Trios, create a shadow, and how to erase mistakes (although it seems like I forgot to erase all mine here hmmmmm?!?) with the colorless Copic.

The best thing I learned was that I didn't have to own all the colors they list for the class. You can come with what you have and just have fun. Participants were willing to share markers. Crafters are the NICEST people....


This is my favorite card of the class! We learned how to make hearts just by touching the pen tip to the paper going slightly left and again going slightly right. It was fun to try out making small details on the elephant to represent his rough skin. The darker blades of grass were made in the same fashion as the hearts. The class was laid back but very engaging. I can't wait to see what they come up with next year!

Who's got some more great Copics tricks and tips to share? Please leave a comment below.


La-Vie

Thursday, December 6, 2012

Tiny Yet Powerful - Copics with Clear and Simple Stamps at CKC Lancaster 2012


Did you miss me? I took a break from daily blogging to work for several clients who needed my crafty expertise this holiday season. But I'm back to continue sharing the things I learned in classes at CKC Lancaster 2012.

Today I have a tiny duo - gift bag and matching card. I am still rather new to coloring and shading with Copic Sketch markers. I love taking classes with Clear and Simple Stamps because they really know how to teach the techniques. They teach using Copic trios usually. I knew nothing about how to buy Copics or what the numbers meant or how to use them to create the wonderful stamped and colored images I see online. This is the second year I've taken classes with them. It's a family run business and I love all of the craft products they sell.


Here's what I learned .... 1. Distress Ink may not have been the best choice for coloring and shading with Copics. It seemed to smudge a bit with all of the layering of the colors. 2. You can create your own unique pattern within patterned paper using copics. The bag and card show a layer of patterened paper. We were instructed to color in the diamonds (no blending needed) to make the pattern. I would have never thought of that and now I do it all the time. 3. Where to put the shading to make it look more realistic. I need much more practice but feel encouraged to whip out my Copics more often.


These are perfect when you have a little something you'd like to present in a cute and personable way.


La-Vie