Showing posts with label DT. Show all posts

Saturday, May 2, 2015

Anything Goes Challenge - 'Lil Patch of Crafty Friends


It's time for another DT post! Please join in Challenge 9: anything goes craft challenge at Lil Patch of Crafty Friends challenge blog! It's been a blast being on this DT, but I need to see your creations to make it SPECTACULAR!!

The challenge runs for two weeks starting May 3rd (Australia Eastern Standard Time). Ok, so guess what? We have not one, not two, BUT THREE sponsors - Sami Stamps, Bugaboo Stamps and Ching-Chou Kuik! They have offered some amazing prizes! Please check out their sites and show them some love!


#1
Prize ~ $12 Gift Certificate

#2
Prize ~ 7 Images

#3
Prize ~ 1 Image

**********************************************************************
I was very fortunate to receive the digi
Hello magnolia by Ching-Chou Kuik!


It's a beautiful image with lots of hair (my arch nemesis!) I had fun learning where to put the highlights and low lights. I am sure you cannot guess what I colored with! Wink of Stella!!! 

Here's a better look at the subtle shimmer you get with Wink of Stella brush pens. They have a limited color palate but I was able to layer colors to create deeper shades and to blend colors. I have never tried this technique with Wink and I was so happy with the results.


Wink does not yet have skin tones so I did use a Copic to color her skin with minimal blending. The rest of the CAS card came together rather quickly. 

Supplies:
  • Stampendous mixed media cardstock (digi printed on...)
  • We R Memory Keepers - inked rose (Card base)
  • Live for today: dollar tree (sentiment)
  • simple stories say cheese - layers
  • wink of stella brush pens
  • Copic Marker E11 
  • Scotch ATG


Thanks for stopping by!

Challenges:

Please follow me on social media and help spread the word about me.

Monday, December 23, 2013

Get Inky! Challenge 20: Winter Snow


Today the last challenge of the year starts at the Get Inky! challenge blog. It is also my final challenge inspiration post as a design team member. It has been a great ride! Well, this time we're looking for your winter snow projects. I've decorated a darling mini gift bag for those special little Thank you gifts at Christmas time.

The 2013 Holiday set (available on Etsy) has the most darling little snowman with all the trimmings! My snowman is ready for a snowball fight as soft billowy snow falls all around him.  This clean and simple look was achieved with Copics and Flowersoft. 


Supplies:


  • Get Inky! 2013 Holiday Stamp set
  • Mini white gift bag
  • Copics - 100, YR07, R29, G17
  • Uniball Signo White pen
  • Flowersoft, Flowersoft glue
  • Recollections white glittered embellishment
  • Memento black tuxedo ink


A quick tip for ya... there were some ink spots on the white bag. Quickly resolved with my opaque white pen!

Thanks for stopping by!

La-Vie

Monday, November 25, 2013

Get Inky! Stamps Challenge 18: Onward and Upward... Skyward bound!


A new inventive challenge has just begun at the Get Inky! Challenge blog entitled Onward and Upward...Skyward bound! To inspire you, I created an A2 sized card using the Get Inky! Stamps Whimsical Moon and Stars set available on Etsy.


I've always wanted to make a card using a hot air balloon so I cut one from the Cricut cart Everyday Popup Cards at 4.34 inches. I only used some of the layers and decided to color in the basket with a Copic. Perched on top of foam circles it looks so majestic. I love how it turned out! 


Get Inky! Stamps proved to be the best accompaniment. In Memento ink just slightly darker than the DCWV parchment card, I stamped clouds and stars to create a sky for my hot air balloon. The sentiment is divine stamped in Bahama blue Memento Ink.

Supplies:

  • Cricut cart Everyday Popup Cards - , and layers cut at 4.34"
  • Memento ink - summer sky, Bahama blue
  • DCWV glitter cardstock, Parchment card base
  • Bazzill pink and beige cardstock
  • Recollections foam circles
  • Copic E37

La-Vie

Tuesday, November 19, 2013

Kraftie Kre8ations DT Reveal - Swatch book of Thankfulness


As a part of the Kraftie Kre8ations (KK8) DT, I'm learning about new crafts and techniques. Today we are showing our gratitude in a swatch book. "What's that?" you may ask... well it's like a small scrapbook. I've been mulling over whether I wanted to start a project life type scrapbook and making a swatch book kind of reminded me of that style of scrapbooking. So this is me, dipping my toe in the water and it feels fine!!


My swatch book entitled Live, Love, Laugh is about my adventures in October 2013. It's made from 3 x 4 inch pieces of cardstock from my scrap bin and a couple of journaling cards from a Project Life core kit called Amber edition. The scraps were from DCWV, Bo Bunny, Basic Grey, American Crafts, etc. The ten pages of the swatch book were made with my We R Memory Keepers 3 x 4 punch (with rounded corners) and the holes were added with my Crop-a-dile Big Bite.

Here's a closer look...


Last month, I was on a weight loss journey so I thought I would show my gratitude for my progress and my growing bond with my workout partner.

I used a dimensional sticker sheet (Jolee's maybe??) to adorn the pages and to being continuity to the swatch book. The butterfly is from a dollar store sticker sheet and the one kraft chevron is a leftover from a border punch from Stampin' Up!


Here's to meeting up with old friends and for having some old fashioned fun!! My daughter is winning a race and my son is ready for a sack race at the church fish fry. We are thankful!


I am thankful that my husband and my best friend accompanied me to a huge costume party (where we had a BALL) and that my new-found fitness allowed me to look fabulous in my flapper outfit! My daughter saw us having so much fun she went and threw her outfit on for some pics.


So there you have it! The last page has some journaling and here's a look at the book closed and spread open. I enjoyed making this swatch book so much. It's a great way to reflect on the month. Now I see why Project Lifers are into it so much. I can easily remember the little things we did and show my young children to remind them as well. I just might start one for real come Jan 1, 2014. Follow me here and on Bloglovin' (buttons at the sidebar) to see the big reveal!!

I hope you enjoyed this presentation and will check out my fellow DT member's reveals at Kraftie Kre8ations.

La-Vie

Wednesday, November 13, 2013

Inspiration for Get Inky! Stamps Challenge 17: Thanks


Have you heard about the challenge at the Get Inky! Challenge blog? It's all about giving thanks. To inspire you to join in on the challenge, I created a Thank you card using two Get Inky! Stamp sets - Sew Sweet Cupcakes and Love Bugs (found on Etsy).


I enjoyed making the Thank you watermark with VersaMark ink and Get Inky! Stamps - instant background!! Finding unique ways to use leftover cuts is a must. Here I used a balloon as the place to stamp my sentiment. And who can resist a glittery butterfly?

Supplies:
  • Get Inky! Stamps - Sew Sweet Cupcakes and Love Bugs
  • Bazzill blue card base 100 lb cardstock
  • Personalized by You - A2 pink card layer
  • Recollections - glitter butterfly 
  • Ink: VersaMark and Blue jay chalk ink
  • Martha Stewart punch around the page - ribbon loop 
  • American Crafts twine
  • Cricut cut - balloon from my stash
  • Scotch ATG and Zots large and bling glue dots
Thanks for stopping by and I hope to see your entry in the challenge!

La-Vie

Friday, November 8, 2013

I MADE IT!!! I'm on the Cards Galore Challenge Blog Design Team!!


Guess what? You can look forward to seeing more of my Copic coloring in the new year!! I made it onto the Cards Galore Challenge blog DT!!! Please stay tuned for some great challenges and project inspiration in the new year!! Woooooo Hooooo!!!


 Remember this lovely? I was a guest designer for Cards Galore back in August. I am so excited to be  on the regular team now!!


La-Vie

Thursday, October 31, 2013

Kraftie Kre8ations DT - Black and Orange


It's time for another Kraftie Kre8ations reveal! We've got your black and orange just in time for Halloween! This time I decided to really challenge myself to make something different. In my crafting, I hardly use stickers, glossy accents and I had not figured out the mechanics of pop-up cards. This project includes all 3!!!!


The card base is by American Crafts and most of the card (inside and outside) is adorned in October Afternoon Witch Hazel collection. My friend Lyne suggested I use glossy accents on the black dress to make it pop. Thanks Lyne!


A product I love from Art Gone Wild is their Crafty Cutts Dies CCD-023 Rectangle Stairs. It's a die that cuts 4 levels of stairs for pop up cards. I used 3 of the levels for this card. The die cuts all four at once with the score lines. It was very easy to cut, fold and attach. All I had to do was use my powder tool from EK Success to remove the stickiness from the stickers (leaving a small portion sticky) and attach them to the "stairs."

Finally, the moon was made with Bazzill cardstock, Antique linen Distress Ink and the Creative Memories cutting system. Here's a closeup of the pop up.


Stop by the Kraftie Kre8ations blog to check out my fellow DT member's creations!


La-Vie

Saturday, October 19, 2013

Inspiration post: Get Inky! Challenge 15 - Buttons on a Halloween card

Have you heard??? 
There's a new exciting challenge over at the Get Inky! Challenge blog - Buttons on a Halloween card. It's my day to offer inspiration here and on the Get Inky Stamps blog.
Pop over and leave me some love! Pretty please?!


I am crazy for chevron so I decided to make this fun Halloween card using DCWV cardstock. I love how it shines just enough. The card base is a black American Crafts tri-fold card. To create the opening, I cut a square from black DCWV chipboard and stamped with Get Inky!'s 2013 Halloween Spooktacular set (available on Etsy) in versa mark. I then heat embossed with detailed embossing powder from Sparkle N Sprinkle. It's called vanilla ice (Vanilla ice, ice baby.... dun dun dun dundun dun!) so I had to buy it. It's semi transparent and has glitter in it. Buttons accent the sentiment. Don't ya just LOVE the font?


Opening the card reveals Halloween patterned and plain paper from my stash, and more buttons. The Get Inky! stamp is perfect for the occasion and stamped well in Memento black tuxedo ink. I left some room for a handwritten message. I'm just in love with this style of card. I hope you enjoyed it and will consider joining in on the challenge and picking up some Get Inky! Stamps soon.

Challenges:
Craftin' Desert Diva's - Linky Party 17 - Halloween
The Crafting Cafe - Anything Goes
D.L.ART - anything goes

La-Vie 

Sunday, October 13, 2013

Boxes of Hope by the Kraftie Kre8ations DT


Getting diagnosed with a life threatening illness can be hard on anyone. It is always good to know you are not in it alone. The KK8 Design Team have made boxes of hope that can be filled with words of encouragements. For the next two days we will show case our creations.


It was a blessing to create this Breast Cancer box to brighten my college friend Jennifer Whetsell's day who is a breast cancer survivor. I started out with a brown chipboard cross box from Hobby Lobby. Pink is the color of choice, so I painted it and layered scrapbook paper, a quote, ink, crochet flowers, brads and stickles to accentuate the breast cancer symbol.


The box is filled with quotes I found online at The Quote Garden. I am hoping they resonate with my dear friend.  


It was very nice to share a little cheer and support. Thanks for stopping by!

Challenges:
D.L.ART - anything goes
D.L.ART Linky Pinky Party - Breast Cancer Awareness

La-Vie

Monday, September 30, 2013

Get Inky! Stamps Challenge 14: Fall Colors


Today a new challenge is posted to the Get Inky! Challenge Blog!
Pull out those fall colors and create a project to wow us! 


My project is a square card with vellum punched layers featuring a sentiment stamp from Get Inky! Stamps' Love Bugs available on Etsy. I punched all three layers of vellum at once and an oily substance was left behind. Next time I would incorporate some paper to see if the oil would still leak through.


Here's a closeup of the sentiment and some of the leaves and acorns that were left over once I punched the vellum. I love that the punch leaves behind usable confetti. I also love the jute and the rustic flatback buttons. 


One last view with the changing leaves. Makes me wanna pull out my jean jacket and leggings. Enjoy the season! Can't wait to see your fall-inspired projects!

Supplies:

  • Get Inky! Stamps - Love Bugs available on Etsy
  • Lara's Crafts - Jute Twine
  • Favorite Findings - wooden flatback leaf and acorn buttons
  • Stamp on It - A2 Vellum Bright color pk 1 (text weight)
  • Tombow Vellum mono adhesive
  • EK Success - falling leaves punch
  • Zots glue dots - bling and petite
  • Memento - Tuxedo black ink
  • DCWV 5x5 card in green
La-Vie

p.s. I love your comments!! Load 'em on me!!

Saturday, September 28, 2013

Winnie the Pooh Challenge - Kraftie Kre8ations DT


Guess what? September is National Honey month and this week is Kids Creative Week! To celebrate these occasions, the Krafie Kre8ations design team created projects featuring Winnie the Pooh and kids. Why? Because we ALL know Pooh loooooooves his honey!! And what kid can resist that lovable, huggable bear, Winnie the Pooh? 

Join in on the fun!! If you except this challenge, create a project featuring Winnie the Pooh and kids. Link your blog post or gallery photo to the Kraftie Kre8ations blog between September 29th and October 5th and one winner will be chosen to receive a special prize. The winner will be announced on October 6th.  


Our family took our first trip to Disney in 2011. My children were 2 and 6. It was such a magical time! This Mosaic Moments layout shows all the fun we had waiting in line for the many adventures of Pooh ride in Magic Kingdom.


I am very experienced at creating Mosaic Moments layouts using 1" and 3" square punches. Actually my entire Disney trip is in Mosaic Moments (links to the other layouts I have created are at the bottom of this post.) However, this was my very first time using Kiwi Lane Designs templates. The title on this page sits on cardstock cut using the Aspen Court mini 2A. A full supply list is included below.


On this page I used both sides 2A and 2B of the Aspen Court mini Kiwi Lane Designs templates to adorn the journaling block. I like to leave lots of room for handwritten reflections. I hope you enjoyed this trip down memory lane with me.

Supplies:
  • Mosaic Moments grid paper
  • Kiwi Lane Designs - Aspen Court mini 2A, 2B
  • Cricut cart Disney Pooh and Friends - Pooh's head on pg. 18 and Pooh title on p. 16 cut at 2"
  • Martha Stewart Drippy goo punch
  • Pressed Petals, Inc. Black Mini metal letters
  • DCWV - blue leaf cardstock: Animal Crackers Stack, Adhesive cardstock - green, yellow glitter cardstock
  • Bazzill - beige cardstock
  • Recollections - orange, red cardstock, red and yellow washi tape, black cardstock
  • Core'dinations - Autumn (yellow) cardstock punched with the drippy goo punch
  • Queen and Co. - Disney inspired brads
  • Fiskars Zings - red circle epoxy stickers
  • Marvy square punches
  • EK Success Pooh stickers
  • Tim Holtz Distress Ink - Faded Jeans
  • Xyron, Scotch ATG

Thanks for stopping by! If you'd to get your Disney fix check out my other layouts. Here are the links...

La-Vie

p.s. I love comments and new followers!!

To view more of my Disney pages check out these links:

Thursday, September 19, 2013

Get Inky! Song Challenge 13: The Birds and the Bees


On September 16th, a new challenge started at the Get Inky! Challenge blog. The challenge is to create a craft based on the classic Jewel Akens song (Let me tell you 'bout) The Birds and the Bees. It's my day to post inspiration at the Get Inky! Stamps blog to get those creative juices flowing.

My card is a square one measuring 4.25" x 4.25" from The Paper Studio. I created the love scene to match the elements of the song by printing and cutting a pre-made scrapbook page from the Cricut Imagine Nursery Tails cart. I then embellished with Stickles, Distress Ink and Get Inky! Stamps - the bees, flower, heart, love to be exact - from the Buzzing Bees and the Love Bugs stamp sets available on Etsy.

Supplies:

  • Get Inky! Stamps - Buzzing Bees, Love Bugs
  • The Paper Studio - card base 
  • Stickles - midnight blue, green
  • Bazzill basics white card stock
  • Nursery Tails Cricut Imagine Cart
  • Tim Holtz Distress Ink - Faded Jeans

I hope you create a masterpiece to enter into Challenge 13!

La-Vie


Monday, September 2, 2013

Get Inky! Challenge 12: Cupcakes


Guess what? There's a new challenge posted to the Get Inky! Challenge blog and it's a fun one! This time we are challenging you to make projects using cupcakes. As a part of the team that exemplifies the challenge, I decided to think out of the box a little to get your creative juices flowing.

Using the Sew Sweet Cupcakes and Joyful Jar Drinks stamp sets available on Etsy, I created a happy birthday Artist Trading Card (ATC). ATCs measure 2 1/2" x 3 1/2" - and are the smallest craft I've made to date. I wouldn't consider myself a small crafter but I am learning to work small and loving it!

Here's my ATC!


This ATC is super special because I used Get Inky! Stamps with honeycomb paper to create a 3D effect. It was my first time creating with the dynamic duo and I enjoyed it so much I'm making it a normal part of my crafty toolbox.

Here's another view to show you how tall the cupcake wrapper becomes with the honeycomb paper. To create this look, I stamped half of the bottom of the Get Inky! cupcake stamp onto the honeycomb paper in tuxedo black memento ink. I cut it out and set it aside. Then I took a second ATC and stamped the entire cupcake image in Bahama Blue and fussy cut it out and colored it with Copics.


Using a Tombo glue stick I added glue to the bottom of the honeycomb paper and lined it up with the bottom of the cupcake. Once it was stuck down I applied glue stick the top portion of the honeycomb paper and opened it like a fan and stuck it down on the other side of the stamped cupcake wrapper. Adding crystal ultrafine transparent glitter was a snap with my Quickie glue pen.

Supplies:

  • Inkessentials manila ATC (2)
  • Cuttlebug cupcake embossing folder from the Once Upon a Princess set
  • Memento Dew Drop Ink - Lilac Posies, Rich Cocoa, Bahama Blue
  • Recollections - bling brad
  • McGill 1/16" hole punch
  • Copics - B0000, B00, B02, BG05
  • Elizabeth Crafts fussy cut scissors
  • Tim Holtz tonic scissors
  • Quickie glue pen
  • Tombo glue stick
  • Zots glue dots
  • Inky Antics brown honeycomb paper

I learned a valuable lesson while making this ATC. When choosing a stamp to use honeycomb paper with, make sure the shape is symmetrical. I wanted to do the icing as well but since it wasn't. When I opened the honeycomb paper the shaped looked like a cone. I saved it to use on another craft at some point. But thought I'd pass on the tip to save you time and frustration.

So c'mon! Join in on this fun challenge! I can't WAIT to see what you come up with!


Challenges TBD

La-Vie

Monday, May 27, 2013

Good Golly Glitter Challenge - Get Inky! Stamps


It's the dawn of a new crafty challenge over at the


This time we're looking for those glittery creations. To inspire you, I created a clear card using stamps from Sew Sweet Cupcake


I was really interested in trying out the whole clear card thing... I wanted to stamp, color with glitter and create a fabulous card. In the end, I did just that, but it took many tries to get it all pulled together. I almost pulled my hair out y'all!! But my frustration will help you avoid the pitfalls and reap all the benefits.

I started out with a clear card from Close to My Heart. It has a plastic coating that must be peeled off on the outside and the inside of the card. I attempted many times to stamp directly on the card front but it did not work. I think I need some re-inkers for my Stazon ink pads.

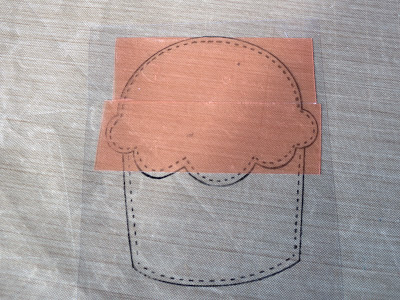
Determined to complete the project, I pulled out my 8 1/2 x 11" clear vinyl sheets from Stamp La Jolla (used for windows or shaker cards). It's 5 mil so it's thin and flexible. I stamped the cupcake on it and cut out a square around the cupcake to give myself some wiggle room.

Let the magic begin!! I covered the BACK of the cupcake top with Terrifically Tacky tape, then I fussy cut the vinyl with the tape attached for a clean  look. I am in love with my new fussy cut scissors by Elizabeth Crafts. I was able to get into all the tiny spots and to get under the tape in the areas at the lower end of the cupcake top. That was very important for making the two sections the right colors without overlapping.


I peeled off the red layer from the tape and applied Doodlebug Design Sugar Coating cupcake glitter (how fitting?!) in pink. I pressed my fingers into the glitter and rubbed pretty hard to burnish the glitter to the tape. Once it was set, I taped the bottom of the cupcake and glittered it in American Crafts Wow! Cricket (green). Using the Xyron I adhered the cupcake to the card front.

Both glitters are translucent. Perfect for highlighting the cardstock I chose from DCWV Nana's Kids stack. The cardstock is glittered and shiny as well. I cut two identical pieces and using Tombow Vellum mono adhesive I adhered them inside the front and back panels of the clear card with the design facing outwards.
rear view of the card
The finishing touches were added with a Get Inky! Stamps sentiment inside the card and a sheer bow made with ribbon from my stash (hand tied by moi!).


Good Golly Glitter!!! I hope you try this technique. Until next time... looking forward to seeing your creations in this challenge.

Challenges:
3 Girl Jam - #19 Anything Goes with Ribbon
Tsunami Rose Designs: Wednesday Challenge #21 - Cards

La-Vie

Monday, May 13, 2013

Thank You Card using Get Inky! Stamps


A new challenge is posted to the Get Inky! Challenge blog! This time its a Die Cut challenge. To inspire you and encourage you to join this challenge, I created this thank you bib card. This card also was created for one more reason... but I'll share that later on in the post. Check back for more Design Team member inspiration for this challenge at the Get Inky! Stamps Blog.

Supplies:
  • Cricut Cartridge Florals Embellished -  cut at 2.75" 
  • Bib cards and overlays (variety pack) - The Paper Cut 
  • Martha Stewart scalloped circle layering punch
  • Ink - Hero Arts Neon Dye Ink: neon pink
  • EK success Powder Tool
  • American Crafts ribbon
  • Adhesives - Scotch ATG, Xyron 1" and 5", Zots glue dots, scotch magic tape
  • Tim Holtz tonic scissors
  • Cardstock - Bazzill, DCWV Adhesive, SEI, Recollections
I love the fancy font of the Get Inky! Stamps Sew Sweet Cupcakes stamp set. I used the Thank You stamp. Click the link above to check it out! I thought it was perfect for this project.

Using The Paper Cut bib card (4.25" x 5.5") and matching overlay (3.88" x 4.13") I created the card base. In order to get the scallop circle I used a little trick I learned along the way. I knew I was making a die cut for the card front, so I used a Martha Stewart layering punch where the die cut will sit. To make sure it would fit, I cut it out of paper first and put it against the base cut for the flower. Once the card is put together, no one will be the wiser!!! Maximize your resources folks!

I then placed the scalloped circle on scrap paper and stamped the Thank You stamp with Hero Arts neon pink ink.


When creating multi-layered die cuts, use DCWV adhesive cardstock whenever possible. This flower has 6 layers. It saves a step when the adhesive is already applied. Here's a picture of one of the layers I cut using the same settings used to cut adhesive vinyl. It's called a kiss cut - meaning the cardstock is cut but the liner paper below it is not. When you're ready to layer, peel the cut off of the liner just like a sticker.

When you're dealing with multi-layered die cuts, you may get glue boogers or extra glue overlapping. My sure fire fix for that is to use the EK Success powder tool. Applying powder to the sticky areas removes the stickiness so that the card won't stick to the envelope, etc.


I used the "cheater method" of adding my ribbon bow. Before placing the overlay on the card, I placed a length of American Crafts ribbon (4 3/4") across the card front and taped (with normal tape) the ends on the back of the overlay. I used a second length of ribbon (11") to tie the bow. It saves ribbon and frustration. Give it a try!

Note: because the ribbon is underneath the flower, I applied a glue dot behind each leaf to keep those adhered.

Guess what??? After making one card for the challenge, I decided to make 25 more for my daughter's 2nd grade teacher. She returned to school after an extended absence for breast cancer surgery. She is in remission and we all are so happy that God spared her life and brought her back to us. She is a wonderful teacher! I figured she might have quite a few folks to thank for their help, thoughts, prayers, meals, gifts, etc. and what better way to do so?!  


I made two of each card so I only showed you half of the cards. I changed the ink and ribbon to match. All the ribbon is spring related.


All the children wore team Souders t-shirts the day she returned. It was a love fest!


I hope you enjoyed today's post, will join the Get Inky! Challenge, use some of the techniques I shared and pay it forward with a random act of kindness.

I LOVE COMMENTS!!

La-Vie