Friday, March 30, 2012

Jinger Adams Design Team Application


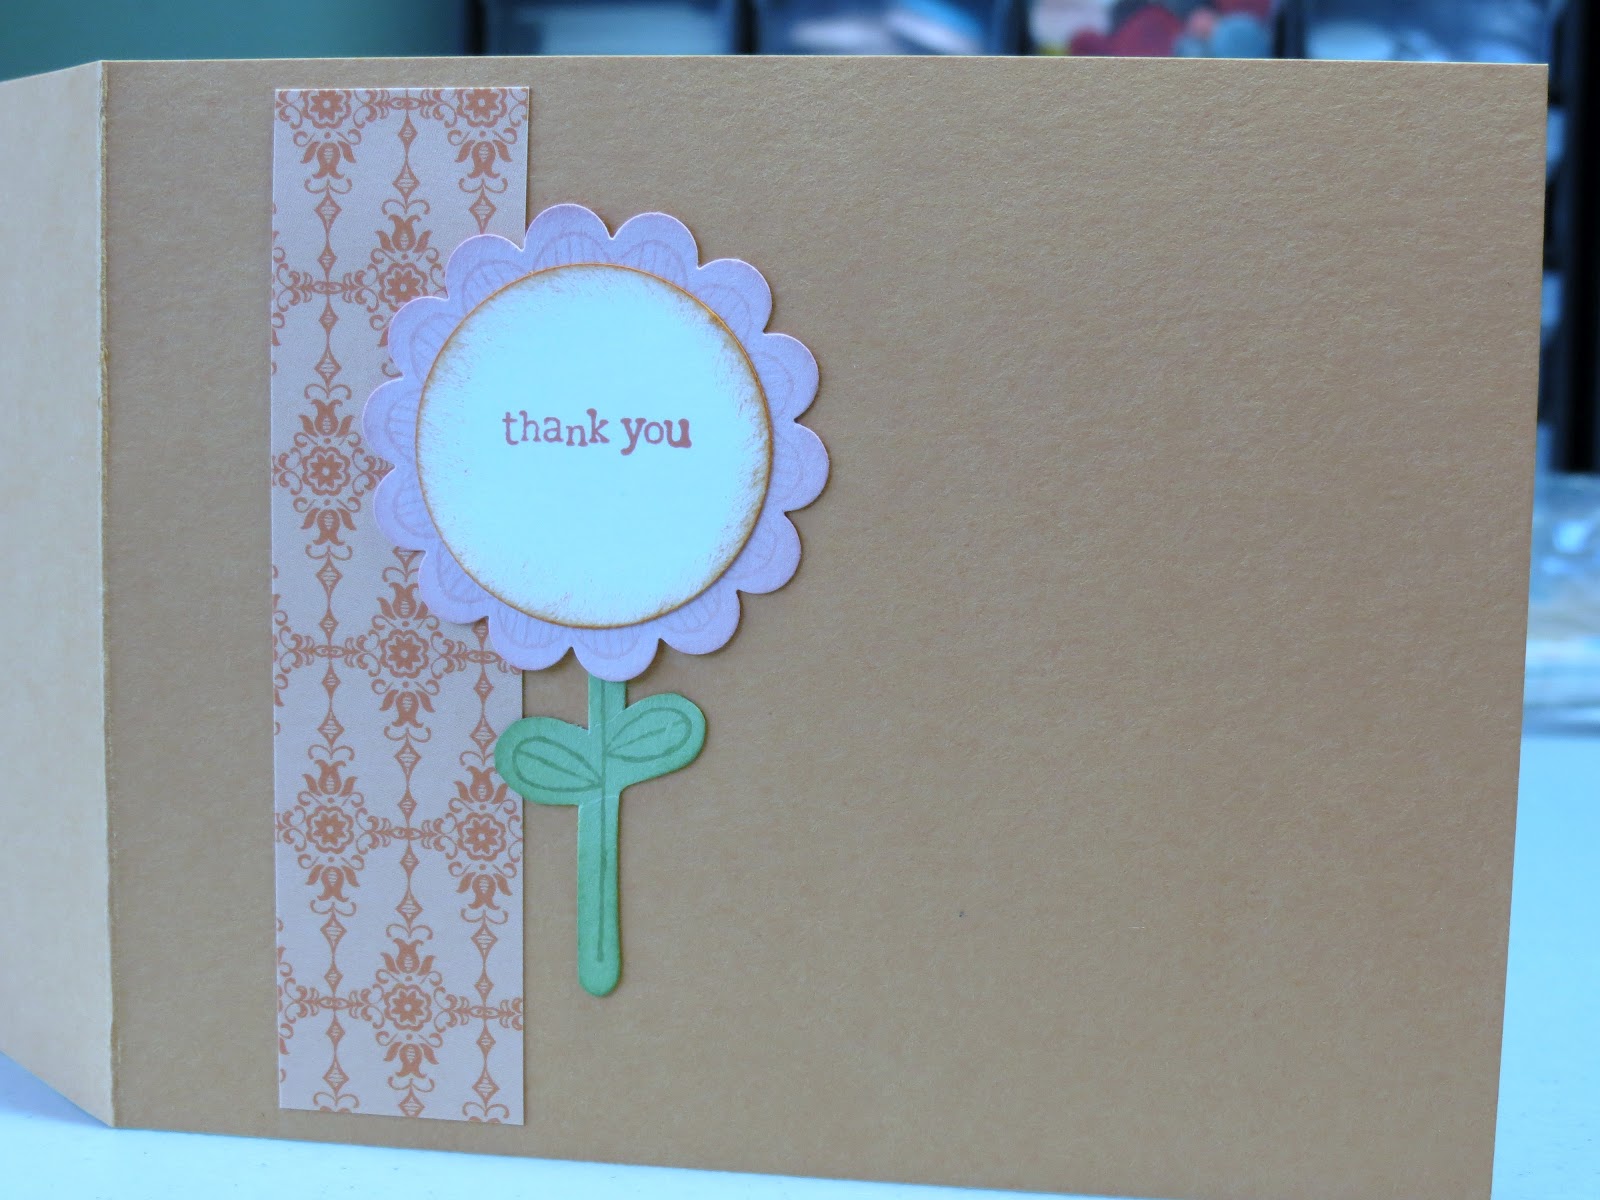
Using the New Testament and Everyday Paper Dolls Cricut Cartridges I created this card for my Ginger Adams Design Team Application. See the rules below.


Wednesday, February 29, 2012

Jinger Adam's Design Team Call

Jinger Adam's and The Scrapbooking Queen are looking for talented, motivated, responsible designers who have time to commit to designing layouts, cards and projects each month with Jinger Adams products and promote Jinger Adam's products line. We haven't set a specific number of designers to add to our present team . At this time are only accepting designer who reside in the USA.

We are looking for:
1. Enthusiastic, creative and DRAMA Free people that love to create with designer Jinger Adams product line(s) and are able to do 2 monthly assignments such as layouts, projects, and cards with her awesome products.
2. You must post your work on 2 different galleries that you belong too.
3. You must be able to commit to a 12 months term, which will be from April 1, 2012 through April 30, 2013.
4. You must be at least 18 years of age.
5. You agree to release the rights of your designs photos be posted on the Jinger Adams Blog & website for display on the Jinger Adams Company sites. Credit will be give to the designer of said project.
6. If needed, your designs may also be needed for display at trade shows.
7. People that can take great pictures of their work in natural light, with a few close-ups. Because we will be posting your work on Jingers Adams Company blog, we want your work to shine. Dark photos, shadows and flash spots don’t show your work well.
8. Able to do 1 blog hops per month with Jinger Adams product line and other companies lines.
In return you will receive:
  1. A package with plenty of Jinger Adams products to design with for your blog post.
  2. Your picture and bio on the Jinger Adams Blog and each of the design Team blogs too.
  3. Product from co-sponsor companies to use for blog hops and other events.
If these sound like the perfect fit for you, then submit your project via the inLinkz below.
Please submit only one BRAND new project that show your style we will be picking designers for the team from the submission to add to the present design team members. No back posting this must be a fresh new post just for Jinger Adams Design Team Call. Make sure your post show us your style, post as if you were on Jinger Design Team show us your very best work and posting skills. Anything linked post that is not stated for the design team will be deleted and removed so please read the guideline . WE have several openings to fill.
Question's Only please email: TheScrapbookingQueen1@gmail.com
We thank you in advance for all of your work and appreciate your entry!


La-Vie

Saturday, March 24, 2012

Soccer Coach Gifts


My daughter participated in our neighborhood soccer team. In order to thank the coaches I made these scrapbook pages and placed them in scrapbook frames from Micheal's to create a home decor gift.


My Cricut E2 came loaded with exclusive carts and the ones I used here are Cricut Car Decals 2 for the soccer coach and soccer girl and American alphabet for the font. The green and black cardstock is by Bazzill. I also used various stickers and journaling blocks from my stash. I asked my daughter for her thoughts to add to the journaling blocks. A quick easy priceless gift for the coaches who donate their time to enriching our youth.

La-Vie


Friday, March 23, 2012

Cricut Circle March Monthly Challenge

Cricut Cicle MARCH MONTHLY CHALLENGE: Creative Sharing Challenge!


March is National Craft Month. This month, we want you to display your passion for your craft by creating a piece of wall art to display in your home, office, or wherever! The topic can be whatever you wish . . . just use your craftiness to make something you can display and share with others. The WINNER of this challenge will receive a $150 Credit to Cricut.com!

The Challenge: Create a piece of wall art (canvas, art board, sign, vinyl directly on wall, framed art, shadow box, etc.). Use at least three colors.

Rules and Guidelines: Circle Blog Challenges are open to Cricut Circle Members only. Your project must be newly created for this challenge and include atleast 2 Cricut Image Cuts. You must submit a project to be entered into the Challenge Prize Drawing.

How to Enter: Submit your entry by 9:00 pm MST on Saturday, March 31st, 2012.

Prize: This month the winner will receive $150.00 in credit to Cricut.com.

Winner: The winner will be selected randomly from qualifying entries using www.random.org and will be announced on the Cricut Circle Blog on Thursday, March 1st, 2012.


I love when a Cricut challenge coinsides with something on my craft to do list! I have had this shadow box (Frame it collection 9x10" frame for use with 6x4" photos) for quite some time with the intention to create a scene from my son's birth. I kept various keepsakes from the blessed day to scrapbook later - his blodd pressure cuff, my bracelet, the front of a fav onesie and the crib card. Combine these together and voila! an instant masterpiece.

You might not be able to tell, but I used 2 8x8 cardstock sheets cut into smaller portions to cover the back of the frame. The pieces are put together like a puzzle behind and around the raised self-adhesive platform in the middle for a 4x6 photo where I placed the green mat stack.


Project Supplies
  • 3 colors - blue, green, yellow
  • cardstock - DCWV Nana's Kids baby boy 8x8 and mat stack, Mango Frost stack 8x8
  • Cricut carts - New arrival "it's a boy" cut at 2" and the font is from A Child's Year cut at 1.5"
  • adhesives - ATG, Zots jumbo and small glue dots, Scotch double-sided scrapbooking tape
  • Creative memories corner rounder
Wish me luck!

La-Vie

Thursday, March 22, 2012

My mailbox adorned - Vinyl project

Since we moved here 2 years ago we have needed new numbers for our mailbox. I always said "I can do that with my Cricut!" but I never made the time to do it. When I created the Cars theme for my son in Vinyl, I added this in so I wouldn't waste all that good vinyl.


I put numbers on both sides of my mailbox so that folks can see what number we are when they are travelling up or down the street. I kiss cut the vinyl at 5" for both the numbers and the shadow. The vinyl was easy to layer using transfer tape. I used the same transfer tape to apply it to the mailbox. Since I have added the numbers it has rained and snowed and they letters have held on without fail.


Next, I'm going to make some of those car decals to put on my back Van window. Hopefully it won't take another 2 years....lol

La-Vie

Wednesday, March 21, 2012

Sweet Little Baby - Cricut Circle Weekly Challenge #54

Weekly Challenge #54: Decorative Letter Challenge!

The Challenge: Create a scrapbook page, card, home decor item, or other project where you include a word of your choice. One or more of the letters in your chosen word must be replaced by a Cricut shape. For example, replace the letter “o” in the word LOVE with a heart.

Rules and Guidelines: Circle Blog Challenges are open to Cricut Circle Members only. Your project must be newly created for this challenge and include atleast 2 Cricut Image Cuts. You must submit a project to be entered into the Challenge Prize Drawing. One entry per person, please.

Prize: We will select one winner to receive $25 in credit added to their Cricut.com account. Please allow 4 to 6 weeks for delivery from winner announcement.

Winner: The winners will be selected randomly from qualifying entries using www.random.org and will be announced on the Cricut Circle Blog on Friday, March 30th, 2012.


Here's my entry for this challenge. This card is for a friend who is having her third child but her first baby girl next month. It includes 4 Cricut cuts using the Cricut Imagine machine and the letter "b" is replaced with a glittery rattle.


I wanted to experiement with the sillhouette style that I have been seeing on blogs and Pinterest lately. I chose the baby image (cut at 2.5") and the word baby (cut at 1.5") from the Cricut Cartridge A Child's Year. The rattle was cut at 1.7" from Craft 'n Craftin pink glitter cardstock and Cricut Cartridge New Arrival. The scallop oval (cut at 4.5") was a stock image in the Cricut Imagine machine. Sweet Little is a portion of a stamp by Stampin' Up from the Something sweet set. I did not ink the word baby that is the last part of the stamp. I punched it out with the Stampin' Up word window punch.

The inside of the card is finished with Bazzill pink cardstock punched with Martha Stewart scallop three dot. The sentiment is from Stampin' Up Full of Life stamp set. I will write a message to the mom-to-be with an at you Spica glitter pen by Copics.


Other supplies used:
  • adhesives - ATG, foam dots, zots glue dots, xyron 1.5"
  • pebbles twine
  • DCWV Mango Frost stack, Nana's Kids - baby girl
  • magenta seam binding
  • We R Memory Keepers Sweetheart Inkers - pink
  • Inkadinkado ballerina pink pigment ink


Wish me luck!

La-Vie

Tuesday, March 20, 2012

My Stampin' Up! Hostess gifts

As I mentioned yesterday, this past weekend I had some friends over for a Stampin' Up! Party. My rep Samantha Eshlemen lead us in creating two Easter crafts. Stampin' Up products are the bomb! Not only is it Sale-a-Bration time where you get something free with every $50 spent... She is selling scented embossing powder!!! WHAT??? There's a few scents and a million possibilities! They also offer coordinating paper, ribbon, embellishments, dies, embossing folders, the list goes on and on. I didn't even mention the stamp sets. The most intricate and useful on the market. Shop here!

That said, I thought I would share the hostess gifts I have already received. There are more to come once the show closed and I get my hostess dollars, free tote etc. But this is what I got the day of the show. It was sooooo worth it to host!


La-Vie

Monday, March 19, 2012

Stampin' Up! Party

This past weekend I had some friends over for a Stampin' Up! Party. My rep Samantha Eshlemen lead us in creating two Easter crafts. None of my friends are into crafting like I am but I wanted to let them peek into my world. I also wanted to pay homage to the wonderful lady who single-handedly started me making cards and 3-D items.

Stampin' Up products are the bomb! Go to her website now! She is selling scented embossing powder!!! WHAT??? There's a few scents and a million possibilities! They also offer coordinating paper, ribbon, embellishments, dies, embossing folders, the list goes on and on. I didn't even mention the stamp sets. The most intricate and useful on the market. Shop here!

Here's what we made. I learned a few great tips.

1. Use post it notes to hold small dies and paper in place while cranking it through your die cutting tool

2. Innovative punch use - the bunny ears were made from a portion of a 5 petal flower punch!

3. Using post it notes to do masking with stamps. to get part of an image when needed. I usually use painters tape.


La-Vie

p.s. Check out one of my honored guest's blog about her time at the party... http://www.thepinkfluffypen.com/2012/03/daily-post_17.html#links

Sunday, March 18, 2012

Disney Pixar Cars Room Decor - Vinyl Project


My son turned 3 last month and we changed his room from baby to big boy! He moved into a twin bed and chose The World of Cars as his decor. Asking a 3-year old what they want their room decor to be is almost  futile but after looking at many options, he finally reacted in a way that I knew Cars was the way to go!


Using the Disney Cars Cricut Cartridge started with Lightning McQueen. This was my first big vinyl project so I made lots of mistakes. At first I didn't use transfer tape. I got so frustrated I almost gave up. But I knew the look on my son's face would make it all worth it so I forged on. Lightning McQueen is cut at 9.5" and I got all of the vinyl from Oh My Crafts for 99 cents a sheet! I did not have the right color for the side window and lightning bolt. So I used ink to color white vinyl silver.


I also cut the Cars symbol out at 9.5" as well. This was a little more easy to layer. I used transfer tape to place everything properly.


I chose a font and shadow from the Cricut Cartridge Batman to add my son's name to the wall. Transfer tape allowed me to get it (almost) straight. lol


I used the E2 Cricut to cut the vinyl using the kiss cut method. Here is an example of the size of Lightning McQueen vs my hand. I was upset because placing these large layers by hand made it hard to get in the right place and then there were serious wrinkles and air bubbles but once I put it on the wall, all of that disappeared to my surprise!


Ok so the bed isn't made and he's still in diapers thus the changing table, but I wanted you to get a sense of how it look on the wall. In the future (I got tired out on this project) I will add more of the characters to the wall. The greatest thing is, this is not permanent. I can change the theme as he grows.

La-Vie

Wednesday, March 14, 2012

Cricut Circle Weekly Challenge #53

Today I am competing in the Cricut Circle Weekly Challenge #53: Wearing O' the Green for a chance to win $25 credit on Cricut.com. By 3/15/12 at 9pm MST I must upload a link to this post containing something that can be worn on St. Patrick's Day that includes at least 2 Cricut cuts and the color green.

This challenge took me way out of my comfort zone because I haven't made anything to wear before and I have not celebrated St. Patrick's Day either. But I wanted a challenge so I decided to create a hair adornment. I set out to use several items from my stash that I have not yet used. I am very happy with the end result. However, it was very hard to photograph so please bear with me. I borrowed my daughter's doll to model it for me.


This idea all started with a 26mm twist daddy and an alligator clip by Imaginisce from the I-Top line. The alligator clip already comes covered with white ribbon and outfitted with a screw in spot for the twist daddy.


I started by screwing the bottom portion of the twist daddy into the alligator clip. Then I used a 2" Cosmo Cricket Gluber for the first time to create the ribbon ruffles. It looks like a huge glue dot. I was able to pinch pleat a length of ribbon from Micheal's around the circle to create the first layer.


Then, I attached the alligator clip to the center back of the gluber. In the remaining space, I created a second layer of ribbon using Webster's Pages Bloomers which is a divine combo of flowers and trim. I added the smallest glue dots to the ends of the ribbon on both layers to finish off the circle of ribbon nicely.


I attached the hair clip to the dolls hand to show that the flowers actually point outward rather than up toward the other ribbon. It is created that way to give the hair clip interest from any side.

Using the Imaginisce pink glue gun, I created a cirlce of hot glue at the inner edges of the ribbon with the polka dots so that I could attach the top of the twist daddy in the center of the adornment. I then cut 2 shamrocks (2.25" and 1.25") using my Cricut E2, the Designer's Calendar cartridge and American Crafts metallic foil cardstock.


Using a jumbo Zots glue dot on top of the twist daddy top I affixed the largest shamrock. Bending the leaves and stem of the shamrock to create more interest, I affixed the smaller bent shamrock on top the first with a Zots 3D glue dot. The finishing touch was adding two green flower pins.


This is truly a monochromatic masterpiece. I am sure it will look just as cute on my daughter if she attends the St. Patrick's Day parade with her best friend this weekend.

Wish me luck!

La-Vie

Check out My New Weight Loss Blog

Want to know what I've been up to? Follow my weight loss journey in my new blog co-authored with my friend Michelle. We just started The P.I.N.K. Method this week. It's a program just for women. Check it out! http://twopinksinapod.blogspot.com/
La-Vie

Friday, March 9, 2012

Feb Cricut Circle Magazine Sketch Challenge


As a member of the elite Cricut Circle, I have access to the exclusive monthly Cricut Circle magazine. The online periodical serves up major inspiration and a challenge just for us! This month it's a sketch challenge. The sketch was designed by Susan Neal. The prize is $150 credit for Cricut.com. Since I promised myself to enter as many challenges with Cricut Circle as possible, I am throwing my hat in the ring!


The card I created - just 4 you - is made with scraps and left over elements. I love challenging myself to use scraps. The card base was cut from the Cricut Cartridge Sophie using double-sided dotted cardstock from my stash. The yellow dotted cardstock from my stash coordinated well with the flower Cricut Imagine cut from Lori's Garden. For a little shimmer, I spritz it with smooch spritz and outlined certain areas with smooch pearlized top coat. The bow, bling brad and the just 4 you stamp from Micheal's completes the look. Clear and Simple Stamps has a hybrid ink I love. I used it here in "Simply Blue Tiful."


A tip I picked up from Tammy Skinner at the Creative Imaginations blog was to use every last bit of your ink in the Imagine machine and use the lighter colored images you print and cut for layering and for pastel layouts. The flower I printed and made 3D with foam tape has a lighter colored image of the flower on the bottom. That's a secret that no one would ever know!


Makes me think of spring....

Wish me luck!

La-Vie

Disney Autograph Book - Cricut Cuts


We used the Cricut to cut some of the Disney characters using the cartridges Happily Ever After and Dreams Come True. I cut everything with my Cricut Expression and my daughter at age 6 put everything through the xyron to make it a sticker and layered all the pieces.


The hardest part about cutting Disney characters small is the eyes. They tend not to look as natural or be so small that you cannot figure out where and how to place them. We got around this issue by using a white opaque pen to create the eyes.


I love the design on each of these pages which are from DCWV Safari Kids mat stack.


We enjoyed making Daisy the most because she so stylish and wears makeup!


Who can deny THE MOUSE? He's so cute!

La-Vie

Tuesday, March 6, 2012

Disney Autograph Books


Our first trip to Disney in Orlando happened December 2011. In preparation, my daughter (age 6 at the time) and I created autograph books for her and her brother. We used the Provo Craft Your Story Photo covers and to bind the books. Using Disney embossing folders and the Cuttlebug we embossed the covers. I love the ribbon we used for the cover! We used bling alaphabet to add my daughter's name and a more manly alpha stickers. Ek Success makes the cutest bling mickey symbols.

We noticed in hindsight that the soft covers offered with the Your Story are not best for this type of book because it gets handled a lot. There are plenty of hard covers with the Your Story and we will use those next time. Also using a larger sized pen will help the characters that wear large gloves be able to get a better grasp and do a clearer signature.


I used mat stack pages DCWV Safari Kids. We had accumulated a bunch of Disney princess stickers so I let my daughter decorate the pages the way she saw fit. Ariel is her favorite princess so her page is first.


I used a basic scallop rectangle cut with the Cricut E2 to suggest where the signature should go. Some characters were so into character - or maybe our book was so unique - that they signed the book backwards and upside down!

More pics next time....

La-Vie