Showing posts with label SEI. Show all posts

Saturday, March 28, 2015

Create a Card Blog Hop!!!!!!


Welcome to the Create A Card Blog HopWe are so happy you could join us today.  This is a one day blog hop, but don’t worry you have until Monday to stop by all the blogs and leave a comment to be entered into the drawing for the wonderful prize we have for you.


If you started at the beginning of the hop at Scraps by Gracie
you should have arrived here from Pamela's blog.

Catherine Pooler, founder of Stamp Nation and CreativityGrows Here has generously donated a trial membership to Stamp Nation for us to give away to those who hop along with us!!!!


To be entered into the drawing, just comment and follow each of the blogs on the hop today. That's it! It's just that easy! Prizes will be drawn and announced on Theresa's blog Scraps by Gracie on Wed. April 1st - and that's no joke!

But WAIT!!! To sweeten the pot, I also have blog candy of my own. Please comment here, follow my blog with bloglovin or GFC and follow all my social media links found at the bottom of this post to be entered for to win some crafty goodness.

Please leave me your email address in your comment. It will be the only way I can contact you.


*****************************Now on to the project!**********************************

I decided to CASE (copy and share everything) a card from Pinterest. At the end of the post I shared the inspiration and the designer's blog. 


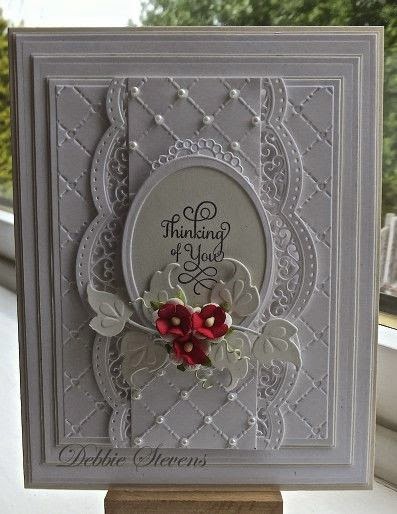
I created two almost identical cards based on the original. I have always been curious about the white on white on WHITE cards. It makes me think... what's up with all the white? But I must say I GET IT now. It's gorgeous...refined... classy...especially for wedding cards.


All the patterned cardstock came from a single SEI stack called white elegance. The cardstock is white with an embossed white pattern. I chose patterns that would blend in and complement each other.


One of the layers is punched with a Martha Stewart punch, the top note is made using Stampin' Up! nesting dies and accented with a punched element on top. A Prima flower and diamond shaped Recollections bling accent the card front.


Just look at all that dimension! But guess what? It can still fit in a normal envelope!!


Our Daily Bread Designs had the most wonderful wedding sentiment - recipe for a happy marriage - and the cake stamp is from Recollections. I used Versafine for the sentiment and Encore metallic ink for the cake. Oh and both of the external sentiments are from Recollections stamped in the same inks.


I bet you didn't notice....for extra flair, the card base and a couple of the layers are made with heavy weight cream shimmer cardstock from my stash. I am very happy with how it came out. Surprisingly, CASEing a card takes much longer than creating one from scratch.

Here's my inspiration by Debbie Stevens of PaperPastimes. I fell in love with the layers and the richness of her creation. 


Please be sure to hop over to all the other wonderful blogs. Here is the entire line-up:


Thanks for hopping by!!!


La-Vie

Challenges:


To be entered for the prize, please follow me on social media and help spread the word about me.

Pinterest


Friday, August 9, 2013

Get Inky! Halloween Spooktacular Blog Hop


Welcome to the Get Inky! Stamps 2013 Halloween 
Spooktacular Blog Hop and Sale!!! 


If you've just come from the wonderful Jessica's blog, you're in the right spot! If not, please visit the fabulous Thia's blog - Blue Moon Creation to start the hop and see the complete hop lineup.

During this weekend only (starting at 12 am on Friday, August 9 through Sunday the 11th at midnight PST) we will be taking 20% off of your entire order at our Etsy Shop!!! No minimum purchase required, just use coupon code 2013SPOOKTACULAR20 upon checking out.

We said there'd be treats, so here's the scoop...

TREATS (provided you follow the rules)!!!!!!!!!!!!!!!:

1 winner will receive one 2013 Halloween Spooktacular Stamp Set (value $27.99, winner is responsible for shipping charges and will be billed via PayPal emailed invoice).


*To be eligible to be in the drawing for this set, you must complete these 2 easy steps...
- Follow ALL blogs along the hop if you aren't doing so already.
- Comment on EVERY blog post along the hop.

We also have 3 $15 gift certificates to our Etsy shop!!!
* To be eligible for one of these prizes, you must...
-Follow ALL blogs along the hop if you aren't doing so already.
-Comment on at least ONE blog post.

********************************************************************************

I decided to create a 2-page layout of my daughter's first Trick or Treat at daycare. She is 1 year and 9 months. (She's 8 years and 7 months now...I know...I know... I'm a wee bit behind!!)

Supplies:

  • 7 Stamps from - Get Inky! Stamps 2013 Halloween set
  • Candy corn paper, Orange swirl cardstock - The Paper Studio
  • Black cardstock - Bazzill
  • Washi tape - Recollections
  • Embellishments and borders - Jolee's Boutique
  • Tabs - SEI
  • Twine and white galaxy marker - American Crafts
  • Bib card and layers - The Paper Cut
  • Dimensional stickers - fun and candy - ATD crafts
  • Chipboard button - stash
  • Copic Marker - Y15
  • Zig Photo Signature pen
  • Ink - Clear and Simple Stamps hybrid ink - Perfect Little Black Dress, Espresso Your Style
The left hand scrapbook page showcases Zora in her Pocahontas-inspired outfit from Old Navy. I got her the boots from Target for $20 (unheard of expenditure but after searching high and low and not finding anything I splurged). And guess who's in the red hoodie? I strategically placed the 3D candy corn pointing to my daughter giving me that side-eye glance. "Kids..."


Check out the Get Inky! Stamps "Got candy?" on the tab in the picture of Zora's teacher helping corral my daughter's candy stash and other students all at the same time!


The right-hand page of is interactive. I love the pic of Zora trying to eat the smarties (wrapper and all)! I had to point that out again with the 3D candy corn. And do you see her classmates dressed as the incredibles and minnie mouse?? Stinkin' cute!!


This was the perfect spot to showcase 6 more of the stamps from the set. My favorite is the candy corn cluster! I stamped it with Clear and Simple Stamps Hybrid ink in Perfect Little Black Dress and colored it with a Copic and a white opaque marker by American Crafts.


That's not all! Guess what? Did you figure out that this page is interactive???? By using the tab to flip up the bib card, you reveal.....


More pics of my Zora, stamping, stickers and journaling. It was important to line up the two tabs so that the interactive feature wasn't revealed until NOW! How ya like me now???!!!


I hope you enjoyed this walk down memory lane with me!!


Your next stop along the hop is the talented Ann's blog! Thanks for stopping by, commenting and following me. Happy Hopping!!

The stamps are awesome!! I hope you take advantage of the sale!!! I'd love to see YOU "Get Inky!"


Challenges:
CAS-ual Fridays: buttons
Sister Act Card Challenge: anything goes
2 Creative Chicks: Anything goes for kids
D. L. Art Thankful Thursday: linky party -- anything goes
Created with Love Challenges: anything goes

Sarah Hamer Designs: Tuesday Link Up Party


La-Vie

Saturday, June 29, 2013

Adrieel's Photo Shoot


This week my nephew Adrieel had his first professional photo shoot! Everyone loved him in his sailor suit and nautical socks. He is 5.5 months old here and is showing signs on scooting (using his toes and his face to navigate) which is pure joy for my sister to watch.


I am in charge of creating his scrapbook (of course) so I decided to enter some challenges while doing it! The DCWV June Stack-a-holic challenge asks to use one stack to complete a scrapbook page and to follow a provided sketch.  About a Boy June 15th challenge asks us to create a scrapbook page about a male in our lives using circles. The marriage between the two is my page!


Here is the sketch I was given to work with. As you can see I followed it in a literal way this time around. Using 6 designs and the embellishment sheet the DCWV My Sunshine Stack from Jo-Ann Fabrics and a few simple embellishments I was able to showcase one of Adrieel's top 10 memories for 2013.

Additional supplies include: sun kissed die cut from The Paper Loft, Summer Shapes, Jolee's Boutique for the beach balls and felt sun, SEI Grandpa's Attic cardstock alphabet stickers, The Paper Studio 1" circle punch and a Copic Spica at You glitter pen for the hand stitching.

Challenges:
DCWV June Stack-a-holic Template Challenge
About A boy - Going in Circles
Party Time Tuesdays - Anything Goes
CAS-ual Fridays - Hunger Games: use at least one arrow


La-Vie

Thursday, May 16, 2013

Thank You Gift Bag with Get Inky! Stamps


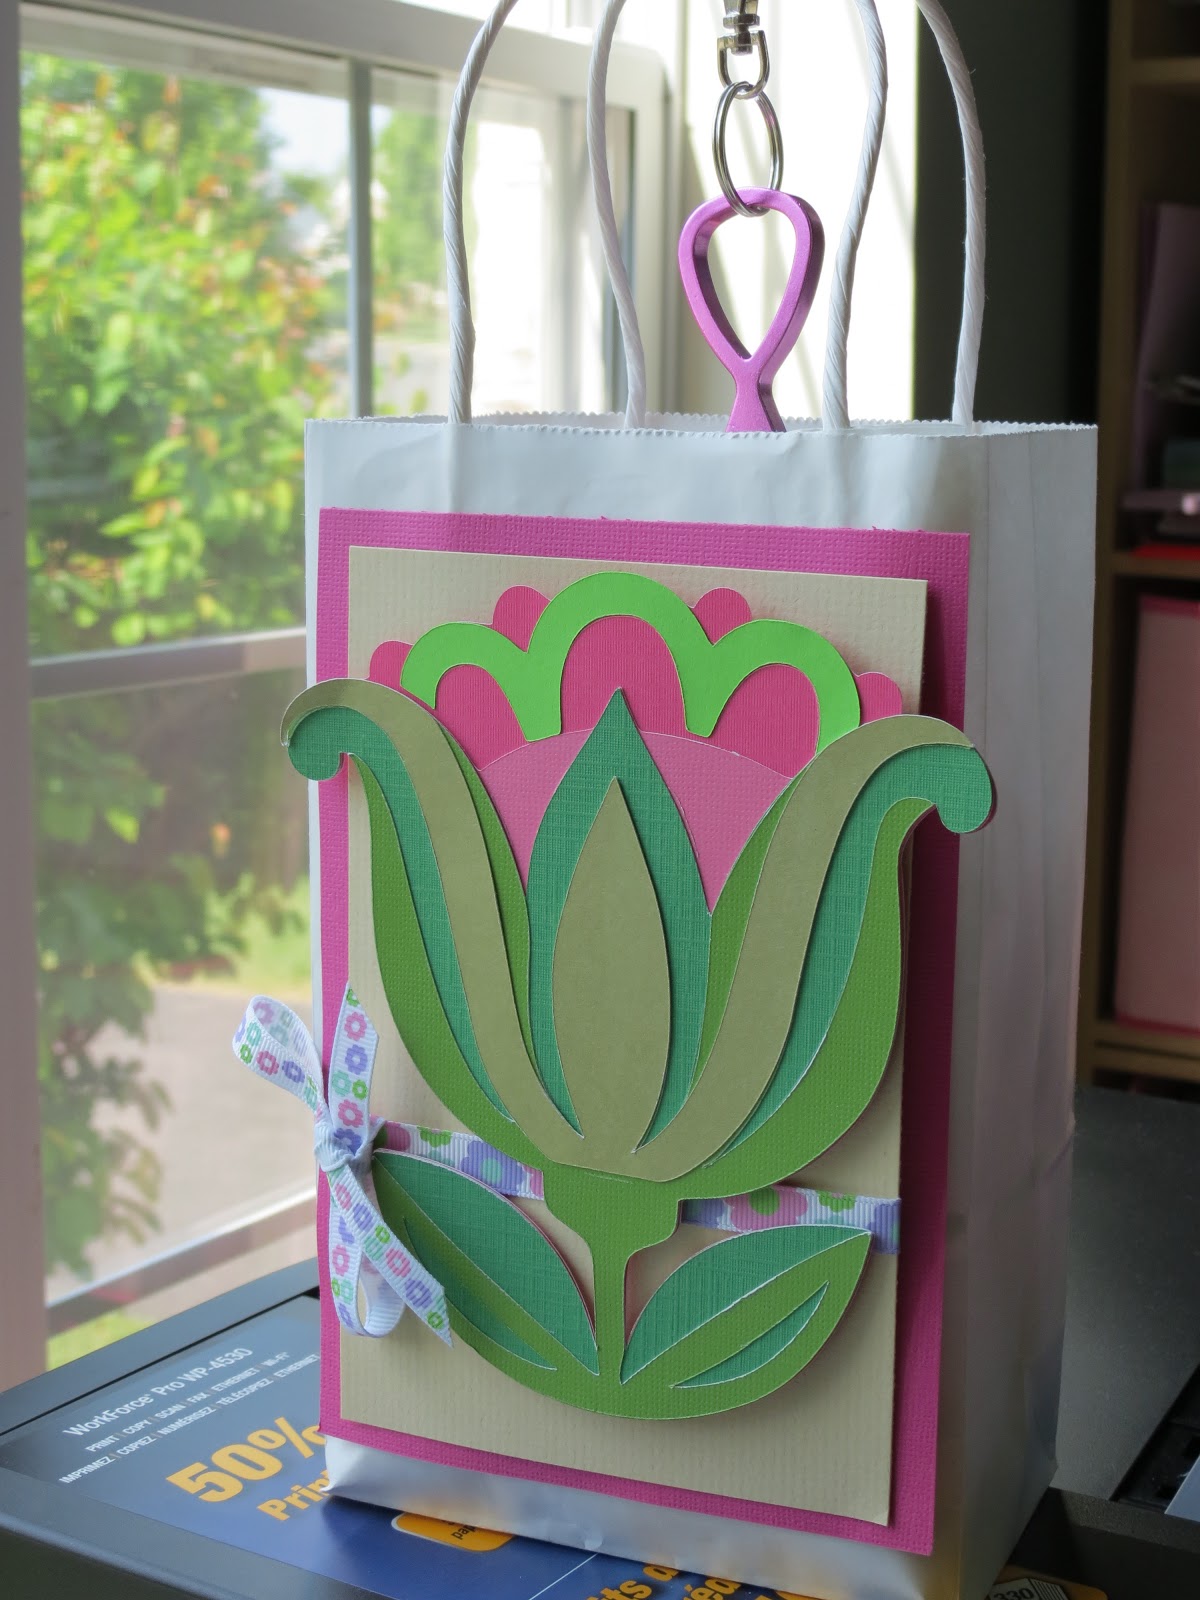
I looked and looked for the perfect packaging for my 25 thank you cards. There was none to be had! So I decided to decorate a gift bag myself to match the cards. It has the same die cut flower on the front (raised a bit on Zots 3D glue dots) and the same ribbon and colors of cardstock. On back I hand wrote a heartfelt note to Mrs. Souders.

I found a bling Breast Cancer key chain at Dick's Sporting Goods. I decided to tie the bag handles closed with a bit of ribbon and the key chain attached so it wouldn't get lost. I finally delivered the cards yesterday and they were well received and cherished! Mission accomplished!!


Supplies:
  • Get Inky! Stamps - Sew Sweet Cupcakes
  • Cricut Cartridge Florals Embellished -  cut at 6" 
  • Ink - Hero Arts Neon Dye Ink: neon pink
  • American Crafts ribbon
  • Adhesives - Scotch ATG, Zots 3D glue dots, scotch magic tape
  • Cardstock - Bazzill, DCWV Adhesive, SEI, Recollections
  • white K and Company gift bag 5.25" x 8.375" from target
I love the fancy font of the Get Inky! Stamps Sew Sweet Cupcakes stamp set. I used the Thank You stamp. Click the link above to check it out! I thought it was perfect for this project.

Hope you enjoyed this quick post! Maybe you'll be inspired to decorate a gift bag for the next special gift you give to a loved one.


La-Vie

Monday, May 13, 2013

Thank You Card using Get Inky! Stamps


A new challenge is posted to the Get Inky! Challenge blog! This time its a Die Cut challenge. To inspire you and encourage you to join this challenge, I created this thank you bib card. This card also was created for one more reason... but I'll share that later on in the post. Check back for more Design Team member inspiration for this challenge at the Get Inky! Stamps Blog.

Supplies:
  • Cricut Cartridge Florals Embellished -  cut at 2.75" 
  • Bib cards and overlays (variety pack) - The Paper Cut 
  • Martha Stewart scalloped circle layering punch
  • Ink - Hero Arts Neon Dye Ink: neon pink
  • EK success Powder Tool
  • American Crafts ribbon
  • Adhesives - Scotch ATG, Xyron 1" and 5", Zots glue dots, scotch magic tape
  • Tim Holtz tonic scissors
  • Cardstock - Bazzill, DCWV Adhesive, SEI, Recollections
I love the fancy font of the Get Inky! Stamps Sew Sweet Cupcakes stamp set. I used the Thank You stamp. Click the link above to check it out! I thought it was perfect for this project.

Using The Paper Cut bib card (4.25" x 5.5") and matching overlay (3.88" x 4.13") I created the card base. In order to get the scallop circle I used a little trick I learned along the way. I knew I was making a die cut for the card front, so I used a Martha Stewart layering punch where the die cut will sit. To make sure it would fit, I cut it out of paper first and put it against the base cut for the flower. Once the card is put together, no one will be the wiser!!! Maximize your resources folks!

I then placed the scalloped circle on scrap paper and stamped the Thank You stamp with Hero Arts neon pink ink.


When creating multi-layered die cuts, use DCWV adhesive cardstock whenever possible. This flower has 6 layers. It saves a step when the adhesive is already applied. Here's a picture of one of the layers I cut using the same settings used to cut adhesive vinyl. It's called a kiss cut - meaning the cardstock is cut but the liner paper below it is not. When you're ready to layer, peel the cut off of the liner just like a sticker.

When you're dealing with multi-layered die cuts, you may get glue boogers or extra glue overlapping. My sure fire fix for that is to use the EK Success powder tool. Applying powder to the sticky areas removes the stickiness so that the card won't stick to the envelope, etc.


I used the "cheater method" of adding my ribbon bow. Before placing the overlay on the card, I placed a length of American Crafts ribbon (4 3/4") across the card front and taped (with normal tape) the ends on the back of the overlay. I used a second length of ribbon (11") to tie the bow. It saves ribbon and frustration. Give it a try!

Note: because the ribbon is underneath the flower, I applied a glue dot behind each leaf to keep those adhered.

Guess what??? After making one card for the challenge, I decided to make 25 more for my daughter's 2nd grade teacher. She returned to school after an extended absence for breast cancer surgery. She is in remission and we all are so happy that God spared her life and brought her back to us. She is a wonderful teacher! I figured she might have quite a few folks to thank for their help, thoughts, prayers, meals, gifts, etc. and what better way to do so?!  


I made two of each card so I only showed you half of the cards. I changed the ink and ribbon to match. All the ribbon is spring related.


All the children wore team Souders t-shirts the day she returned. It was a love fest!


I hope you enjoyed today's post, will join the Get Inky! Challenge, use some of the techniques I shared and pay it forward with a random act of kindness.

I LOVE COMMENTS!!

La-Vie


Wednesday, March 27, 2013

A Boy and His Dog

 
Today I have a project inside of a project for ya! First, as an entry into the Repeat Impressions Sketch Challenge #M2013 I created this card based on the sketch provided (see below). I used punches and the creative memories shape cutting system to cut the circles and squares. My son Aidan (almost 4 years old at the time) and our Shih Tzu Barkley (named after Big Bird's dog) are great play partners. 


Surprise!! I decided to use the card as an interactive part of a layout that I am entering into 2 other challenges. This layout is perfect for the "it's a dog's life" challenge at The Stamping Dragon. Since the subject is my darling boy and it's made almost entirely with scraps, it's also perfect for the mid-month challenge at About A Boy!


 The layout features the card with the secret journaling and full sized picture. I've always wanted to try something like this and as simple as it is...I have never tried until today. The cute dog die cut was cut with from the Four Legged Friends Cricut Lite cartridge. All but the base paper - SEI Park Buddies: Doggy Treats - started as scraps from my stash. 


Supplies:
  • and layers cut at 6" from the four legged friends cricut lite cartridge
  • Adhesive - pink Scotch  ATG and xyron
  • SEI Park Buddies: Doggy Treats
  • Basic Grey Mellow: Settle Down (patterned cardstock with the children and dogs)
  • Camoflage paper: Crate Paper - Toy Box Collection: Library
  • Card base - Bazzill
  • Pet food paper (layer inside the card and under the picture on the card front) - Bo-Bunny Cat Treats Paper
  • Everything else is from my stash from an unknown manufacturer


La-Vie

Tuesday, November 6, 2012

Mini Monsters Trick or Treat bags

 
To promote my craft business in my neighborhood, I decided to make 100 decorated Trick or Treat bags filled with dum dums and my business card for Halloween. Unfortunately, Hurricane Sandy forced us to postpone trick or treating and I was out of town. However, my wonderful husband was here to give out bags for one hour (he missed the first hour) so about half the bags were given out.


This is a great project for any event - birthday, Christmas, welcome to the neighborhood etc. And kids love to help. My 7 year old daughter helped the most and my 3 year old son came in from time to time to lend a quick hand. Both my children are becoming very crafty. The key to making this easy for kids is to use DCWV adhesive cardstock. I cut it like vinyl so that I can peel the pieces off like a sticker rather than having to fight with the backing being cut as well. 
 
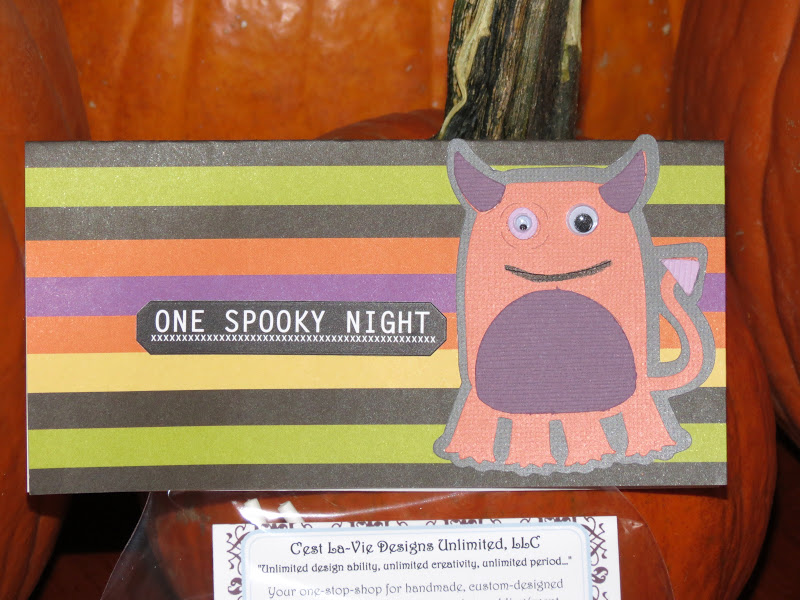
I used Halloween stickers, paper and cardstock from my stash - some were from The Paper Studio and some where from SEI, to create toppers for the bags. The solid cardstock was from Bazzill and DCWV. All of the monsters were cut and layered using Cricut Cartridge Mini Monsters. All but the spider were cut at 2.75". The spider was cut at 2.25". In hindsight, I would've liked to cut the witch larger - maybe at 3".


The treat bags are from Michaels Crafts. I liked them because 100 came in a pack, they are shaped like a vase with a wider rounded bottom and a tapered top. The google eyes of all sizes really made these mini monsters come to life! Instead of cutting the mouths and glueing them on, we used a Zig writer to draw along the guideline cricut created for the mouth.


Some papers were so bold I decided to just stamp a halloween message. Goblin Greetings is from Stampin Up and Happy Halloween is from Imaginisce. All monsters and shapes were inked on the edges with Tim Holtz Distress Ink.


I absolutely love the google eyes with eyeshadow and lashes that I found at hobby lobby. My son got in the act by placing the eyes in an angry fashion on this spider. I think it worked out very well and was something I never would have thought of myself. Thanks Aidan!


This candy corn girl reminds me of my brown beauty Zora and is my favorite of the bunch! Isn't she adorable???? But not more adorable than my hard-working kids! This was a major undertaking for us. Oh, and I printed my own business cards on the Avery business cards from Staples. There's 10 to a page and they snap out perfectly. I was able to print on the back as well to share my fb fan page, pinterest and blog address. The template was on the avery website. I'm very pleased with it.

 
Thanks for stopping by!
 
La-Vie