C'est La-Vie Designs Unlimited, LLC maintains this blog to showcase its hand made crafts for sale and to inspire others to rise to their most creative selves.
Friday, March 2, 2012
A Valentine and Mailbox for Zora
For the boys in my daughter's class I created this valentine using Love Struck Cricut cart DCWV glitter cardstock and Bazzill blue cardstock. I used Aleene's spray adhesive to adhere the layers. Punched 4 holes (two next to each other in each space) to make sure the pencil fit. My daughter wrote the to: and from: on the back. It was a hit!
My daughter is in 1st grade. All the requests for things she needs to bring in is new to me. When the teacher requested something to collect her Valentines in I decided not to reinvent the wheel. I used the paper mache mailbox from my vendor table display and dressed it up with ribbon, cardstock, chipboard letters and embossing.
My daughter had the cutest recepticle in the class! She was so pleased with it. I attached an 8 1/2 x 11" sheet of paper using removable adhesive, embossed the white layer with a Cuttlebug embossing folder from the Love is in the Air set and inked it with pink ink using a large dauber. I needed to use permanent adhesive from the ATG gun to attach this layer. I love this ribbon from Micheal's.
I was in charge of the games for the party. We did pin the heart on the cupid for prizes. I used DCWV adhesive 12x24 cardstock and the cupid from Love Struck. I cut a basic heart for each child from the stock images in the E2. The kids loved it.
La-Vie
Tuesday, February 21, 2012
Repeat Impressions Sketch #F812
I'm entering the Repeat Impressions Sketch #F812 challenge to win a $25 Repeat Impressions Gift Certificate! I created a "just because" card using a Repeat Impressions stamp, and scraps including the card base, double-sided cardstock, Cricut Imagine circular image - Lori's Garden.
I stamped the sentiments on scrap cardstock and punched it out with this top note from Stampin' Up! Luckily it fit the stamped sentiment perfectly! The stamp is a large square stamp with flip flops with this sentiment in the bottom right hand corner. I used the tiny inkers to ink just the sentiment.
- blue bling - Me & My Big Ideas rhinestones "pastel"
- peach cardstock
- smooch spritz
- Stampin' Up punch
- Cricut Imagine circular image - Lori's Garden
- Cuttlebug and Swiss Dots embossing folder
- Repeat Impressions Stamp -
- Zots 3-D glue dots
- We R memory Keepers sweetheart inker - brown
- Memories Direct double sided ink daubers - black
La-Vie
Fall Wedding Invitation
| back |
| front |
This was the largest wedding order I ever received. Although the challenge was fun, I underestimated the stamina it would take to create 75 identical wedding invitations. The results were stunning and the pictures don't seem to do it justice.
I got all the supplies at Hobby Lobby. A few tips for ya...the embossing folder was not long enough so I had to run it through twice. It is tricky to line up the design without smashing the previously embossed design. In order to make sure the printing was consistent and unblemished, I had the printing for the text and the monogram done at Staples print center.
The ribbons were made by hand by cutting ribbon lengths in 6" and 8" lengths. Create a loop (circle) with the larger length and adhere the overlap with your fav adhesive, loop the second length of ribbon just the same then attach both loops in the center. This can be done with a staple or glue dots. The monogram is raised on foam tape and covers the area where you have attached the ribbon. If you use staples, make sure to staple only to the printed layer of the invite and use colored staples.
- brown - embossed with love is in the air Cuttlebug embossing folder
- orange layer - 5 x 8"
- cream layer - 4 x 7.5"
- ribbon loops - 6" and 8"
- Circle punch
- MS word to layout the text and the monogram
Sunday, February 19, 2012
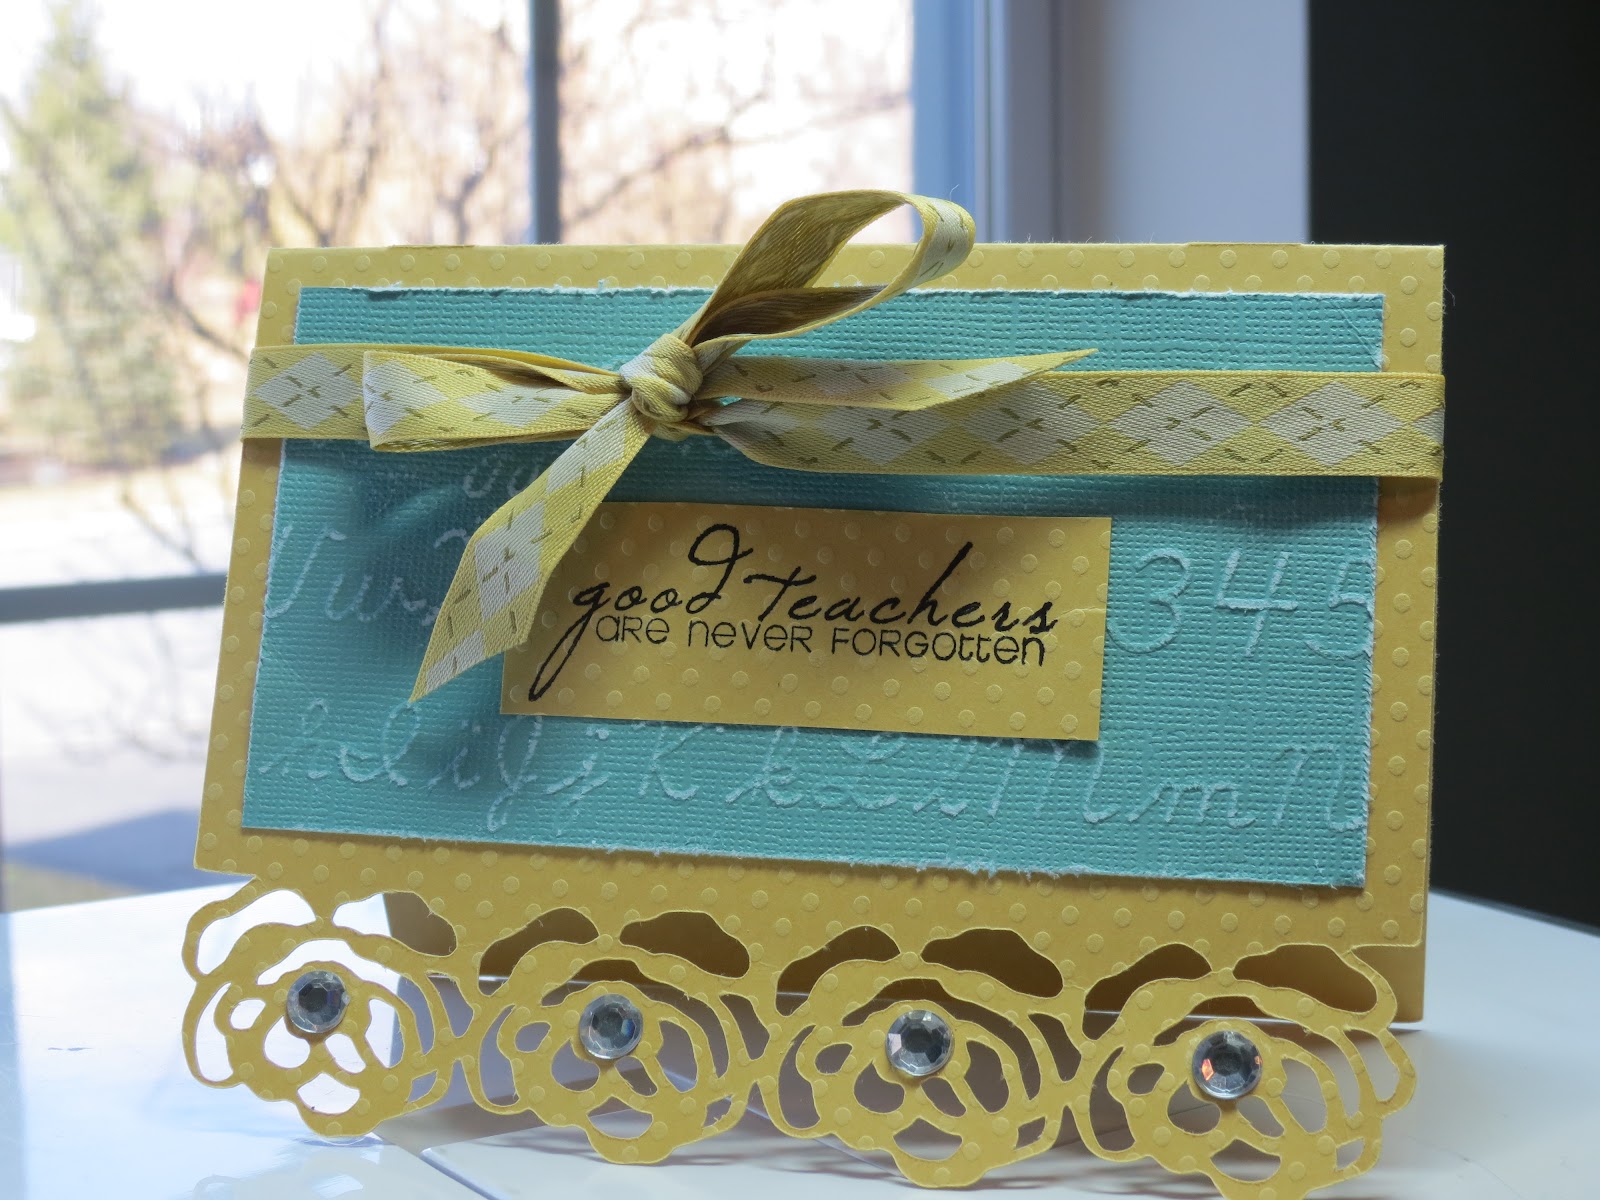
Good Teachers Are Never Forgotten
- Cricut Cart - Sophie
card 2 pg 32 - stamps by Clear and Simple stamps Teacher set
- darice rubber stamp pad
- Ranger Archival ink stamp pad - black
- card base - bazzill basics dotted swiss
- layer - bazzill embossed with Cuttlebug folder - art deco
- Bling from Recollections
What's your dry embossing tip?
Friday, February 17, 2012
Thanks Heat Embossed Card - Sophie
This is another card is the order fulfilled for teacher appreciation week (an order from my bestie Nikki...shout out girlfriend!) and I love how the heat embossing gives it that extra something special. I'm just starting to heat emboss sentiments. It can be tricky getting the right coverage with the ink and the embossing powder. I use a tooth brush to get rid of stray embossing powder that sticks to the design before adding heat. That way my sentiment is clean and clear (for the most part...)
- Cricut Cart - Sophie
card 2 pg 53 - gold encore ultimate metallic stamp pad
- gold embossing powder and heat gun
- darice rubber stamp pad
- stamps by Inkadinkado - Thankful for Everything set
- card base - bazzill premium cardstock
- layer - SEI poppy paper stack
- top note - QuicKutz
- Pearls from Recollections
What's your stamping or embossing tip?
Wednesday, February 15, 2012
Teacher Appreciation Cards
Never were words more true... this stamp set is a must have from Clear and Simple Stamps!
I created a set of 12 teacher appreciation cards for my bestie Nikki recently using the Sophie cartridge. Nikki is the best customer because she let's me know what she needs and then leaves the creativity to me. The order included this card
- Cricut Cart - Sophie
card 2 pg 37 - stamps by Clear and Simple stamps Teacher set
- darice rubber stamp pad
- Ranger Archival ink stamp pad - black
- bazzill card bases - pink: bazzill premium cardstock, yellow: bazzill basics dotted swiss
- layer - "Cursive" Cosmo Cricket Core Impressions by Core'dinations
- layer distressed with We R Memory Keepers heart tool
- Pearls and bling from Recollections and ribbon from stash
What do you give for Teacher Appreciation week? Remember you can order unique show-stopping cards to thank your teachers from me!
Monday, February 13, 2012
Thinking of You
This card is cut from Sophie with an understated edge. I thought it was a perfect card to try out my Heartfelt Creations Dutch Iris stamp. I learned that this stamp needed my pressure. The words could be seen but I traced over just to be sure they could be read. On a lighter card I'll pull out my Copics and color in the Irises. The C'oordinations cardstock is green on the inside. The coordinating ribbon from my stash - cut on an angle - completes the look.
La-Vie
Saturday, February 11, 2012
Engagement, Wedding or Anniversary card
Sophie's back..... with this versatile love card that can be used for engagement, wedding or anniversary. C'oordinations cardstock is quite complimentary. The outside is embossed with just a portion of an embossing folder in the Cuttlebug Love is in the Air set. Inside I used a My Pink Stamper stamp froim the Everyday Sentiments set. My Pink Stamper always offer the right sentiment to make cards pop!
I love that these stamps are larger. I was getting very frustrated with itty bitty sentiments in my large cards. I used to leave the insides blank, but now I'm all set.
La-Vie
Thursday, February 9, 2012
Happy Birthday card - Damask Decor
Aw, you thought I was going to show another Sophie card....but I have a wonderful birthday card from Damask Decor Cricut cart today. I love this shaped card which can be fashioned for males or females. This color scheme is for someone who doesn't like all the girlie colors or for a man in your life.
Damask Decor has many square cards on it. Cutting those too large may force you to have to make your own envelopes or use large vellum ones. So watch the size. I like the 5.5" envelopes from Die Cuts With A View and American crafts. However, both are marked at 5.5 but fit different sized cards. Word to the wize... all square envelopes are not created equally.
La-Vie
Tuesday, February 7, 2012
Repeat Impressions Sketch #J2512 Challenge
Today is the last day to enter Repeat Impressions Sketch #J2512 Challenge to win a $25 Repeat Impressions gift certificate. I thought I'd throw my hat in the ring.... Using this sketch, I came up with this get well card. To make it fun for and exciting, I gave myself a time limit! I created this card from A to Z in under 30 mins.
- Blue card and white envelope - Recollections "Frost Mix"
- Art Deco embossing folder and Cuttlebug
- 1st layer - SEI Poppy paper stack - metallic foil
- layer cut in Cuttlebug with Spellbinders Nestibilities Big Scalloped Rectangle
- Top layer Bazzill preimum cardstock scrap
- Ribbon from the Paper Studio
- Stamps from umbrella4you set by The Stamps of Life
- Tim Holtz Disteress Ink- Evergreen Bough
I love this embossing, wish more of it was showing. I combined a few of the stamps to create the message.
La-Vie
The sweetness of Friendship card
It seems like I am addicted to the Sophie Cricut cart....well I am!! There are so many cards to choose from! This one was cut at 4.5" using C'oordinations white wash cardstock. The layer is embossed using the Cuttlebug and Quikcuts swirls folder, pearls, and a dimensional sticker from my stash. Simply divine!
La-Vie
Sunday, February 5, 2012
Repeat Impressions DCC21- heat embossing challenge
One of my 2012 goals is to submit my work for more challenges and for publication in print magazines. So, today I am entering the Repeat Impressions Designer's Choice Challenge (DCC21) that calls for a project using the technique of heat embossing shown on the Repeat Impressions blog entitled The House That Stamps Built. The deadline is 2.14.12 at 5pm EST and the prize is the choice of one sheet of Repeat Impressions unmounted stamps.
I love Repeat Impressions stamps and card kits. I have used them several times on this blog. However, today my project does not use their stamps. I created a card for teacher appreciation week (an order from my bestie Nikki...shout out girlfriend!) and I love how the heat embossing gives it that extra something special.
- Cricut Cart - Sophie
card 2 pg 28 - gold encore ultimate metallic stamp pad
- gold embossing powder and heat gun
- darice rubber stamp pad
- stamps by Clear and Simple stamps Teacher set
- card base - bazzill premium cardstock
- layer - "School paper" Cosmo Cricket Core Impressions by Core'dinations
- layer distressed with We R Memory Keepers heart tool
- Pearls and ribbon from stash
Wish me luck!
La-Vie
Fly card
The Cricut Sophie cart has so many unique cards. This 2 layered card was created with C'oordinations whitewash cardstock. I love the color combinations and the intricate cuts. This was another fan favorite!
La-Vie
Friday, February 3, 2012
Friends Forever card
It's another shaped card from Sophie Cricut cart today made with Bazzill premium cardstock and stamps from my stash. This card can be made to match any decor or event. Perhaps next time I make this card, I will stamp in the petals as well.
La-Vie
Wednesday, February 1, 2012
Flower card
Shaped cards are most beloved among the people who stopped by my vendor table. This thank you card for a friend is made using the Sophie Cricut cart, C'oordinations white wash cardstock, Bazzill premium cardstock and stamps from my stash. The inside sentiment is shown in the lower right hand corner.
La-Vie
Monday, January 30, 2012
Celebrate card
Here's another blank card I created to sell at local craft fairs. The card was cut at 4.5" and coupled with a store-bought white envelope. The key supplies used were C'oordinations cardstock, Spots and Dots Cuttlebug embossing folder, the Sophie Cricut Cartridge, pearls and a sticker from my stash.
La-Vie
Saturday, January 28, 2012
You Brighten My Day - Sophie Card
This exclusive Cricut cart Sophie is the ultimate! A card maker's dream! C'oordinations, Swiss dots Cuttlebug embossing folder, dimensional stickers and a portion of a border sticker completes the look. I love the sharpness of the Cricut cut flowers and leaves.
What's your favorite Cricut cart and/or embossing folder right now?
La-Vie
Friday, January 27, 2012
How to upload your Cricut handbooks to your IPAD!
As a surprise, my darling hubby got me an IPAD for Christmas. Lo and behold Joy who has one of my fav blogs Obsessed With Scrapbooking posted a how-to on uploading the digital handbooks via an app called Good Reader. I included the link for your review. I have over 125 carts and I was able to upload 98% of them. It is very helpful and handy. Check it out!
La-Vie
La-Vie
Thursday, January 26, 2012
Thank you card
This stamp is My Pink Stamper Everyday Sentiments. The biggie sized stamps are the perfect size to adorn the inside of cards. This is what inspired me to finish the inside of my cards.
What inspires you?
La-Vie
Tuesday, January 24, 2012
Thank you card - Exclusive Sophie Cart
The Cricut Circle Exclusive Cartridge Sophie has become my fast favorite.
I have made quite a few cards from the cartridge and this is one of my best.
I love the monochromatic look.
- C'oordinations cardstock
- 4.5" card cut from Sophie
- Floral Screen Cuttlebug embossing folder
- Clear bling, ribbon and "thanks" sticker from my stash
La-Vie
Sunday, January 22, 2012
Ink Tutorial
Recently, a faithful blog follower asked me to share my thoughts about the inks I use and their various uses. I thought the information would benefit all of my followers so I have prepared a brief ink tutorial. I am still learning but here's a few pointers. I know I have not covered every kind of ink here or every variable. If you have info to add to the conversation, I welcome you to do so in the comments section.
I find that choosing the right ink for a project depends on your project goals. Are you coloring in printed images, making a watercolor background, heat embossing and stamping, etc. If you know ahead of time what you want to achieve AND are familiar of the best inks to use to achieve those goals - you're in the best position possible.
DYE INKS
can be water-based such as Clearsnap Vivid! or solvent-based (waterproof) such as Ranger Archival inks
PIGMENT INKS
oil-based, acid-free, thick versatile inks that can be slow drying - Ranger Adirondak or fast drying - Tsukineko Archival Brilliance
CHALK INKS
Ink that is created to give the look of chalk - muted and matte such as ColorBox fluid Chalk Inkpad
HYBRID INKS
I love Hybrid ink because it offers the best of both worlds - properties of both pigment and dye inks. It is truly all-purpose. The best ones I've come across are from Clear and Simple Stamps.
Watermark and Watermark Resist
VersaMark and VersaMark Dazzle (watermark pad) and Inkessentials Watermark Resist (2 in 1 watermark and resist).
Stazon
I love Tsukineko Stazon solvent-based ink because it stamps clear and strong on all surfaces except fabric. No fail.
Hope this helped you in choosing inks to have on hand for daily use. I am open to answering other crafty questions you may have. Feel free to inbox me or leave your questions in the comments section.
La-Vie
I find that choosing the right ink for a project depends on your project goals. Are you coloring in printed images, making a watercolor background, heat embossing and stamping, etc. If you know ahead of time what you want to achieve AND are familiar of the best inks to use to achieve those goals - you're in the best position possible.
DYE INKS
can be water-based such as Clearsnap Vivid! or solvent-based (waterproof) such as Ranger Archival inks
- transparent - so it gives a fuzzy variation of color. light colors stamp like pastels, darker ones are bright and brilliant
- fast drying - so it's not good for heat embossing but great on glossy or coated papers
- fades - water-based dye inks fade over time
- watercolor effect - with water-based dye ink - apply ink from the pad with a wet brush or ink a stamp with various colors and spritz with water just before stamping, stamp an image and spritz the paper
- stamped images can be colored - with pencils, chalk, anything that's not wet because water-based dye ink will run
- Tim Holtz Distress Ink - water-based dye ink that behaves differently than normal. It stays wet longer and the colors mix well with water (instead of running) and other ink colors for that aged look
- waterproof - after the initial image is stamped and dried, these dye inks don't run when re-wet. this works well if you stamp an outline of an animal and want to watercolor it or color in with markers etc.
PIGMENT INKS
oil-based, acid-free, thick versatile inks that can be slow drying - Ranger Adirondak or fast drying - Tsukineko Archival Brilliance
- don't fade - a great choice for scrapbooking
- dries slower - making it great for heat embossing, available in "clear" for embossing purposes
- opaque - providing a bolder solid color
- waterproof - can be watercolored once dry
- great on coated papers - glossy, photo, vellum etc. - if heat set
- not good for non-porous surfaces - doesn't dry at all
- Archival Brilliance - not good for heat embossing but works well on top of heat embossing for a layered scene effect and on glossy, photo, vellum etc. - if heat set
CHALK INKS
Ink that is created to give the look of chalk - muted and matte such as ColorBox fluid Chalk Inkpad
- opaque - dramatic saturated color
- waterproof - premanent when heat set and can be recolored with markers and watercolors
- works well on glossy and coated papers
- doesn't smear, bleed or fade
HYBRID INKS
I love Hybrid ink because it offers the best of both worlds - properties of both pigment and dye inks. It is truly all-purpose. The best ones I've come across are from Clear and Simple Stamps.
- pigment properties - color is closer to pigment ink but semi-opaque
- dye properties - dries fast like dye ink
- great on all surfaces - even directly to fabric! permanent when heat set
- can be used with copics - and other alcohol markers, regular markers and watercolored
Watermark and Watermark Resist
VersaMark and VersaMark Dazzle (watermark pad) and Inkessentials Watermark Resist (2 in 1 watermark and resist).
- watermark - creates a translucent subtle watermark on paper and cardstock only. it is good for creating background elements and for adding borders or to bring emphasis to a main stamped image.
- Embossing - Versamark can be used for heat embossing because it stays wet long enough to apply the embossing powders
- Resist - stamp a background or any image on glossy paper, ink the entire paper with dye ink (using sponge, brayer or direct to paper application) wipe away excess and the ink will not stick to any of the stamped image
Stazon
I love Tsukineko Stazon solvent-based ink because it stamps clear and strong on all surfaces except fabric. No fail.
- need a special cleaner for your stamps or will be stained
- comes in transparent, opaque and metallic
- permanent once dry - on most surfaces including glass, wood, leather but not for fabric
- air dries immediately on porous surfaces and within 5 mins on non-porous surfaces
- great for coloring - once dry can be colored with markers etc but NOT Copics. It will ruin your Copics markers.
Hope this helped you in choosing inks to have on hand for daily use. I am open to answering other crafty questions you may have. Feel free to inbox me or leave your questions in the comments section.
La-Vie
Friday, January 13, 2012
Believe Card
This is my favorite Sophie card! C'oordinations cardstock, Cuttlebug with the swirls folder from Indentz, stickers and pearls from my stash make this card a beauty! I was inspired the day I created this.
This stamp is a part of the Encourage Me stamp set my My Pink Stamper. It's a larger size which I love!
La-Vie
Wednesday, January 11, 2012
CCI Design Team Call Out - My Application
One of my 2012 crafty goals was to muster up the courage to apply for and ultimately gain a 6-month spot on a blog design team. Soon after I decided on this goal, I received my daily email from one of my favorite blogs, Creative Critterz Imaginations, with a call out for new designers. I thought, this is my first chance to apply! The only problem was, I have been ill for weeks (one thing after another) and have not had a chance to craft at all. As the days of the call out rolled on, I wondered if I'd miss my chance. Today is the last day and the stars aligned! I feel well enough to attempt a submission and I need thank you cards for the many friends who have helped me get through the last 2 weeks by watching my kids, cooking me meals, sending me encouraging messages, etc. Wish me luck!
The CCI blog is run by Tammy Skinner and is all about using the Cricut Imagine machine to print and cut out designs for projects. To apply for the design team I simply had to create a project of my choice. This was a great challenge for me. I love my Imagine machine and wanted to challenge myself to use it in ways I had not used it before to create the perfect expression of thanks. I am really pleased with the results.
Card base
Card inside
In general/tips
La-Vie
The CCI blog is run by Tammy Skinner and is all about using the Cricut Imagine machine to print and cut out designs for projects. To apply for the design team I simply had to create a project of my choice. This was a great challenge for me. I love my Imagine machine and wanted to challenge myself to use it in ways I had not used it before to create the perfect expression of thanks. I am really pleased with the results.
Card base
- I used the 12x12 Bazzill premium white cardstock for the card base because it is very heavyweight, a quality I require for my card bases, has a nice pattern in the cardstock and holds the printing very well from the Cricut Imagine.
I decided to print on both sides of the paper for the first time. Both prints came from the Imagine More cart - the sheet music on page 38 and the dotted print on page 40. Once the printing was done I cut the card base to 5 3/4 x 9" and then folded it in half. - 5 1/4 x 3 1/4 pink bazzill cardstock is the first layer on the front of the card. I used my Cuttlebug and folder from Indentz called Swirls. The second layer is a piece of the card base flipped over to the dotted side cut to 4 1/2 x 3 3/4.
The main image is cut in layers and assembled with foam tape. Better Together cart pg 7. The heart is cut at 1.7 and the other at 2.7
- at the top another piece of bazzill pink cuttlebugged and inked - size 5 x 4. Many thanks and all layers were cut at 1.7 from the Phrases Cricut cart pg 22 and flood filled with the patterns from Imagine More cart. The shadow is cut from the music print, the thanks from the dotted paper and many from a tan color from the same cart.
- the bottom has another piece of bazzill pink inked - size 5 x 4. It is adorned with musical notes that belong with the image on the card front. I decide to jazz up the inside with them instead. The border cut is from the Imagine More cart pg 26 and is cut at 1.3 - inking the edges gave it definition from the other patterns.
card back
- most edges were inked with Tim Holtz Distress Ink in either vintage photo or worn lipstick
- I used Smooch Pearlized Top Coat on the cheeks of the heart to give it a little shimmer
- I used Aleene's tacky spray to assemble the layers of the many thanks. I held the cut with my tattered angels tweezers in the trash can so that I wouldn't mess up anything. However, I sprayed too much and the cut got gluey. My tip for cleaning that up is using the EK Success powder tool. Once you poweder it - it will no longer be sticky!
La-Vie
Monday, January 2, 2012
Happy New Year!
Happy New Year!
I admit that I have been a little M.I.A. lately....but for good reason! For the first time, my family went to see the wonders of Disney in Orlando, FL this holiday season, but came back with a nasty virus. I'm better now, but have not been able to craft in some time. I will soon share the autograph books my daughter and I made and some special Christmas cards as well.
Meeting Princess Tiana was one of the highlights of my visit to the Magic Kingdom. She loved the autograph book and even asked to join my club. When I told her I have a crafting company she wanted to hire me to jazz up her restaurant menus. I was tickled pink even though it is all make believe. Later, Prince Eric told me he used to make Tiana's scrapbooks but she didn't like them very much and paid him in sand dollars! Boy those characters really stay in character... My 2 and 6 year old children had faces of wonder all week (and so did myself and my husband). We cannot wait to return.
I'll be sharing more crafting soon... please excuse my absence.
La-Vie
Saturday, December 10, 2011
Upscale Instant Scrapbook for Kara's Baby Girl
(pg 20 of 20)
Alas, we have come to the end of this instant scrapbook. The family has already begun taking and inserting pictures into this treasure.
This last page is where they will write reflections about the first year or a love note to their baby girl now turned 1. I love all of the whimsical animals on the nursery tails cart. And actually the whole scene was print and cut on the Cricut Imagine. To give the page interest, I perched each animal on foam tape which gives it height. I enhanced the title cut by adding stickles. Adding buttons to a baby layout is icing on the cake. The whole layout is attached to a paper lace scalloped page from HSN 3 birds on parade line called All Dressed Up.
With a little pen work to highlight the hills and valleys this quick layout is complete. I had lots of fun pulling all these layouts together to create a lasting keepsake for a close friend. I hope you enjoyed it too!
La-Vie
P.S. How many of my 63 faithful followers are crafters? How often do you craft?
I'd like to start hosting challenges and doing giveaways on my blog. Are you interested?
Please list your answers in the comments section on this post.
Subscribe to:
Posts (Atom)