Saturday, July 30, 2011

Instant Scrapbook Baby Boy - Pg 12 & 13


As continued from last time, here are the next pages of the scrapbook. Provo Craft has created the perfect cart for religious phrases and images called Inspired Heart sold at their website and at Wal-Mart. This 2-page Christening layout is created with cut at 5", cut at 4" and cut at 2". The cardstock used is DCWV metallic stack - blue


The background paper is Doodlebug Design Inc. - 1583 Polo. The gem stickers are by Martha Stewart Crafts. The ink applied with a large dauber is by Clear & Simple stamps - simply blue-tiful. The stamp - "sharing with you..." is from Stampin' Up! and the Provebs 3 stamp is from Stamp La Jolla. The jubilation stamp is from Memories direct in their phrases set bought from HSN.com.


I hope you found inspiration in the simplicity of this 2 page spread today!

La-Vie

Thursday, July 28, 2011

Instant Scrapbook Baby Boy - Pg 11


No album is complete without baby's first bath! It is one of the most magical times as a parent.

As continued from last time, here are the next page of the scrapbook. Sometimes I find inspiration in weird places... One day long ago I lucked out and found a package of postcards at IKEA of rubber duckies. I thought they were cute but had no idea when or how I would use them. In this layout I created my own embellishment by covering the postcard with vellum to create a journaling block. It has a great effect once written on. The Best Occasions metal dots cover the spots where I applied glue dots to attach the layer.

The bathtub dimensional sticker from EK Success - Jolee's by You was enhanced by adding splashing water with Fiskars zingz sticker accents in circles and drops. Circular rub ons become fresh and new when Fiskars zingz are added to the middle. A DCWV patterened adhesive boarder strip divides the page and DCWV Safari kids mat stack marks where the pictures are to be placed. As usual, the font is American Traditional Designs.

Don't ya just love this layout? I do!

La-Vie

Tuesday, July 26, 2011

Instant Scrapbook Baby Boy - Pg 10


As continued from last time, here are the next page of the scrapbook. Everyone takes that picture of their baby sleeping during those first few nights after they come home form the hospital. A sweet little dimensional journaling block brings focus to the thoughts and feelings that will be recorded here about the baby's first nights.

Supplies include:
  • background paper by Steve's pages - licensed exclusively by Sugar Tree
  • Paperbliss Salon - journaling block and prince dimensional stickers
  • American Traditional Designs rub on font and dimensional stickers - welcome baby pastels
  • DCWV 6x6 adhesive pastel mat stack
  • Clear and Simple Stamps - button stickers, color: a blanc check
La-Vie

Sunday, July 24, 2011

Instant Scrapbook Baby Boy - Pg 8 & 9


As continued from last time, here are the next pages of the scrapbook. These next two layouts coordinate but are covering different yet related topics. I love the printed paper by Paper Pizzaz called baby words. In order to stretch the one 12x12 piece I had left, I cut it and used it on both pages of the spread. The first page highlights when the baby first comes home from the hospital and the second page shows the room he is coming home to.


I created my own embellishment to adorn the center of the page. I encorporated a circle, a sentiment sticker and an American Traditional Designs - elevations dimensional sticker - Welcome baby pastels.


The crib is my favorite part of this scraobook page. EK Success - Jolee's created it and it goes well with any baby page, card or home decor item. The page is split by fabric tape from Cloud 9 Christmas is.. set.

Other materials include:
  • font - Recollectoins layered chipboard sticker "D", American Traditional Designs rub ons
  • large blue brads from my stash
  • my little one sticker from my stash
La-Vie

Friday, July 22, 2011

Instant Scrapbook Baby Boy - Pg 7


As continued from last time, here are the next pages of the scrapbook. Here the new parents can show pictures of the baby's first visitors at the hospital. some many be family, some may be friends. I love this lage font called "hip chip" by KI Memories. It's from their birthday set of chipboard adhesive letters. The mat stack is DCWV nana's kids - baby boy and the remaining supplies are from 6-min scrapbooker baby boy set. I find it fun to mix colors, patterns and coordinating embellishments to create a fun whimsical layout.

La-Vie

Wednesday, July 20, 2011

Instant Scrapbook Baby Boy - Pg 6


I love simple, clean layouts. Less is more in this case...

As continued from last time, here are the next page of the scrapbook. This layout will show the first meeting between the new brothers. These are my favorite male oriented sticker font. Thickers makes it and it's a leather look and feel, Although it is self-adhesive, it doesn't seem to hold on because of the thickness.


  • Nikki Sivils scrapbooker - warm cord brads - red


  • Vellum sentiment & yellow cardstock from my stash


  • patterend paper - 6-min scrapbooker baby boy


  • "Thickers" Black Vinyl stickers


  • DCWV adhesive mat stack neutrals


  • La-Vie

    Monday, July 18, 2011

    Instant Scrapbook Baby Boy - Pg 5


    As continued from last time, here are the next page of the scrapbook. This page will highlight mom and dad bonding with the baby. This simple page was created with very little supplies. The most special part of this page is the sentiment.

    • Vellum sentiment, yellow cardstock, foam glitter alphabet stcikers, foam heart from my stash
    • patterend paper - 6-min scrapbooker baby boy
    • DCWV adhesive mat stack neutrals
    • Miss Elizabeth's rub ons
    • foam tape
    La-Vie

    Saturday, July 16, 2011

    Instant Scrapbook Baby Boy - Pg 4


    As continued from last time, here are the next page of the scrapbook. This page is designed to highlight the baby's first picture. I am super pleased with how it came out. Supplies include:
    • 6-min scrapbooker - baby boy
    • Font - Paper Studio (spare parts) adhesive fabric tags in red and blue
    • DCWV Nana's kids mat stack - baby boy
    • Making memories rub on alphabet - hudson - color: Aquamarine
    • Clear & Simple stamps adhesive  dots - a blanc check
    • journaling stamp, vellum sentiment, epoxy stickers all from my stash
    La-Vie

    Thursday, July 14, 2011

    Instant Scrapbook Baby Boy - Pg 2 & 3


    As continued from last time, here are the next pages of the scrapbook. I love a good 2-page spread! This one will display the baby shower photos. Although this album is for a boy, I had an overwhelming urge to incorporate the yellow pom-pom ribbon. I think it works well.


    The presents were cut with my Cricut Imagine 2 using the New Arrival cart. I am in love with Martha Stewart punches and this one is called Heart Beat.


    I put a little of myself in this layout by incorporating a decoration from my son's baby shower - the baby carriage is from party city. There are plenty of spaces for photos and journaling created with DCWV neutrals adhesive mat stack and Creative memories corner rounder.
    • EK Success striped paper - baby faces christopher stripes and circles
    • heart - foam sparkle stickers
    • Font - American traditional designs - sticker collection sporty girl brights
    • Thank you for the gift rub on - miss elizabeth's
    • journaling block - 6 min scrapbooker "family"
    • Memories direct blue staples and long reach stapler
    • starform stickers outline stickers - silver
    La-Vie

    Tuesday, July 12, 2011

    Instant Scrapbook Baby Boy - Cover and Page 1

    It's been quite a while, but let's just say life and clients got in the way! I'm delighted to be back and to share a project I created for a baby shower gift. A friend of mine wanted to give her sister-in-law a very personal, yet useful gift for her second child. What do you give to the person who already has all the big baby stuff? That's right...an instant scrapbook so that she can easily record her new baby's first year.

    This was quite an undertaking because I had never created a scrapbook without pictures before and was very nervous about creating pages that forced someone to use pictures of a certain size etc. But I quickly got over it and created a product that I am very proud of. And it was very well received by the mother-to-be so mission accomplished!


    The album is by Recollections. It's a boy is printed on Bazzill basics white cardstock and cut at 10" with my Cricut Imagine Nursery Tails cart. The font stickers are from my stash and the foot and hand prints are from Stickopotomus. Finally, the blue button stickers (that remind me of that candy that came stuck to paper strips when I was a kid) is from Clear & Simple Stamps in the color called Your style blue me away.


    I wanted the first page to showcase the family the baby was being born into. I pulled out the autumn leaves 6-min scrapbooker family set I purchased from Wal-Mart some time ago and found the perfect coordinated items, such as a journaling block, ribbon, embellishments, etc. for this page. DCWV adhesive mat stacks are the best for quick placement of pictures.
    • Our family - chipboard stickers - autumn harvest collection
    • family names in black - EK Success sticko dimensional font stickers
    • mom's name - mark richards crystal stickers - crystal script alphabet
    • Best occasions metal dots
    • DCWV adhesive mat stack (neutrals)
    • creative memories corner rounder
    La-Vie

    Thursday, May 26, 2011

    Mom-to-be Congrats Cards

    Two great friends of mine are expecting their first child! To celebrate I created these cards and sent 2 of my favorite pregnancy books - Baby Bargains by Denise & Allan Fields and The Mocha Manual to a Fabulous Pregnancy by Kimberly Seals-Allers.


    I am very happy with how these cards came out. I used Bazzill cardstock is two shades of pink for the card base. The card was cut at 6" from Cricut Cartridge Everyday Pop-up Cards on page 56. On the same page is the pregnant lady and layers cut at 5". The gold metallic used on the outside and inside of both cards is ANW Crestwood Shimmer Sand Metallic card stock. The clothing layers and the side stripe was cut from S.E.I. Poppy Paper stack. The ribbon is Wings: Vineyard Berry from Close to my Heart. I inked the pointed edges of the card with Encore Ultimate Metallic ink in Satin Rose to make it stand out from the straight edge of the card.

    I have been more deliberate about finishing the inside of my cards. This time I played with embossing and debossing using the Sizzix Scrollmark folder from the Wedding Set #2 in my Cuttlebug. The picutre shown is the debossing, so the image is sunken in rather than raised. The corners were rounded with Creative Memories corner rounder. The stamped sentiment is from Stampin Up! The outside stamp is from my stash. In order for the stamping to come out right I used the Darice Rubber Stamp Pad underneath my work.

    La-Vie

    Wednesday, May 25, 2011

    Hello Kitty Graduation Card for Zora


    Yesterday, I created this card for my Daughter Zora who graduates from Kindergarten soon. This is my first use of the Hello Kitty Salutations Cricut Cartridge and I am very happy with the results! I wanted to do a trifold card with the Hello Kitty image hanging over the edge as a way to open the card.

    Inside I used a Martha Stewart punch around the page punch called Heart Chain to embellish the other half of the card front. In line with the theme I embossed the other front side of the card with Cuttlebug - Heart Blocks. It was the perfect match.


    For the inside of the card I used EK success sticko glitter font stickers, Zig Calligraphy pen in Pure Pink and Mod Designs rub ons for the 3 layered flower accent. I was amazed to find out this trick. When I punched the heart border first and then embossed with the cuttlebug folder on the outide, the inside of the card became embossed from the punch I used. I had never tried this before and had never even thought of that effect happening. So to accent the embossed edge on the white cardstock, I wisked hot pink chalk from EK Success over the design. I will be using this subtle technique deliberately in the future. It really helped to tie eveything in. And I didn't have an exclamation point available to me in this font set, so I took a one and cut off a bit at the bottom to make an exclamation point.

     Here is a standing view of the card again. I just love the playfulness of this card and think it is perfect for my 6 year old.


    We are giving Zora her first real charm bracelet from the Miss Chamilia line. It's a new line for Chamilia and it is perfecr for young girls. This bracelet is tiny and the beads are tiny to match. I cannot wait to see her face when she sees this bracelet! There are two bigger sizes so that older girls can use this line too. I found it to be much more affordable than Pandora who doesn't have a child's line and all the others. The charms are between $15 and $25 each and I think the bracelet was $30. Check it out!

    Recipe
    • Cricut Cartridge Hello Kitty Greetings - pg 60 cut at 5.5"
    • Cuttlebug Embossing Folder heart blocks
    • ribbon from stash - bought at Micheal's
    •  Bazzill basics white card stock & premium pink cardstock
    • American Crafts foil cardstock - red
    • Martha Stewart Punch Around the Page - Heart Chain
    • Creative memories corner rounder
    • card base 12" x 5"
    La-Vie

    Sunday, May 22, 2011

    Stamped Baby T-shirts

    Who knew???? Using Clear & Simple Stamps Hybrid Ink you can stamp directly on fabric?? WOW!

    So I promptly made these cute shirts for a 3 month old I was going to meet for the first time. I washed and dried the shirts first. This is Key! You don't want it shrinking on the recipient later on. I used Stampin Up! Stamps - Whimsical words for the sweet little baby sentiment. The cupcakes are from Art Gone Wild! Ummm... I cannot remember where I bought the lamb stamp or the precious stamp...


    I used all 3 colors of this wonderful ink that I have - Paint the town Pink, Espresso your style (brown), Simply Blue Tiful. I need more!! Get some and try this quick but super cute method out for your next gift baby shower!

    La-Vie

    Friday, May 20, 2011

    College Graduation Invite

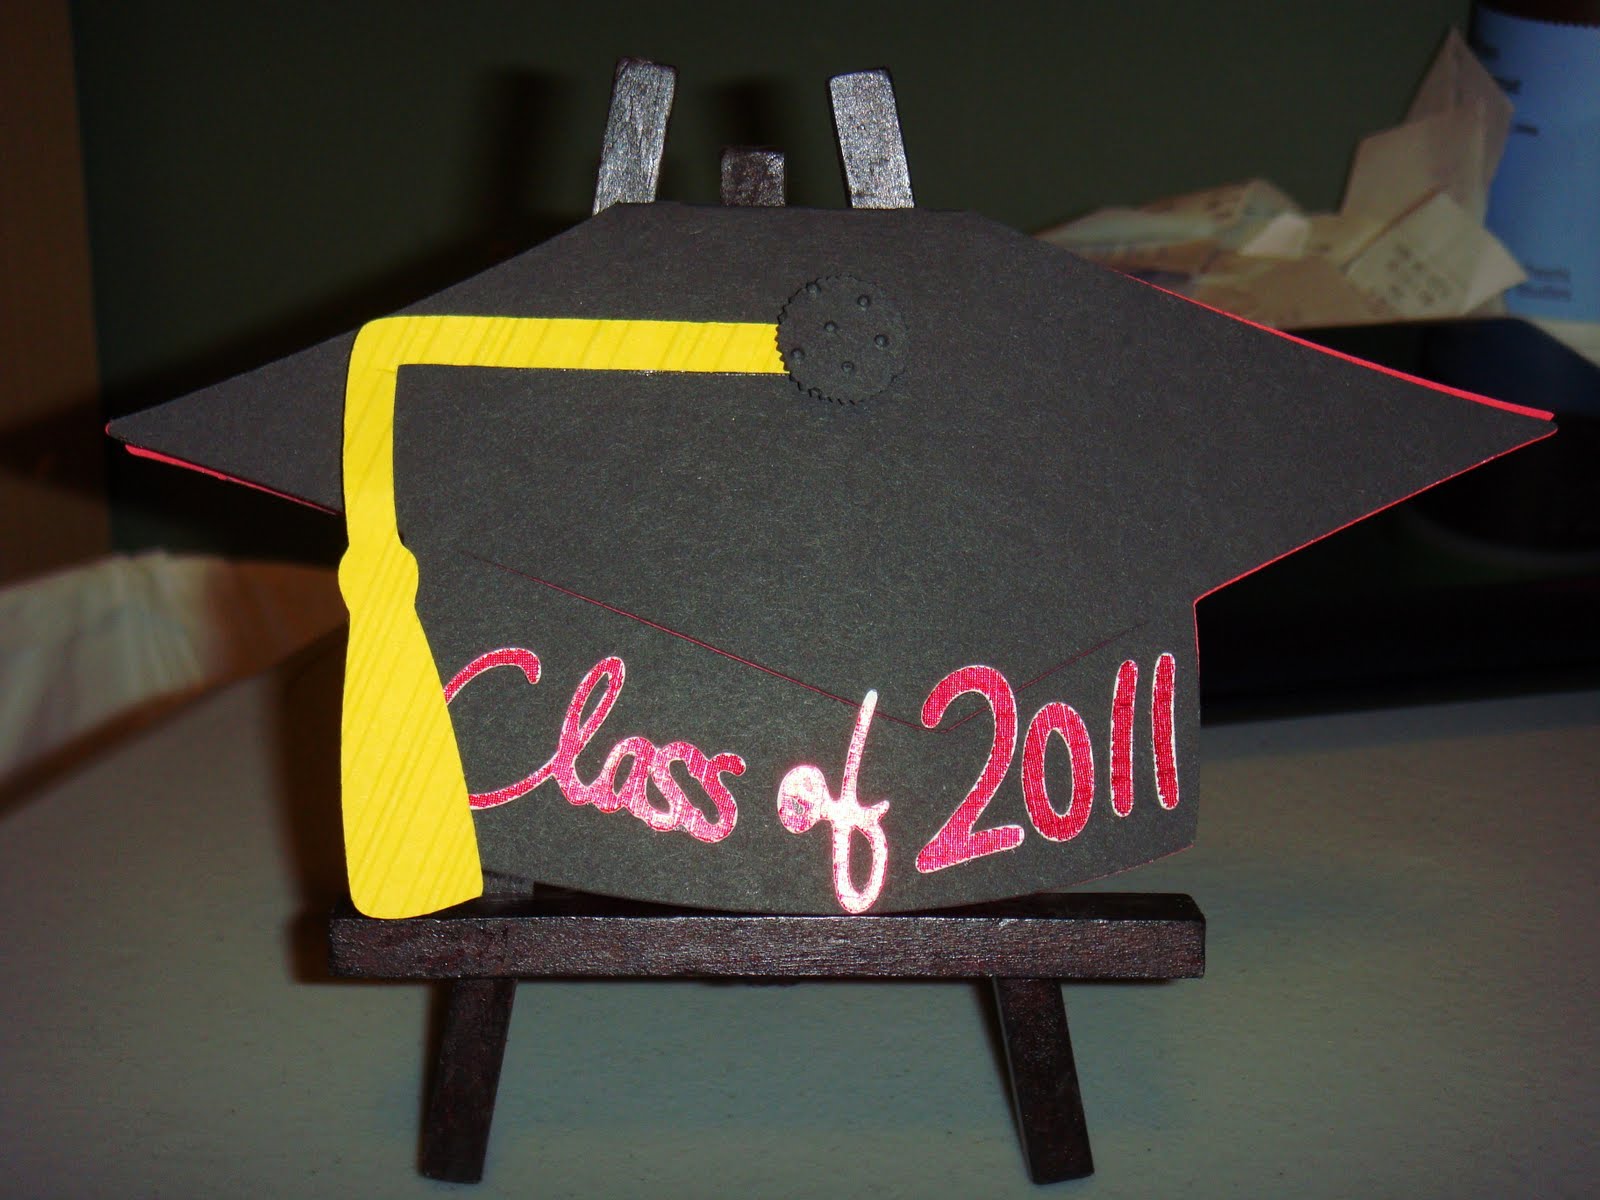
    A good friend of mine hired me, C'est La-Vie Designs Unlimited, LLC, (sounds so official!) to create her oh-so-important Graduation invites. I applaud her accomplishments for gaining her degree while working full time and being a mother to several children. BRAVO! You are my hero and a super woman for sure!


    The card, layers, sentiment and evelope are cut from Cricut Cartridge Wild Card cut at 7.5". Almost all of the categories were cut - phrase, icon, liner, blackout and the main image. I used American crafts foil cardstock for the phrase cut at 1". The tassle was run through the Cuttlebug embossing folder candy cane stripe and swiss dots was used on the round circle on top of the tassle.


    I lined the invites with acid and lingnin free - Wausau Paper - Astrobrights 24 lb paper printed from my inkjet printer. It took quite a while to get the text in the right spot so that I could cut it with a flipped image of the invite on my Cricut Expression.


    The diploma icon is a great place to put the recipient's name since these were planned for hand delivery.


    I lined the envelopes for an extra flair. Word to the wise.. .the tassle did not fit in the envelope as is. I had to fold it in half (which I was not happy with) so I would suggest (putting the tassle on the right - duh I didn't even think about that) making the tassle smaller. All in all, I was very happy with the results and so was my client. She even tipped me!! Hot dog!! Guess I am a legitimate business now!

    La-Vie

    Wednesday, May 18, 2011

    Teacher Appreciation Gifts

    Sorry I have been away so long....did you miss me? Well, I'm back with another PSA and my latest project!

    I think it is very important to "show your love" for teachers that are in the trenches every day. This year was my first time since my lil darlin is in Kindergarten. One of my best friends had a great idea that we should barter and make each other's gifts. I made her occassion card packs and she made the most luxurious soaps and sugar scrubs for my teachers. To accompany the gifts, I made these cards. (out of what?....you guessed it...scraps!) And the sentiments stamped on the cards made tears well up in my teachers' eye (some at least). Mission complete!!


     Recipe:
    • Most of the card bases are made from Bazzill cardstock from my stash of scraps
    • The layers are made from SEI Poppy Paper Stack
    • The flowers were cut from Cricut Cartridge Wild Card
    • The flowers were adorned with Doodlebug Designs Inc. "Braddies" - red is called ladybug blossoms and the brown in called bon bon blossoms.  when the braddies ran out I used bling from my stash
    • To create the dimensional flower I folded each layer in half. Sometimes I used a stylus and inkadinkado stamp mat to create a firmer and straighter fold. For the top layer of the flower each petal was curled around the stylus.
    • Clear & Simple Stamps hybrid ink Simply Blue Tiful and the stamp set called Teacher was used on the outside and inside of the card
    • Thermoweb 3-D dots to attach the flower and its layers.
    • The hear and the font are from my stash. I figured it would be better than having my daughter write her name so many times.
    • All stamping was done on top of the Darice Rubber Stamp Pad which has made a WORLD of difference in my stamping.
    La-Vie

    Tuesday, May 10, 2011

    My Pink Stamper National Scrapbook Day Challenge #1

    National Scrapbook Day Challenge #1 - create anything with a Cupcake
    http://www.mypinkstamper.com/2011/05/national-scrapbook-day-challenge-1.html


    Damask Decor is my new favorite Cricut Cartridge! There are many cards and envelopes on this cart and that's what I am crazy about right now - making cards.

    This card, envelope and layers are on page 62 and are cut at 6.25" using my Cricut Expression 2. I used Bazzill basics cardstock (another fav), stickles, the Cuttlebug embossing folder - Damask Frame. I also cut the regular cupcake design to affix to the envelope for a little extra flair. The "yummy" stamp is from my stash.

    La-Vie

    Challenge #2 - MPS Nat'l Scrapbook Day

    National Scrapbook Day Challenge #2 - use Kraft cardstock to create a card or scrapbook page
    http://www.mypinkstamper.com/2011/05/national-scrapbook-day-challenge-2.html


    I love to use my scraps to make something new! Kraft cardstock was used to create the card base for this birthday card. However, the birthday message was cut previously from Cricut Imagine Cartridge Lori's Garden. I spritzed it with smooch spritz and added some bling for my stash. The frame also was an accent cut from Cricut Cartridge Wild Card. The ribbon from Celebrate It (which I love) is from Micheal's. I love to find new and interesting ways to use scraps. This card is one of the results. Please excuse me for not having any dimensions to report. But wish me luck in this contest!

    La-Vie

    Challenge #3 - MPS National Scrapbook Day

    National Scrapbook Day Challenge #3 - make a breast cancer themed project
    http://www.mypinkstamper.com/2011/05/national-scrapbook-day-challenge-3.html


    This tiny card is created from a stock image in the Cricut Imagine machine. I flood-filled it with a yellow pattern from the machine. It was left over from a project I did a few months ago. I knew it would come in handy! Folded in half it makes an interesting card. The pearls, stamped font and heart eyelet are from my stash. The breast cancer symbol is made from wired ribbon - Celebrate it brand from Micheal's.

    La-Vie
    Monday, May 9, 2011

    Challenge #4 - MPS National Scrapbook Day

    National Scrapbook Day #4 - make a mother's day themed project
    http://www.mypinkstamper.com/2011/05/national-scrapbook-day-challenge-4.html


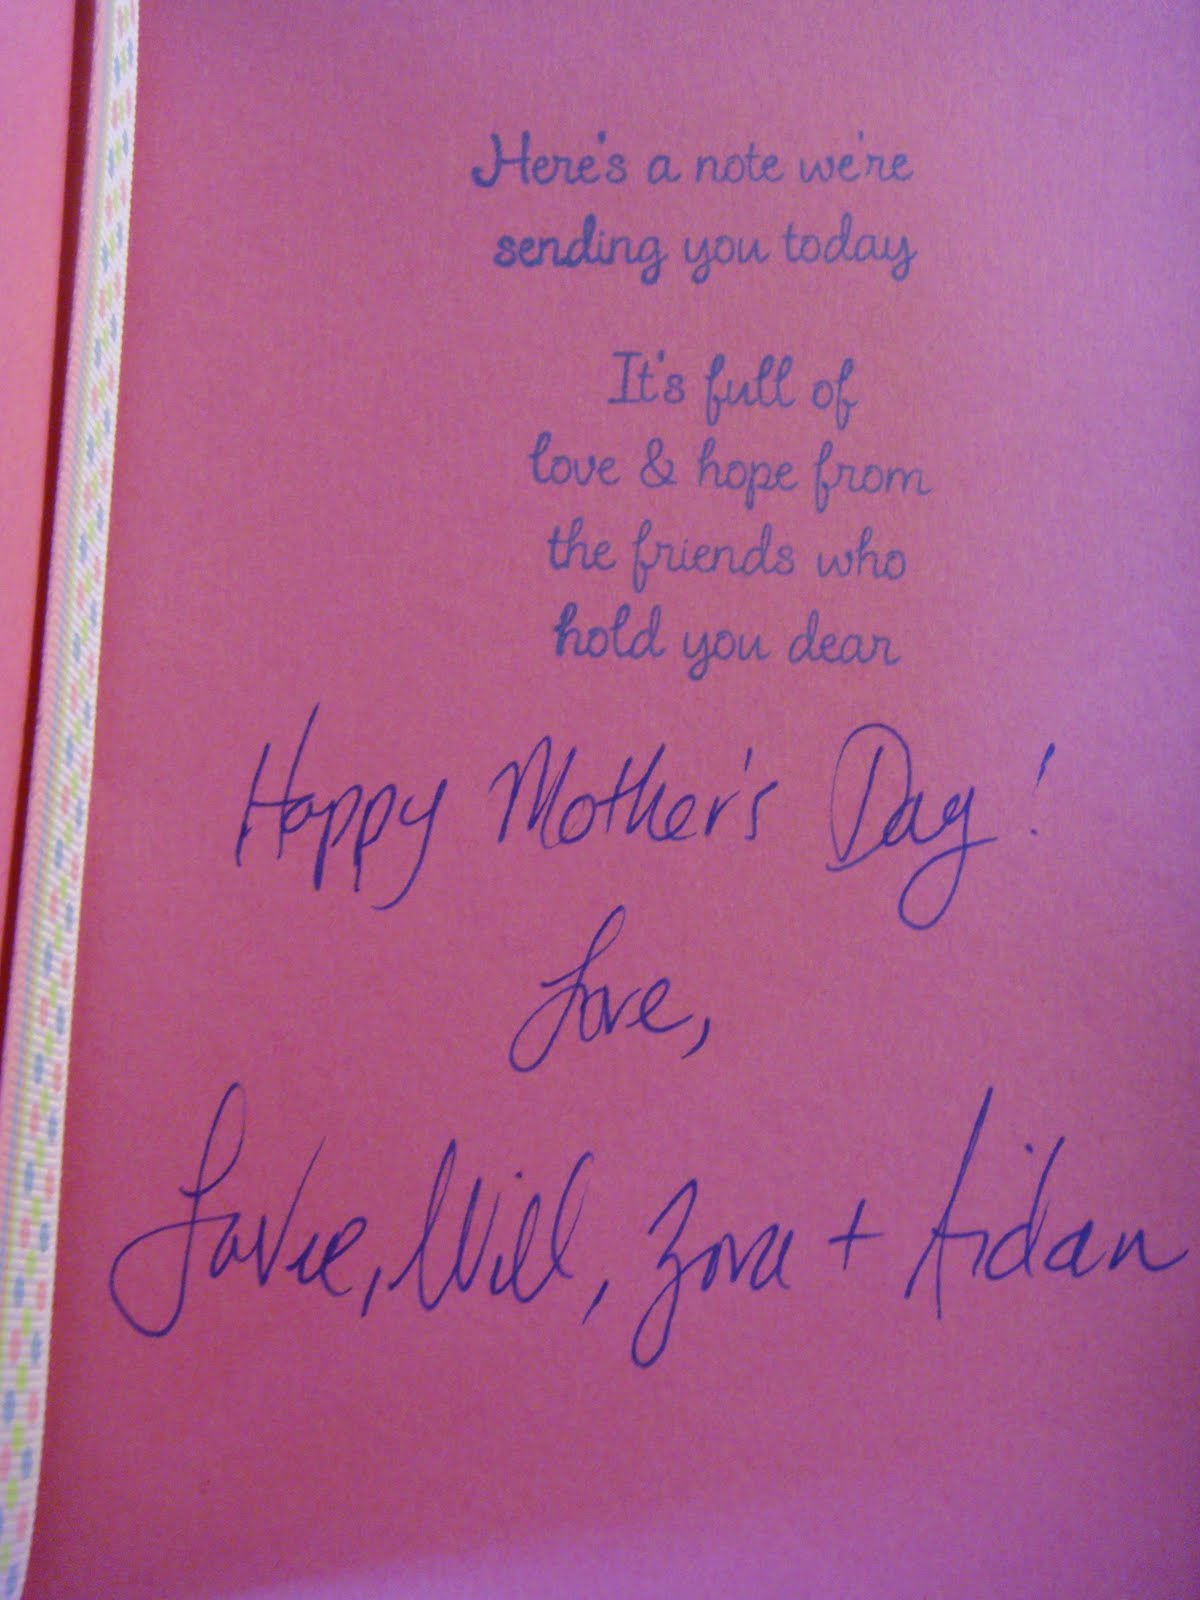
    This card is made from my new favorite Cricut Cartridge Damask Decor. The card is on page 58 and was cut at 6.25" with my Cricut Expression 2. The sentiment and layers were cut from Celebrate with Flourish Cricut Lite Cartridge at 1.5". The card is made from Bazzill basics cardstock. The layer is made from patterened paper from Darcie's LLC. I love the patterned paper because it's approximately 12" x 18" long with a small white border. The stamps used on the inside of the card and from Art Gone Wild! and the ink used was Simply Blue Tiful Hybrid ink from Clear & Simple Stamps.The ribbon is from my stash. This card was used for Mother's Day cards for my friends and family.

    La-Vie

    Challenge #5 - MPS National Scrapbook Day

    National Scrapbook Day Challenge #5 - create any 3D item
    http://www.mypinkstamper.com/2011/05/national-scrapbook-day-challenge-5.html


    This cute little purse (for party favors, etc.) is print and cut from Bazzill white cardstock with the Cricut Imagine, Imagine More Cards cartridge. It was very easy to score and to fold. All 4 sides and the bottom are different patterns and different colors. I added two ribbon scraps for a little extra cuteness... wish me luck!

    La-Vie

    Challenge #6 - MPS National Scrapbook Day

    National Scrapbook Day Challenge #6 - use a tag in your project
    http://www.mypinkstamper.com/2011/05/national-scrapbook-day-challenge-6.html


    The card is created completely from scraps I saved. The tag is print and cut from Cricut Imagine Lori's Garden Cartridge using white Bazzill basics cardstock. The patterned paper and brad are from my stash along with the ribbon. The card base is Bazzill basics which I edged with decorative scissors.

    La-Vie

    Challenge #7 - National Scrapbook Day

    National Scrapbook Day Challenge #7 - Make a scrapbook page
    http://www.mypinkstamper.com/2011/05/national-scrapbook-day-challenge-7.html


    I decided to make a page with pictures I normally wouldn't highlight. Sometimes the best  moments are found in every day reality. I created this page with the Cricut Imagine using Nursery Tails cartridge. The whole page was print on Bazzill basics white paper. I love my imagine!! I then added Gromlets to the suns to make them more fancy and a smiley face button from my stash. The mat is Die Cuts With A View adhesive mat stack and the ribbon is from my stash.

    La-Vie

    Challenge #10 - MPS National Scrapbook Day

    National Scrapbook Day Challenge #10 - create a layout or card with a pet on it
    http://www.mypinkstamper.com/2011/05/national-scrapbook-day-challenge-10.html


    This card was printed and cut using:
    Cricut Imagine - Best Friend Cartridge
    Bazzill white and blue cardstock
    Die Cuts With a View Adhesive Mat Stack
    ribbon from my stash

    La-Vie

    Challenge #11 - MPS National Scrapbook Day

    My Pink Stamper Challenge #11 - Make a project using pink, green, black
    http://www.mypinkstamper.com/2011/05/national-scrapbook-day-challenge-11.html


    My submission is made from scraps and ribbon in my stash. Surprisingly I did not use my Cricut in this challenge. The black layer is punched with an EK Success punch I found at Marshall's this week (mega find!!). The white layer on the card and the ribbon are from my stash. The glitter sticker font is by EK Success - Sticko.

    La-Vie