Wednesday, March 14, 2012

Cricut Circle Weekly Challenge #53

Today I am competing in the Cricut Circle Weekly Challenge #53: Wearing O' the Green for a chance to win $25 credit on Cricut.com. By 3/15/12 at 9pm MST I must upload a link to this post containing something that can be worn on St. Patrick's Day that includes at least 2 Cricut cuts and the color green.

This challenge took me way out of my comfort zone because I haven't made anything to wear before and I have not celebrated St. Patrick's Day either. But I wanted a challenge so I decided to create a hair adornment. I set out to use several items from my stash that I have not yet used. I am very happy with the end result. However, it was very hard to photograph so please bear with me. I borrowed my daughter's doll to model it for me.


This idea all started with a 26mm twist daddy and an alligator clip by Imaginisce from the I-Top line. The alligator clip already comes covered with white ribbon and outfitted with a screw in spot for the twist daddy.


I started by screwing the bottom portion of the twist daddy into the alligator clip. Then I used a 2" Cosmo Cricket Gluber for the first time to create the ribbon ruffles. It looks like a huge glue dot. I was able to pinch pleat a length of ribbon from Micheal's around the circle to create the first layer.


Then, I attached the alligator clip to the center back of the gluber. In the remaining space, I created a second layer of ribbon using Webster's Pages Bloomers which is a divine combo of flowers and trim. I added the smallest glue dots to the ends of the ribbon on both layers to finish off the circle of ribbon nicely.


I attached the hair clip to the dolls hand to show that the flowers actually point outward rather than up toward the other ribbon. It is created that way to give the hair clip interest from any side.

Using the Imaginisce pink glue gun, I created a cirlce of hot glue at the inner edges of the ribbon with the polka dots so that I could attach the top of the twist daddy in the center of the adornment. I then cut 2 shamrocks (2.25" and 1.25") using my Cricut E2, the Designer's Calendar cartridge and American Crafts metallic foil cardstock.


Using a jumbo Zots glue dot on top of the twist daddy top I affixed the largest shamrock. Bending the leaves and stem of the shamrock to create more interest, I affixed the smaller bent shamrock on top the first with a Zots 3D glue dot. The finishing touch was adding two green flower pins.


This is truly a monochromatic masterpiece. I am sure it will look just as cute on my daughter if she attends the St. Patrick's Day parade with her best friend this weekend.

Wish me luck!

La-Vie

Check out My New Weight Loss Blog

Want to know what I've been up to? Follow my weight loss journey in my new blog co-authored with my friend Michelle. We just started The P.I.N.K. Method this week. It's a program just for women. Check it out! http://twopinksinapod.blogspot.com/
La-Vie

Friday, March 9, 2012

Feb Cricut Circle Magazine Sketch Challenge


As a member of the elite Cricut Circle, I have access to the exclusive monthly Cricut Circle magazine. The online periodical serves up major inspiration and a challenge just for us! This month it's a sketch challenge. The sketch was designed by Susan Neal. The prize is $150 credit for Cricut.com. Since I promised myself to enter as many challenges with Cricut Circle as possible, I am throwing my hat in the ring!


The card I created - just 4 you - is made with scraps and left over elements. I love challenging myself to use scraps. The card base was cut from the Cricut Cartridge Sophie using double-sided dotted cardstock from my stash. The yellow dotted cardstock from my stash coordinated well with the flower Cricut Imagine cut from Lori's Garden. For a little shimmer, I spritz it with smooch spritz and outlined certain areas with smooch pearlized top coat. The bow, bling brad and the just 4 you stamp from Micheal's completes the look. Clear and Simple Stamps has a hybrid ink I love. I used it here in "Simply Blue Tiful."


A tip I picked up from Tammy Skinner at the Creative Imaginations blog was to use every last bit of your ink in the Imagine machine and use the lighter colored images you print and cut for layering and for pastel layouts. The flower I printed and made 3D with foam tape has a lighter colored image of the flower on the bottom. That's a secret that no one would ever know!


Makes me think of spring....

Wish me luck!

La-Vie

Disney Autograph Book - Cricut Cuts


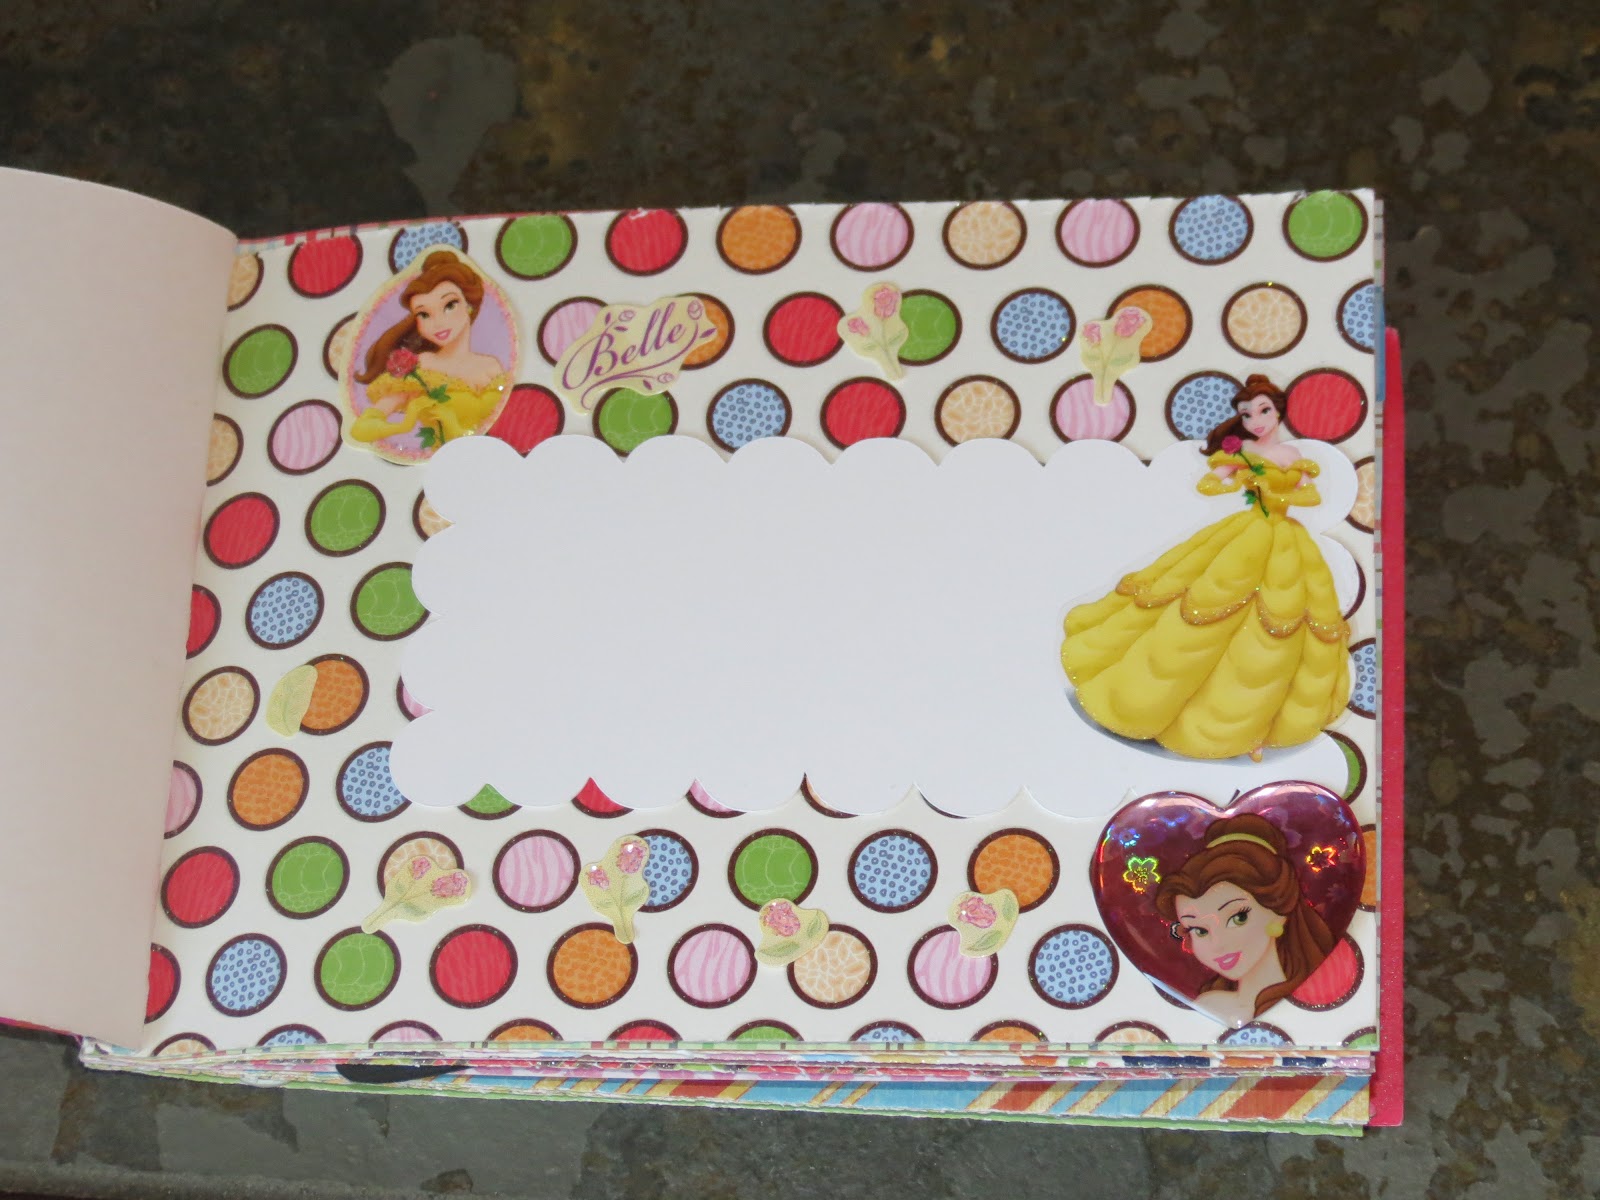
We used the Cricut to cut some of the Disney characters using the cartridges Happily Ever After and Dreams Come True. I cut everything with my Cricut Expression and my daughter at age 6 put everything through the xyron to make it a sticker and layered all the pieces.


The hardest part about cutting Disney characters small is the eyes. They tend not to look as natural or be so small that you cannot figure out where and how to place them. We got around this issue by using a white opaque pen to create the eyes.


I love the design on each of these pages which are from DCWV Safari Kids mat stack.


We enjoyed making Daisy the most because she so stylish and wears makeup!


Who can deny THE MOUSE? He's so cute!

La-Vie

Tuesday, March 6, 2012

Disney Autograph Books


Our first trip to Disney in Orlando happened December 2011. In preparation, my daughter (age 6 at the time) and I created autograph books for her and her brother. We used the Provo Craft Your Story Photo covers and to bind the books. Using Disney embossing folders and the Cuttlebug we embossed the covers. I love the ribbon we used for the cover! We used bling alaphabet to add my daughter's name and a more manly alpha stickers. Ek Success makes the cutest bling mickey symbols.

We noticed in hindsight that the soft covers offered with the Your Story are not best for this type of book because it gets handled a lot. There are plenty of hard covers with the Your Story and we will use those next time. Also using a larger sized pen will help the characters that wear large gloves be able to get a better grasp and do a clearer signature.


I used mat stack pages DCWV Safari Kids. We had accumulated a bunch of Disney princess stickers so I let my daughter decorate the pages the way she saw fit. Ariel is her favorite princess so her page is first.


I used a basic scallop rectangle cut with the Cricut E2 to suggest where the signature should go. Some characters were so into character - or maybe our book was so unique - that they signed the book backwards and upside down!

More pics next time....

La-Vie

Friday, March 2, 2012

A Valentine and Mailbox for Zora


For the boys in my daughter's class I created this valentine using Love Struck Cricut cart DCWV glitter cardstock and Bazzill blue cardstock. I used Aleene's spray adhesive to adhere the layers. Punched 4 holes (two next to each other in each space) to make sure the pencil fit. My daughter wrote the to: and from: on the back. It was a hit!


My daughter is in 1st grade. All the requests for things she needs to bring in is new to me. When the teacher requested something to collect her Valentines in I decided not to reinvent the wheel. I used the paper mache mailbox from my vendor table display and dressed it up with ribbon, cardstock, chipboard letters and embossing.


My daughter had the cutest recepticle in the class! She was so pleased with it. I attached an 8 1/2 x 11" sheet of paper using removable adhesive, embossed the white layer with a Cuttlebug embossing folder from the Love is in the Air set and inked it with pink ink using a large dauber. I needed to use permanent adhesive from the ATG gun to attach this layer. I love this ribbon from Micheal's.

I was in charge of the games for the party. We did pin the heart on the cupid for prizes. I used DCWV adhesive 12x24 cardstock and the cupid from Love Struck. I cut a basic heart for each child from the stock images in the E2. The kids loved it.

La-Vie

Tuesday, February 21, 2012

Repeat Impressions Sketch #F812


I'm entering the Repeat Impressions Sketch #F812 challenge to win a $25 Repeat Impressions Gift Certificate! I created a "just because" card using a Repeat Impressions stamp, and scraps including the card base, double-sided cardstock, Cricut Imagine circular image - Lori's Garden.


I stamped the sentiments on scrap cardstock and punched it out with this top note from Stampin' Up! Luckily it fit the stamped sentiment perfectly! The stamp is a large square stamp with flip flops with this sentiment in the bottom right hand corner. I used the tiny inkers to ink just the sentiment.


  • blue bling - Me & My Big Ideas rhinestones "pastel"
  • peach cardstock
  • smooch spritz
  • Stampin' Up punch
  • Cricut Imagine circular image - Lori's Garden
  • Cuttlebug and Swiss Dots embossing folder
  • Repeat Impressions Stamp -
  • Zots 3-D glue dots
  • We R memory Keepers sweetheart inker - brown
  • Memories Direct double sided ink daubers - black
Wish me luck!!

La-Vie

Fall Wedding Invitation


back

front

This was the largest wedding order I ever received. Although the challenge was fun, I underestimated the stamina it would take to create 75 identical wedding invitations. The results were stunning and the pictures don't seem to do it justice.

I got all the supplies at Hobby Lobby. A few tips for ya...the embossing folder was not long enough so I had to run it through twice. It is tricky to line up the design without smashing the previously embossed design. In order to make sure the printing was consistent and unblemished, I had the printing for the text and the monogram done at Staples print center.

The ribbons were made by hand by cutting ribbon lengths in 6" and 8" lengths. Create a loop (circle) with the larger length and adhere the overlap with your fav adhesive, loop the second length of ribbon just the same then attach both loops in the center. This can be done with a staple or glue dots. The monogram is raised on foam tape and covers the area where you have attached the ribbon. If you use staples, make sure to staple only to the printed layer of the invite and use colored staples.
  • brown - embossed with love is in the air Cuttlebug embossing folder
  • orange layer - 5 x 8"
  • cream layer - 4 x 7.5"
  • ribbon loops - 6" and 8"
  • Circle punch
  • MS word to layout the text and the monogram
La-Vie

Sunday, February 19, 2012

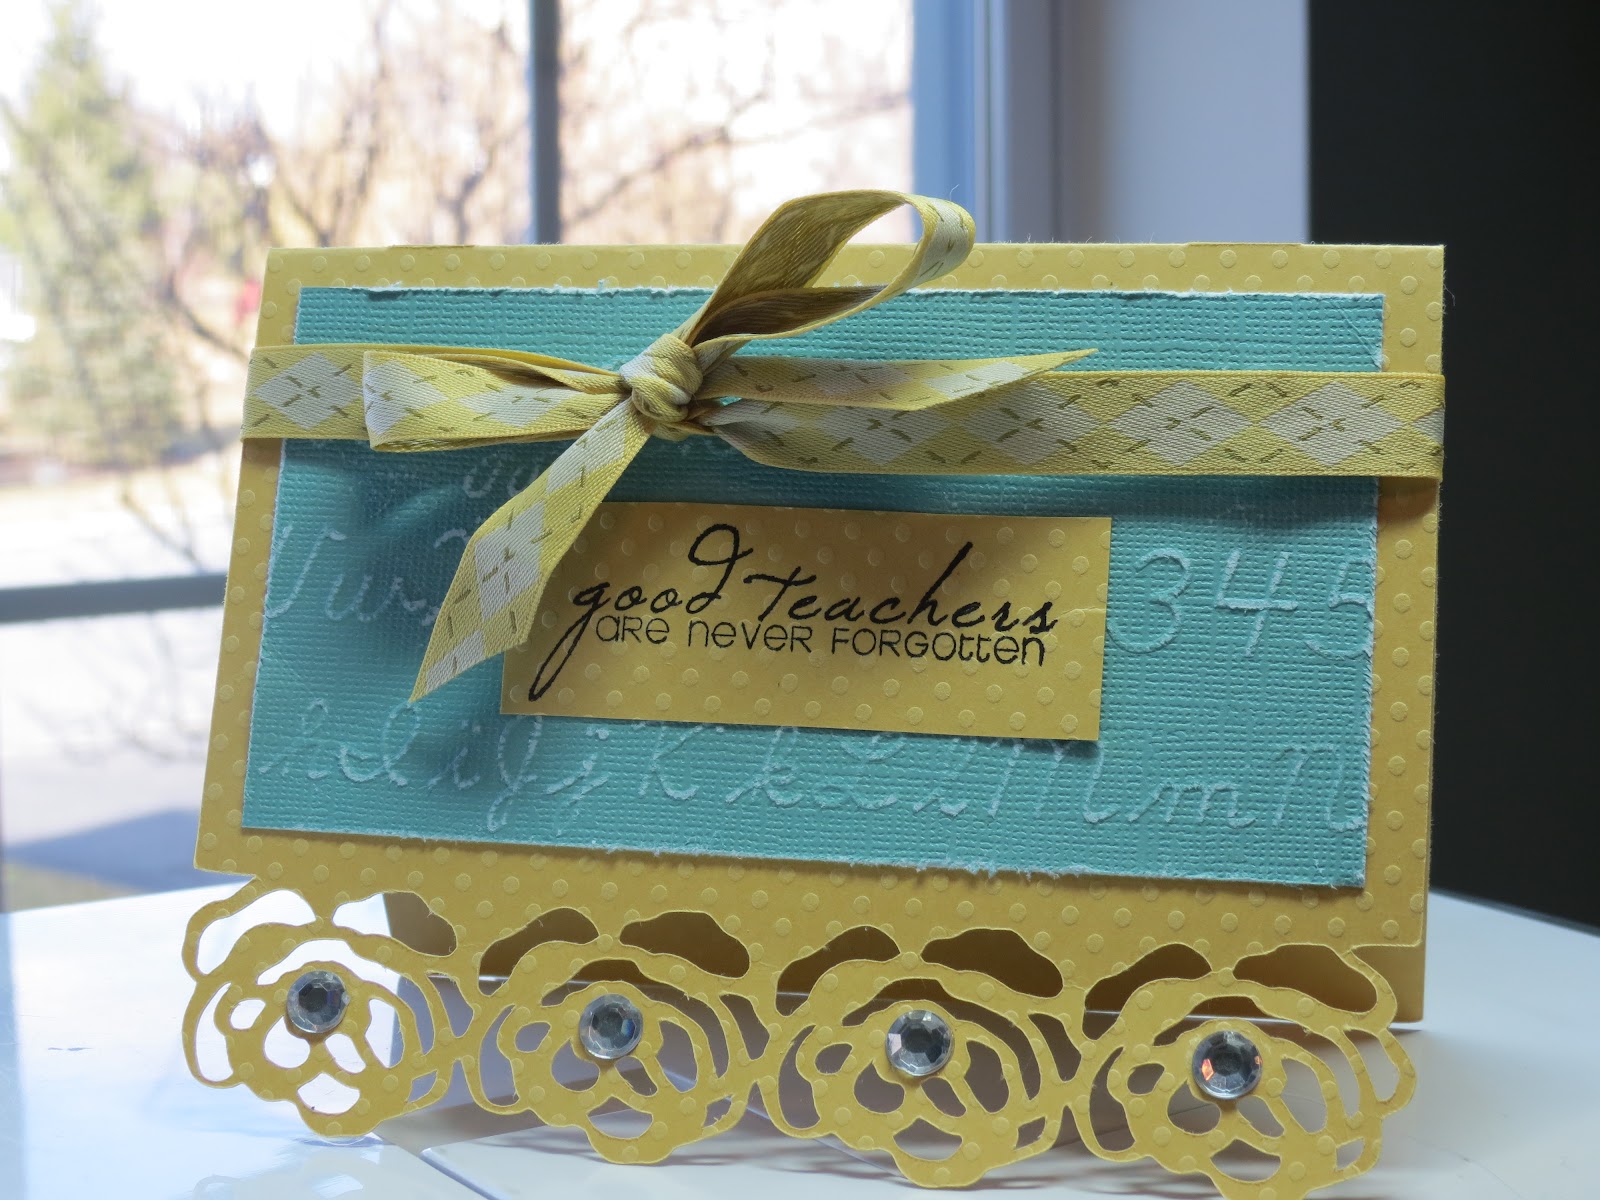
Good Teachers Are Never Forgotten


Here's another card from Nikki's order for teacher appreciation week. This one is another fav from Sophie cart. Nikki had one request...vibrant spring colors. For this card I chose these complimentary colors that screamed spring has sprung!

Dry embossing has become one of my favorite techniques. Using the Cuttlebug brings such a pop to all projects. My tip is, if you plan to stamp on the part of your project that you will emboss, stamp first and then emboss after. You don't want to squish your design or have parts of the stamped image not show up due to the newly created facets in the paper. Pre-planning is key.
  • Cricut Cart - Sophie card 2 pg 32
  • stamps by Clear and Simple stamps Teacher set
  • darice rubber stamp pad
  • Ranger Archival ink stamp pad - black
  • card base - bazzill basics dotted swiss
  • layer - bazzill embossed with Cuttlebug folder - art deco
  • Bling from Recollections
La-Vie


What's your dry embossing tip?

Friday, February 17, 2012

Thanks Heat Embossed Card - Sophie


This is another card is the order fulfilled for teacher appreciation week (an order from my bestie Nikki...shout out girlfriend!) and I love how the heat embossing gives it that extra something special. I'm just starting to heat emboss sentiments. It can be tricky getting the right coverage with the ink and the embossing powder. I use a tooth brush to get rid of stray embossing powder that sticks to the design before adding heat. That way my sentiment is clean and clear (for the most part...)

  • Cricut Cart - Sophie card 2 pg 53
  • gold encore ultimate metallic stamp pad
  • gold embossing powder and heat gun
  • darice rubber stamp pad
  • stamps by Inkadinkado - Thankful for Everything set
  • card base - bazzill premium cardstock
  • layer - SEI poppy paper stack
  • top note - QuicKutz
  • Pearls from Recollections
La-Vie

What's your stamping or embossing tip?

Wednesday, February 15, 2012

Teacher Appreciation Cards


Never were words more true... this stamp set is a must have from Clear and Simple Stamps!

I created a set of 12 teacher appreciation cards for my bestie Nikki recently using the Sophie cartridge. Nikki is the best customer because she let's me know what she needs and then leaves the creativity to me. The order included this card "rose1" card 2 is one of my favs on the cart. The dainty floral pattern makes me smile.
  • Cricut Cart - Sophie card 2 pg 37
  • stamps by Clear and Simple stamps Teacher set
  • darice rubber stamp pad
  • Ranger Archival ink stamp pad - black
  • bazzill card bases - pink: bazzill premium cardstock, yellow: bazzill basics dotted swiss
  • layer - "Cursive" Cosmo Cricket Core Impressions by Core'dinations
  • layer distressed with We R Memory Keepers heart tool
  • Pearls and bling from Recollections and ribbon from stash
La-Vie

What do you give for Teacher Appreciation week? Remember you can order unique show-stopping cards to thank your teachers from me!

Monday, February 13, 2012

Thinking of You


This card is cut from Sophie with an understated edge. I thought it was a perfect card to try out my Heartfelt Creations Dutch Iris stamp. I learned that this stamp needed my pressure. The words could be seen but I traced over just to be sure they could be read. On a lighter card I'll pull out my Copics and color in the Irises. The C'oordinations cardstock is green on the inside. The coordinating ribbon from my stash - cut on an angle - completes the look.

La-Vie

Saturday, February 11, 2012

Engagement, Wedding or Anniversary card


Sophie's back..... with this versatile love card that can be used for engagement, wedding or anniversary. C'oordinations cardstock is quite complimentary. The outside is embossed with just a portion of an embossing folder in the Cuttlebug Love is in the Air set. Inside I used a My Pink Stamper stamp froim the Everyday Sentiments set. My Pink Stamper always offer the right sentiment to make cards pop!


I love that these stamps are larger. I was getting very frustrated with itty bitty sentiments in my large cards. I used to leave the insides blank, but now I'm all set.

La-Vie

Thursday, February 9, 2012

Happy Birthday card - Damask Decor


Aw, you thought I was going to show another Sophie card....but I have a wonderful birthday card from Damask Decor Cricut cart today. I love this shaped card which can be fashioned for males or females. This color scheme is for someone who doesn't like all the girlie colors or for a man in your life.


Damask Decor has many square cards on it. Cutting those too large may force you to have to make your own envelopes or use large vellum ones. So watch the size. I like the 5.5" envelopes from Die Cuts With  A View and American crafts. However, both are marked at 5.5 but fit different sized cards. Word to the wize... all square envelopes are not created equally.

La-Vie

Tuesday, February 7, 2012

Repeat Impressions Sketch #J2512 Challenge


Today is the last day to enter Repeat Impressions Sketch #J2512 Challenge to win a $25 Repeat Impressions gift certificate. I thought I'd throw my hat in the ring.... Using this sketch, I came up with this get well card. To make it fun for and exciting, I gave myself a time limit! I created this card from A to Z in under 30 mins.   


  • Blue card and white envelope - Recollections "Frost Mix"
  • Art Deco embossing folder and Cuttlebug
  • 1st layer - SEI Poppy paper stack - metallic foil
  • layer cut in Cuttlebug with Spellbinders Nestibilities Big Scalloped Rectangle
  • Top layer Bazzill preimum cardstock scrap
  • Ribbon from the Paper Studio
  • Stamps from umbrella4you set by The Stamps of Life
  • Tim Holtz Disteress Ink- Evergreen Bough


I love this embossing, wish more of it was showing. I combined a few of the stamps to create the message.


La-Vie

The sweetness of Friendship card


It seems like I am addicted to the Sophie Cricut cart....well I am!! There are so many cards to choose from! This one was cut at 4.5" using C'oordinations white wash cardstock. The layer is embossed using the Cuttlebug and Quikcuts swirls folder, pearls, and a dimensional sticker from my stash. Simply divine!

La-Vie

Sunday, February 5, 2012

Repeat Impressions DCC21- heat embossing challenge


One of my 2012 goals is to submit my work for more challenges and for publication in print magazines. So, today I am entering the Repeat Impressions Designer's Choice Challenge (DCC21) that calls for a project using the technique of heat embossing shown on the Repeat Impressions blog entitled The House That Stamps Built. The deadline is 2.14.12 at 5pm EST and the prize is the choice of one sheet of Repeat Impressions unmounted stamps.

I love Repeat Impressions stamps and card kits. I have used them several times on this blog. However, today my project does not use their stamps. I created a card for teacher appreciation week (an order from my bestie Nikki...shout out girlfriend!) and I love how the heat embossing gives it that extra something special.

  • Cricut Cart - Sophie card 2 pg 28
  • gold encore ultimate metallic stamp pad
  • gold embossing powder and heat gun
  • darice rubber stamp pad
  • stamps by Clear and Simple stamps Teacher set
  • card base - bazzill premium cardstock
  • layer - "School paper" Cosmo Cricket Core Impressions by Core'dinations
  • layer distressed with We R Memory Keepers heart tool
  • Pearls and ribbon from stash

Wish me luck!

La-Vie

Fly card


The Cricut Sophie cart has so many unique cards. This 2 layered card was created with C'oordinations whitewash cardstock. I love the color combinations and the intricate cuts. This was another fan favorite!

La-Vie
Friday, February 3, 2012

Friends Forever card


It's another shaped card from Sophie Cricut cart today made with Bazzill premium cardstock and stamps from my stash. This card can be made to match any decor or event.  Perhaps next time I make this card, I will stamp in the petals as well.


La-Vie

Wednesday, February 1, 2012

Flower card


Shaped cards are most beloved among the people who stopped by my vendor table. This thank you card for a friend is made using the Sophie Cricut cart, C'oordinations white wash cardstock, Bazzill premium cardstock and stamps from my stash. The inside sentiment is shown in the lower right hand corner.

La-Vie

Monday, January 30, 2012

Celebrate card


Here's another blank card I created to sell at local craft fairs. The card was cut at 4.5" and coupled with a store-bought white envelope. The key supplies used were C'oordinations cardstock, Spots and Dots Cuttlebug embossing folder, the Sophie Cricut Cartridge, pearls and a sticker from my stash.

La-Vie

Saturday, January 28, 2012

You Brighten My Day - Sophie Card


This exclusive Cricut cart Sophie is the ultimate! A card maker's dream! C'oordinations, Swiss dots Cuttlebug embossing folder, dimensional stickers and a portion of a border sticker completes the look. I love the sharpness of the Cricut cut flowers and leaves.

What's your favorite Cricut cart and/or embossing folder right now?

La-Vie

Friday, January 27, 2012

How to upload your Cricut handbooks to your IPAD!

As a surprise, my darling hubby got me an IPAD for Christmas. Lo and behold Joy who has one of my fav blogs Obsessed With Scrapbooking posted a how-to on uploading the digital handbooks via an app called Good Reader. I included the link for your review. I have over 125 carts and I was able to upload 98% of them. It is very helpful and handy. Check it out!

La-Vie